Quick Links on This Page
So you want to how the restoration of the
Fenders
for my E-M-F Automobile is going?
Well, you have found the right page.

Wednesday, June 27, 2001 4:35 PM
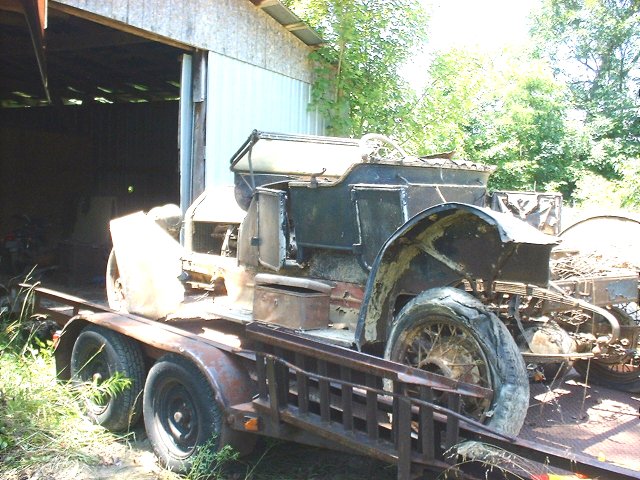 | 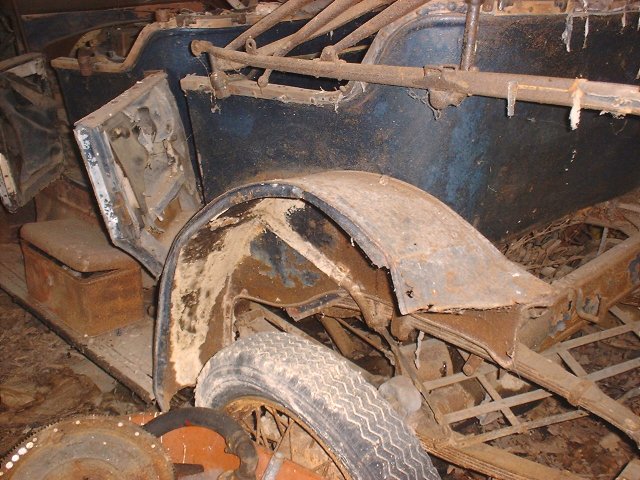 |
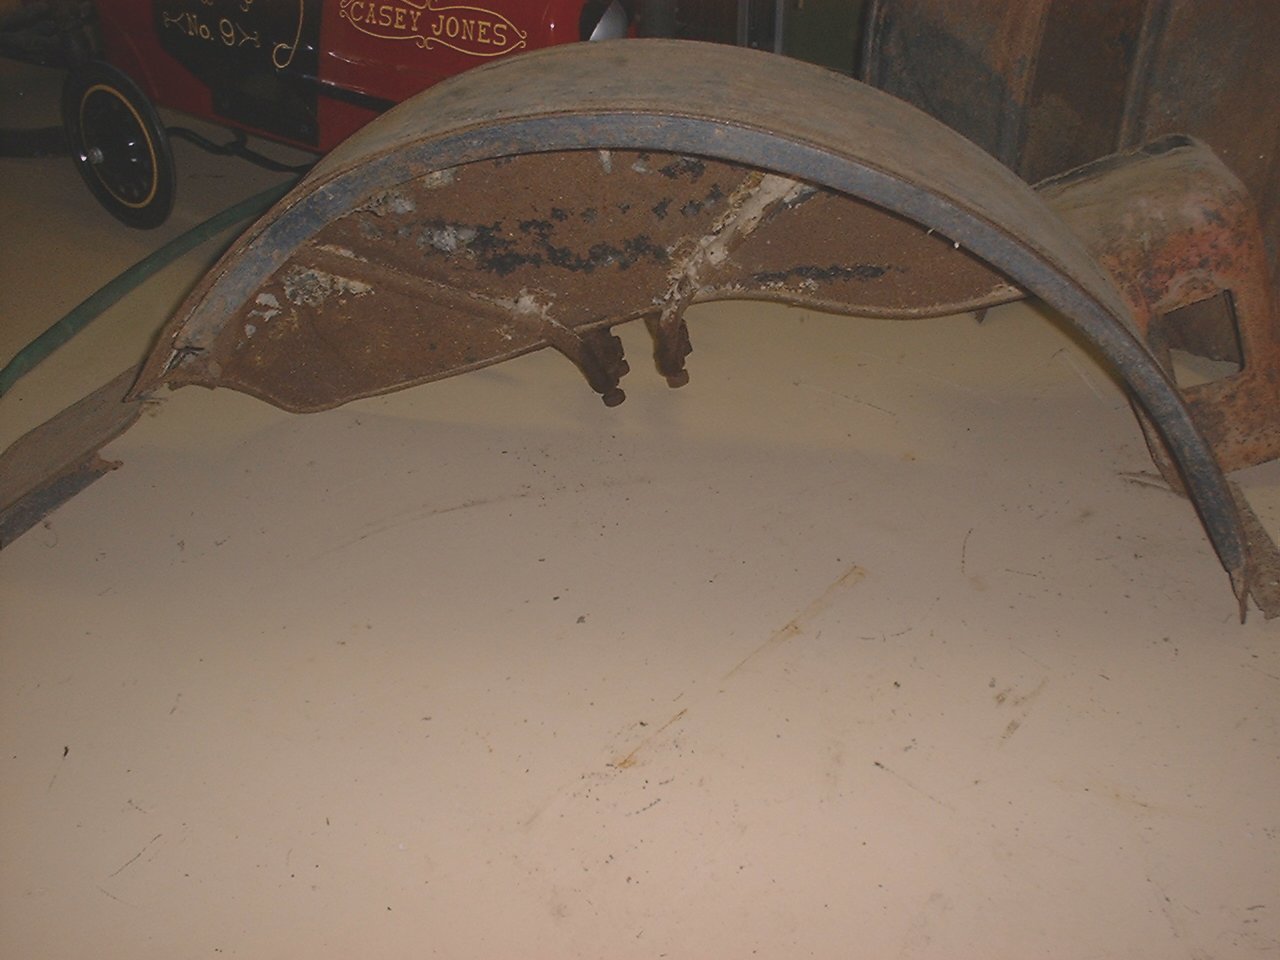
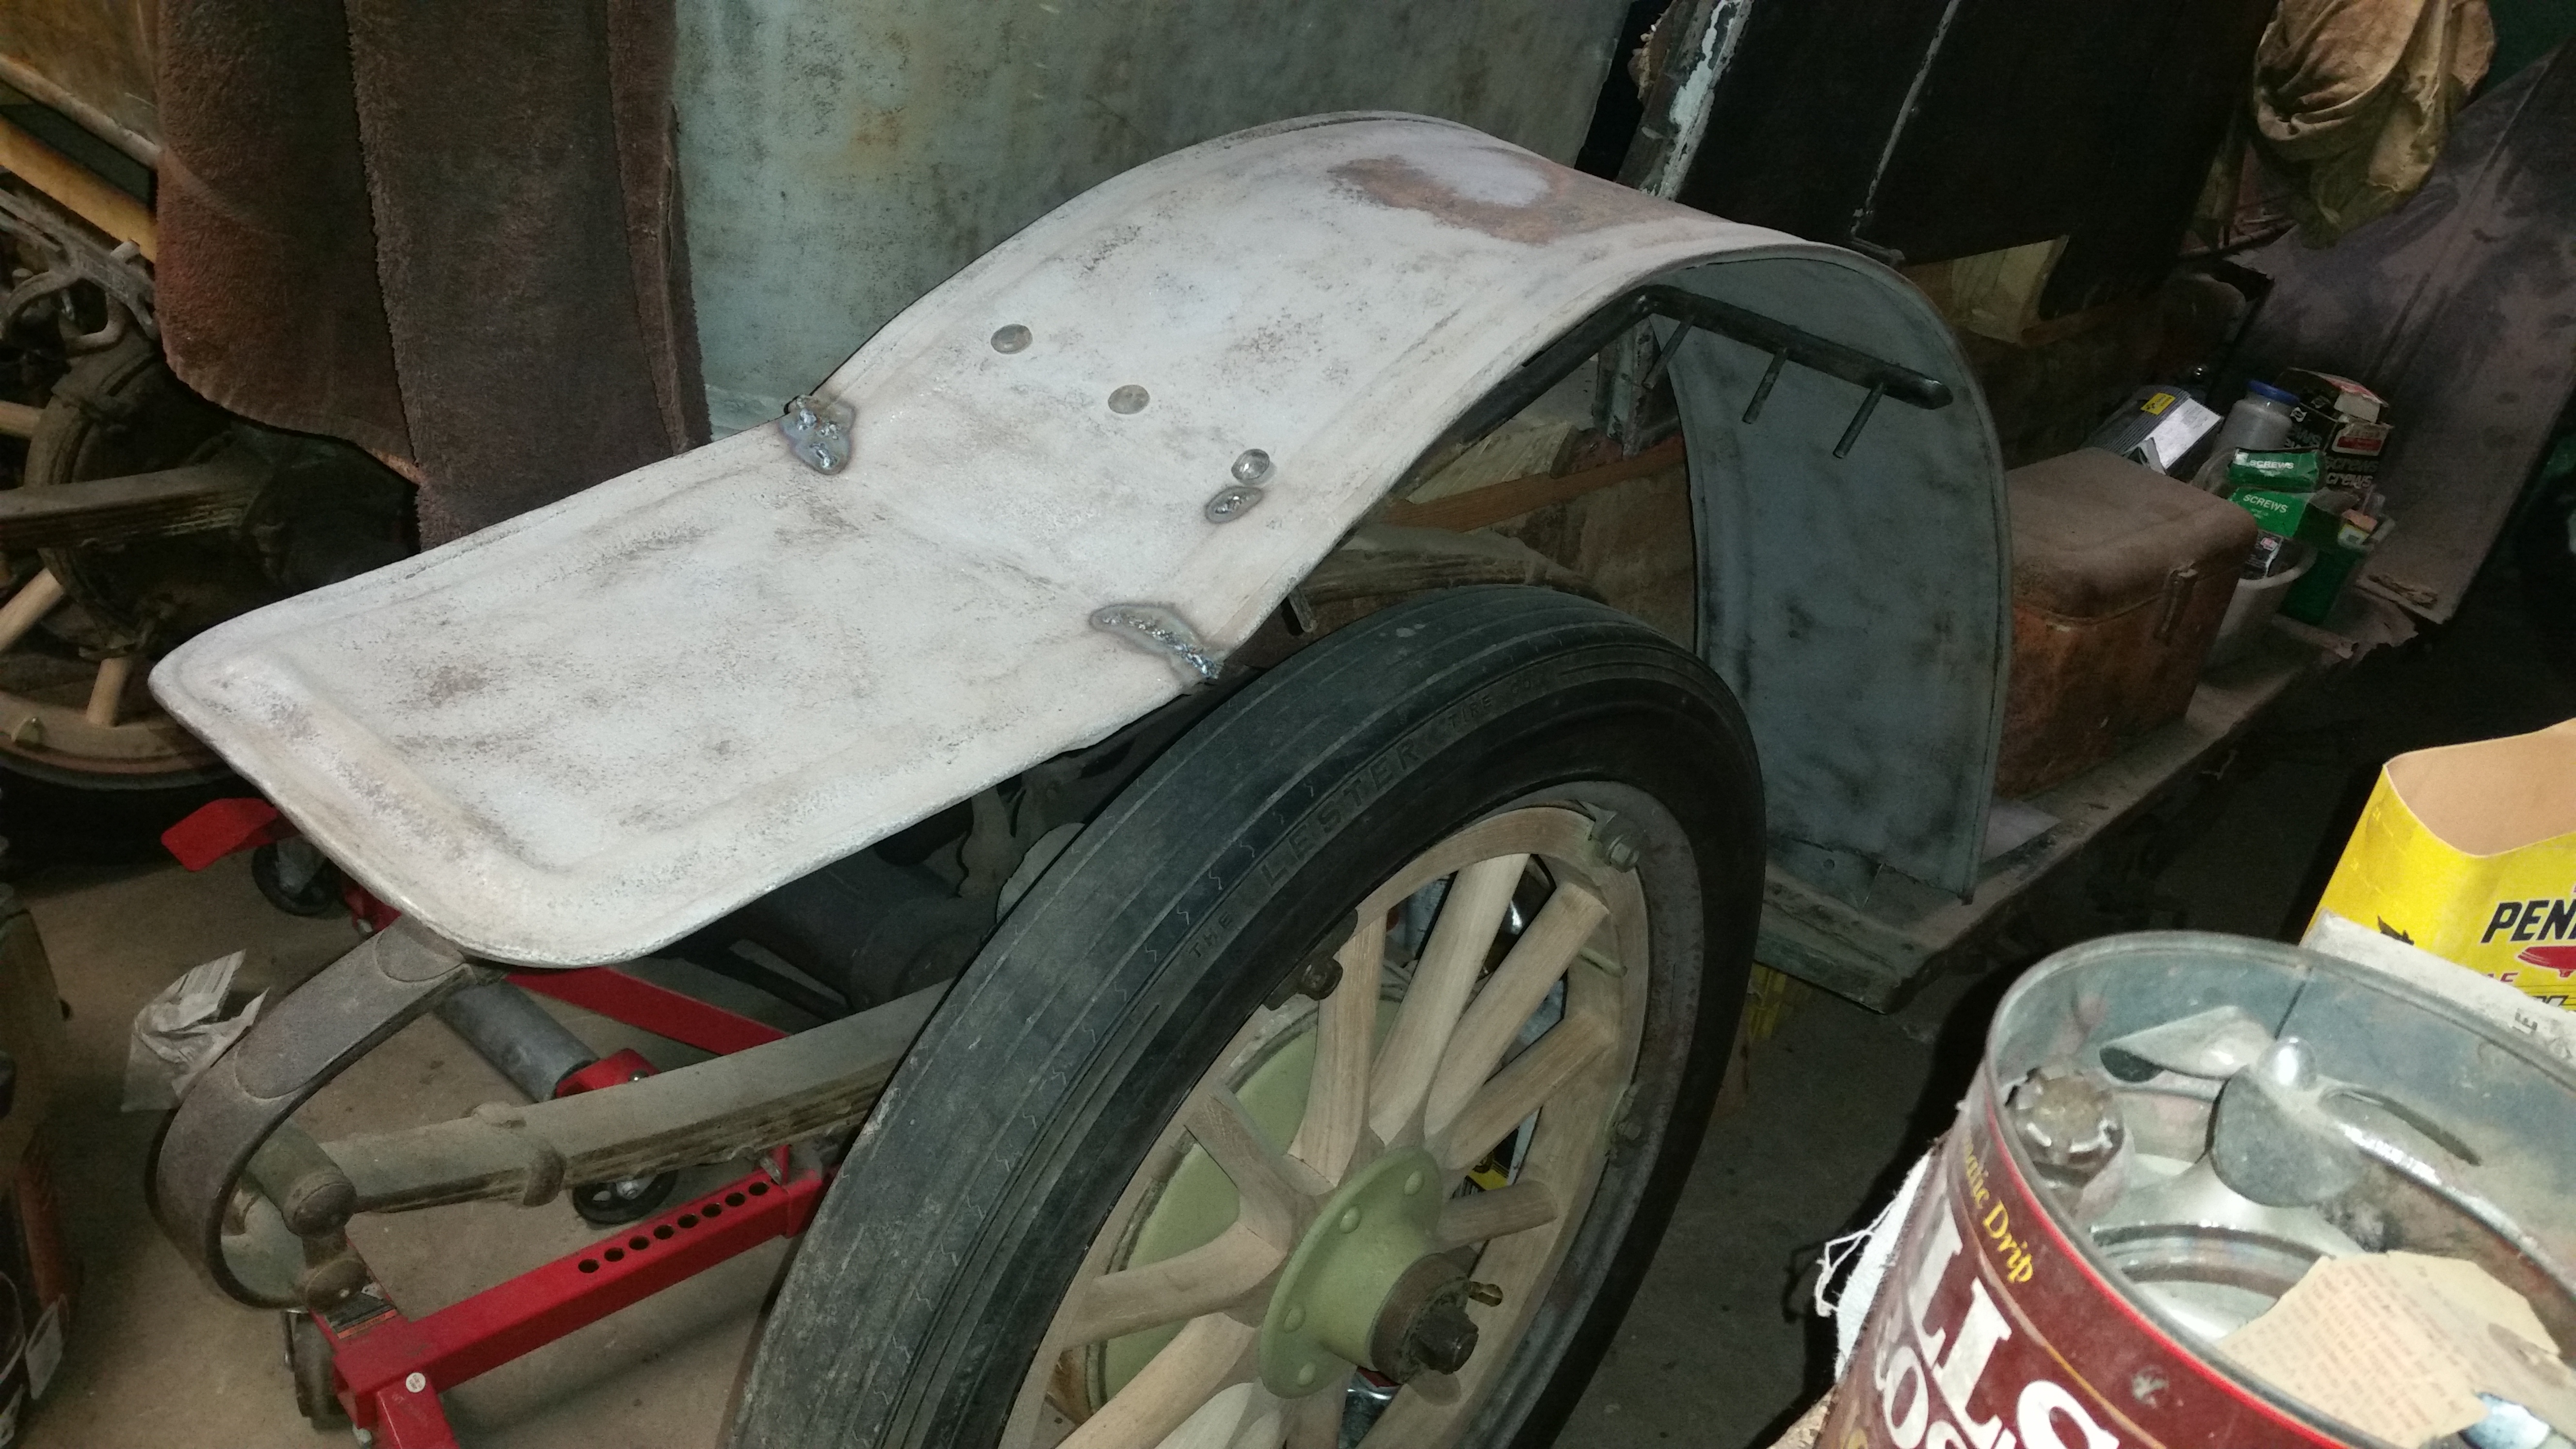
| Look at the fenders on the car when I pulled it out of the barn. Click on the picture to see the full size. | Here is the passenger side rear fender as found in KY. I told you it was rough. Click on the picture to see the full size. |
The Rear Fenders are equally as bad, but I think that there is enough left to be able to piece them back together. I actually have two extra sets of fenders from a 5-Passenger touring that I can use to help repair my rear fenders.
The rear fenders for the 1912 E-M-F's appear to be different between all the body styles. The Demi Tonneau that I have has beads in the fenders that run parallel to each other starting at the running board and extending all the way up the fender to the back where they come together. They 5-Passenger Touring fenders are different from these in that the inner bead (toward the body) follows the contour of the body. The 1912 Roadsters are different from both of these in that the angle of the fender from the running board up and over the wheel is not as sharp, giving it more of a "racy" look.
If anyone has a set of rear fenders for a 1912 E-M-F Demi tonneau that they would like to trade for two sets of rear fenders for a 5-Passenger Touring, or would just like to sell outright, please contact me! If I have to, I will cannibalize the 5-Passenger rear fenders to fix my Demi Tonneau fenders.
The Splash Aprons are rough, but have enough left for patterns. I think I can make new splash aprons myself.
The good news in all this fender talk is that I found a set of original Front Fenders and bought them. They are not perfect, but they should not need much work. You can see in the pictures the passenger side fender I bought, and the original passenger side front fender off of my car. Can you understand why I wanted to buy these fenders? I figure they will save me MONTHS of work in the restoration.
I will probably not be doing much with these fenders for some time to come, but I wanted to get this page started since I had the pictures taken. I'll post more when there is more to post.
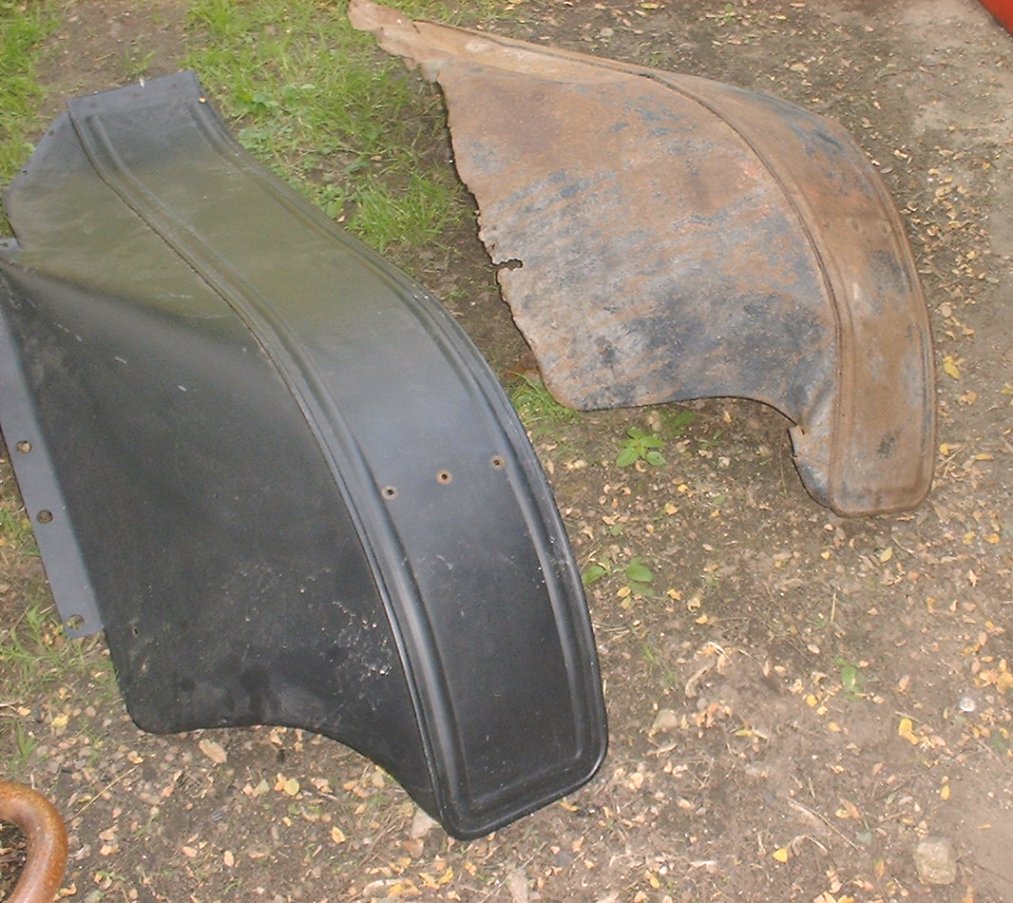 |
| New fenders and original fenders. Can you tell the difference? Click on the picture to see the full size. |
 |
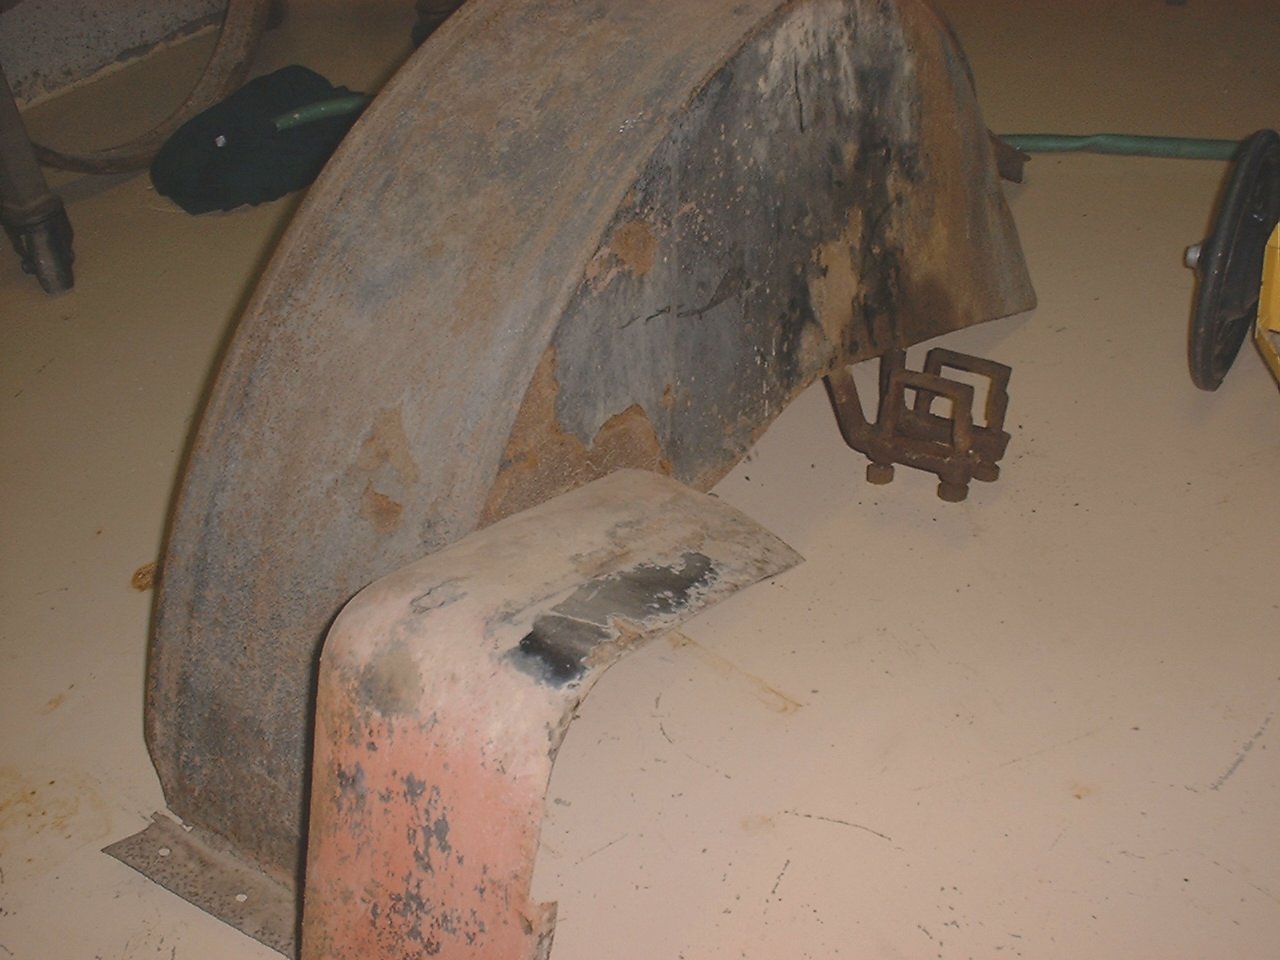
| Bottom side of the new and original fenders. Click on the picture to see the full size. |
Sunday, November 4, 2001 11:38 AM
 |  |
| Here is the inside of the rear drivers side fender. Note that you can see original black paint where the fender was against the body. Click on the picture to see the full size. | Here is the outside of the read drivers side fender. I think I can restore this one. The passenger side is a different story. Click on the picture to see the full size. |
Tuesday, December 30, 2014 9:24 AM
|

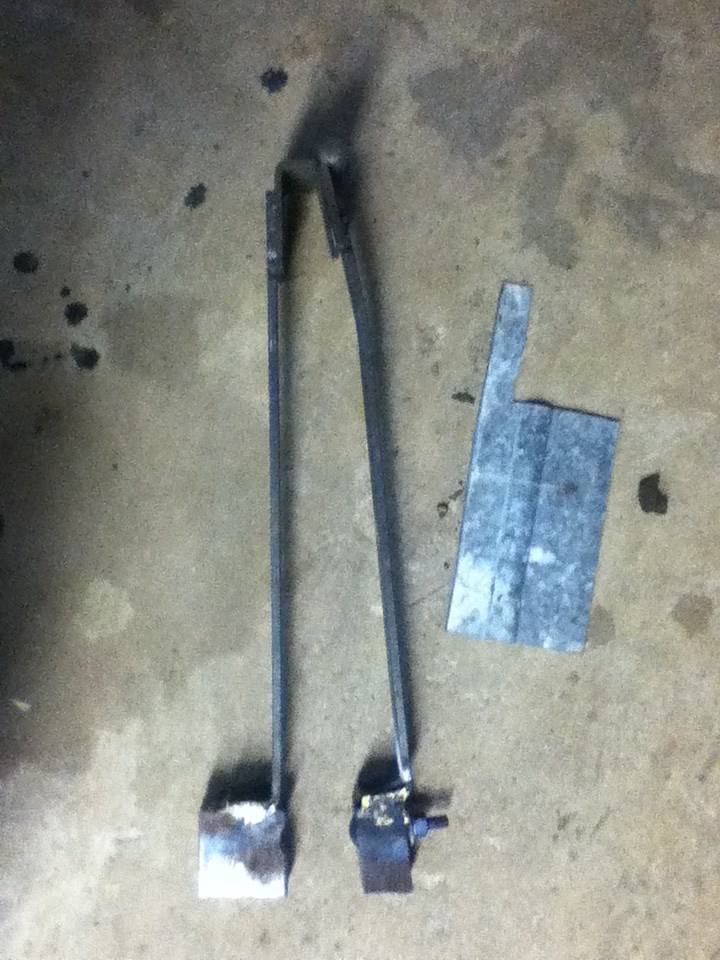
|
| This beading tool was made from scrap in the garage. Click on the picture to see the full size. | Closeup of the head on the beading tool and the first trial bead made with it. Click on the picture to see the full size. |
The second picture is a close up of the head of the tool and the first test bead made with the bead tool I made to put a bead into the patch I need to weld into the fender patch panels of the E-M-F.
Saturday, November 4, 2017 6:30 PM
|
|
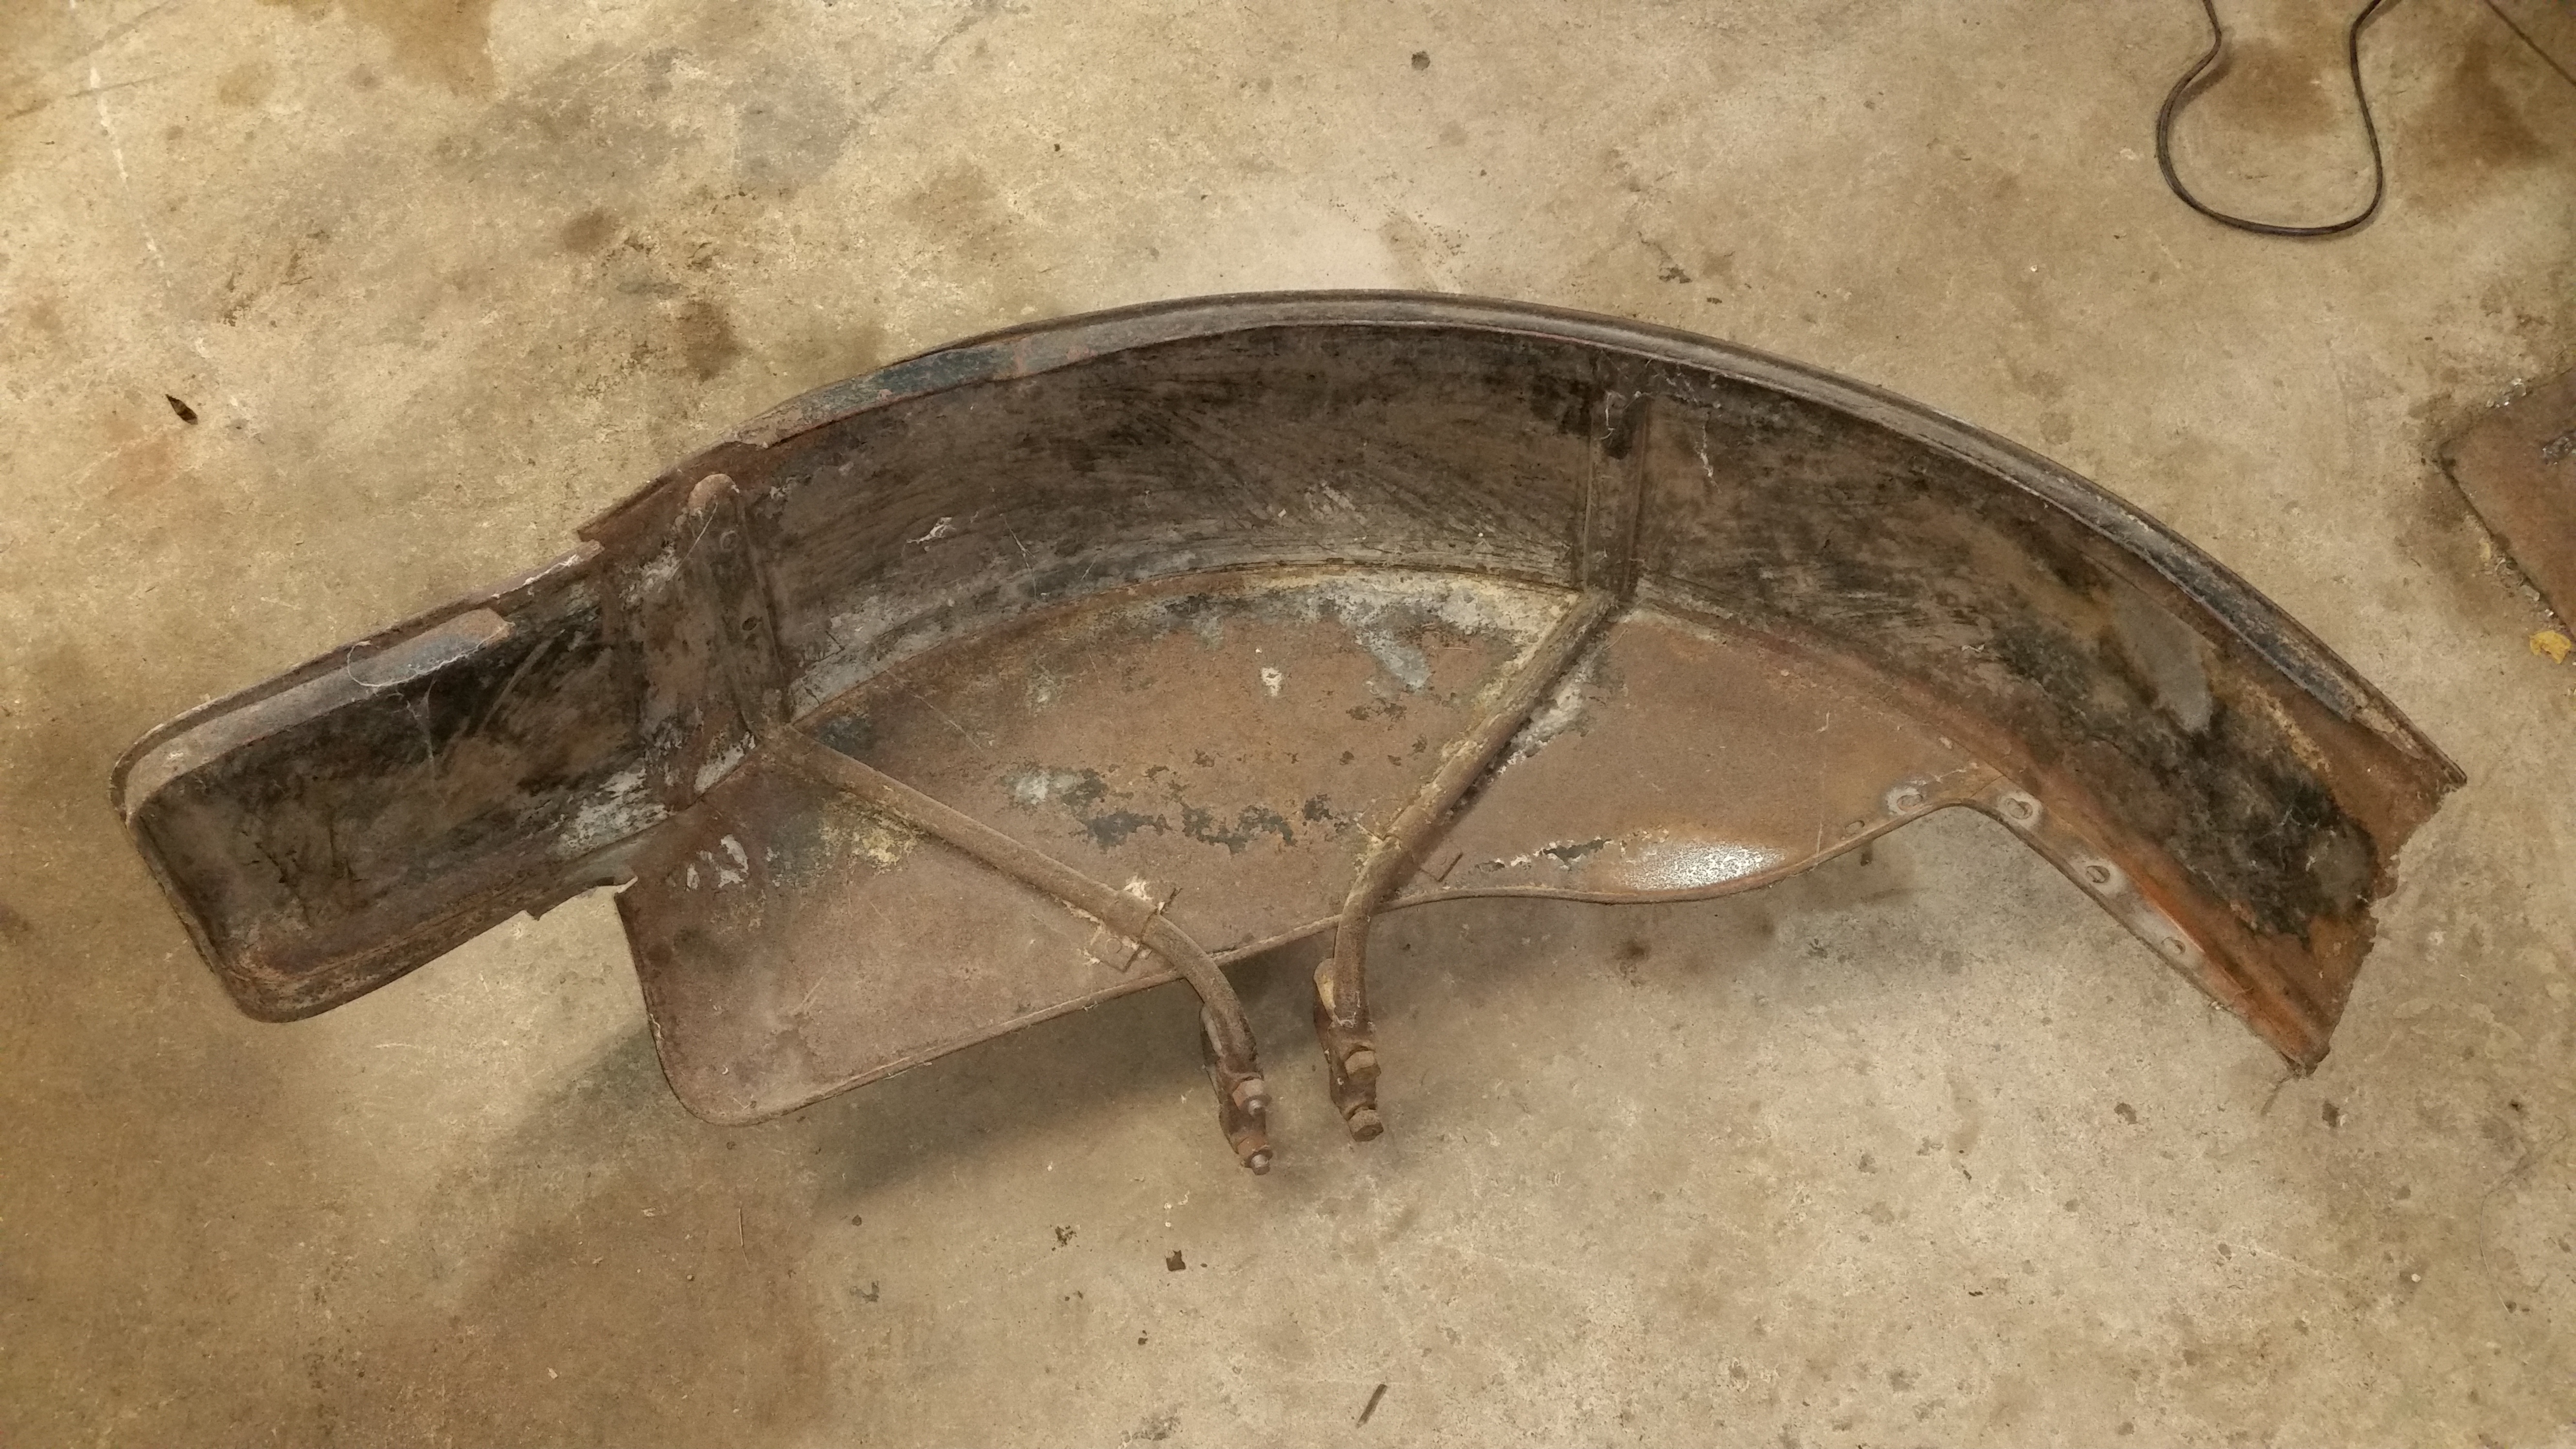
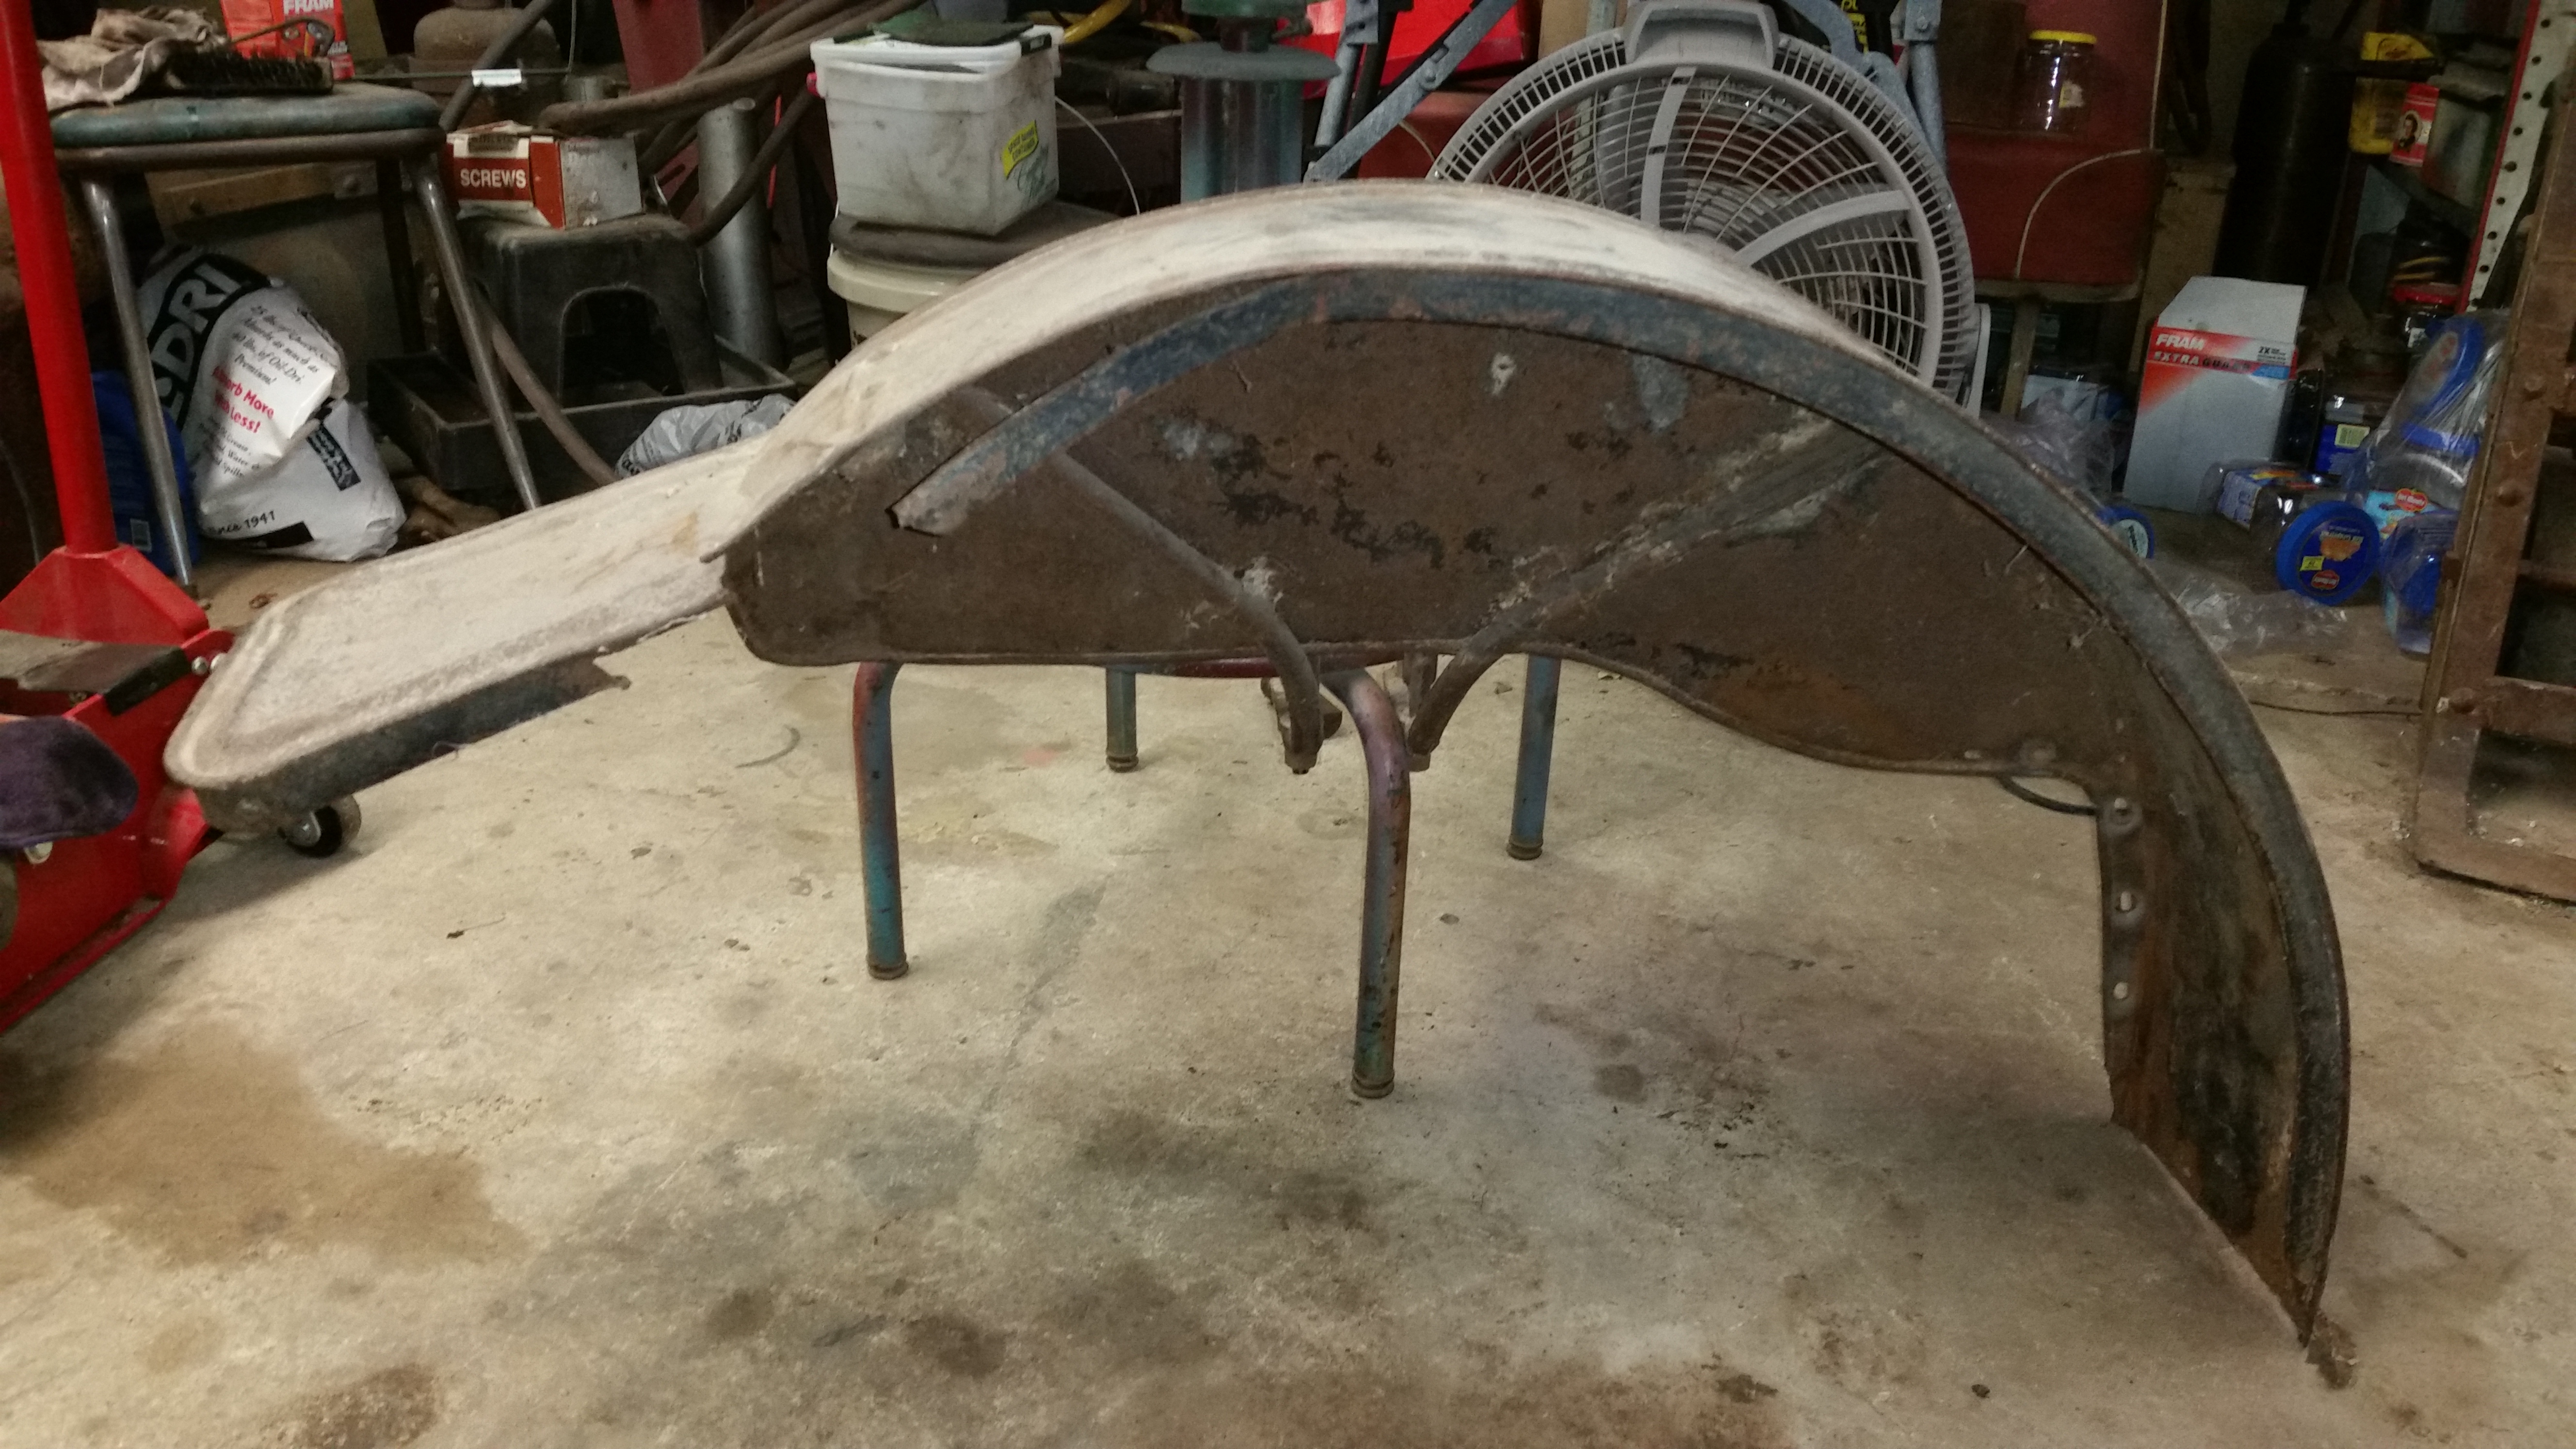
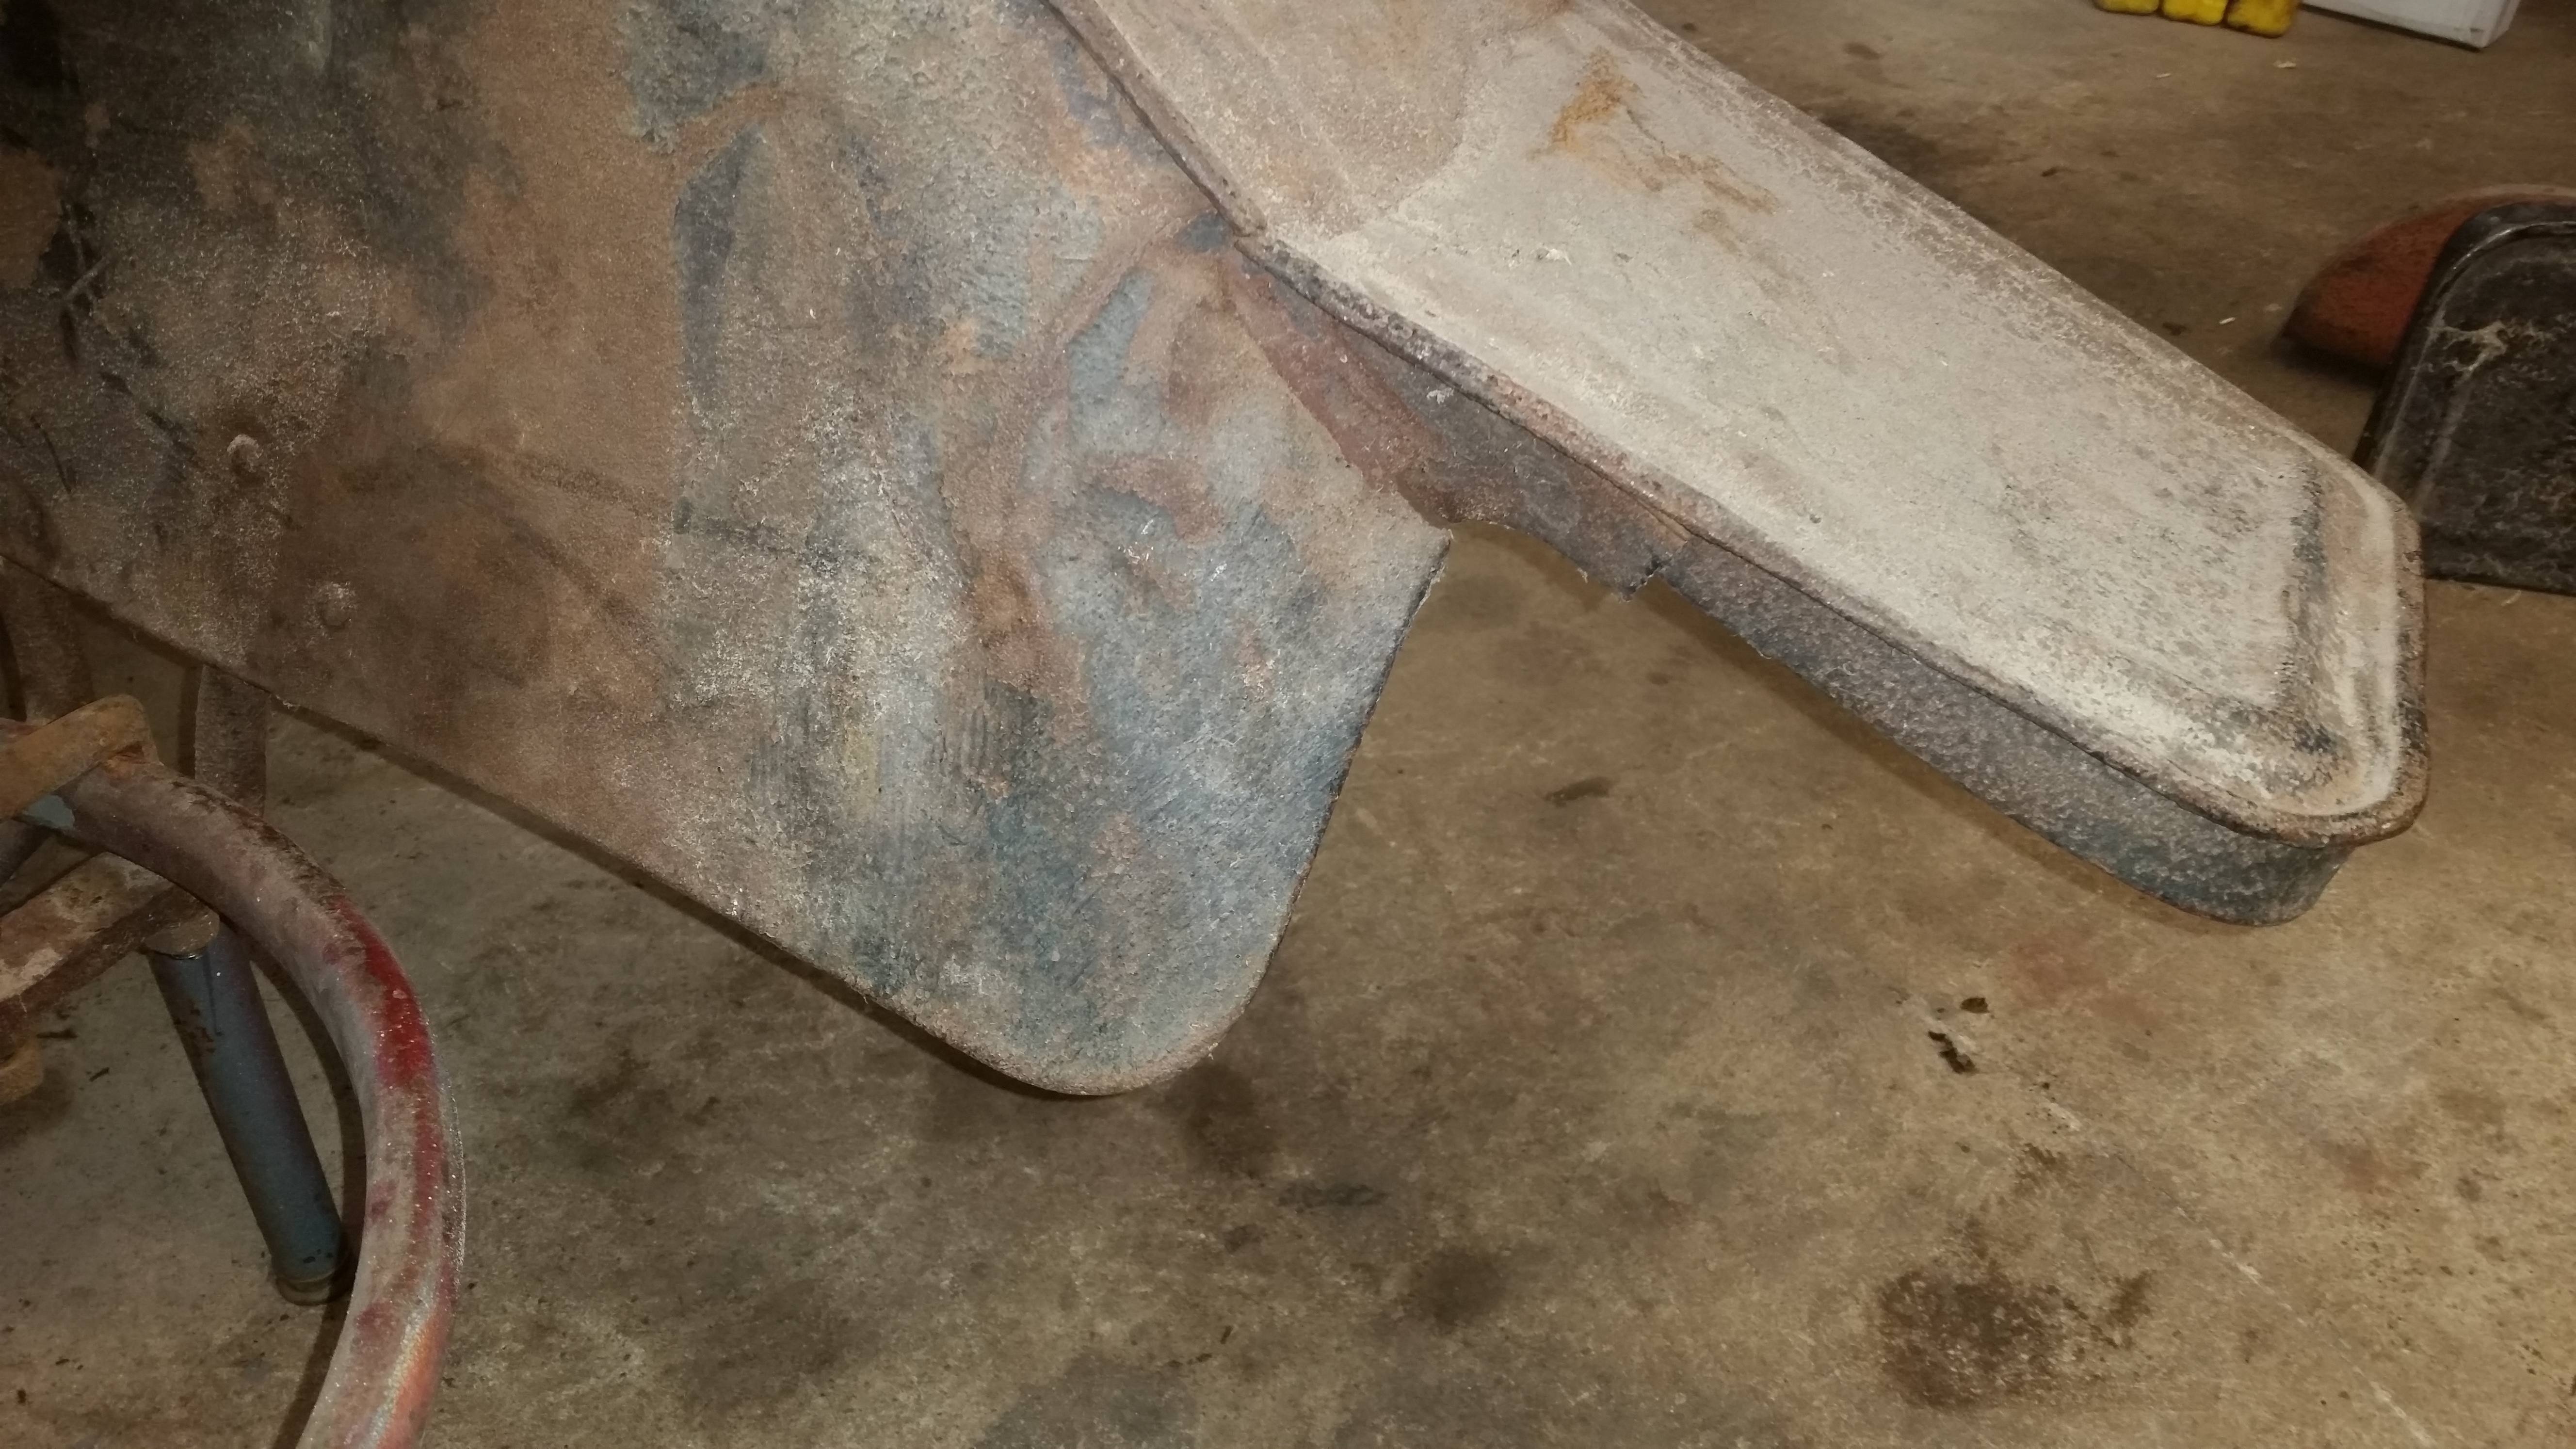
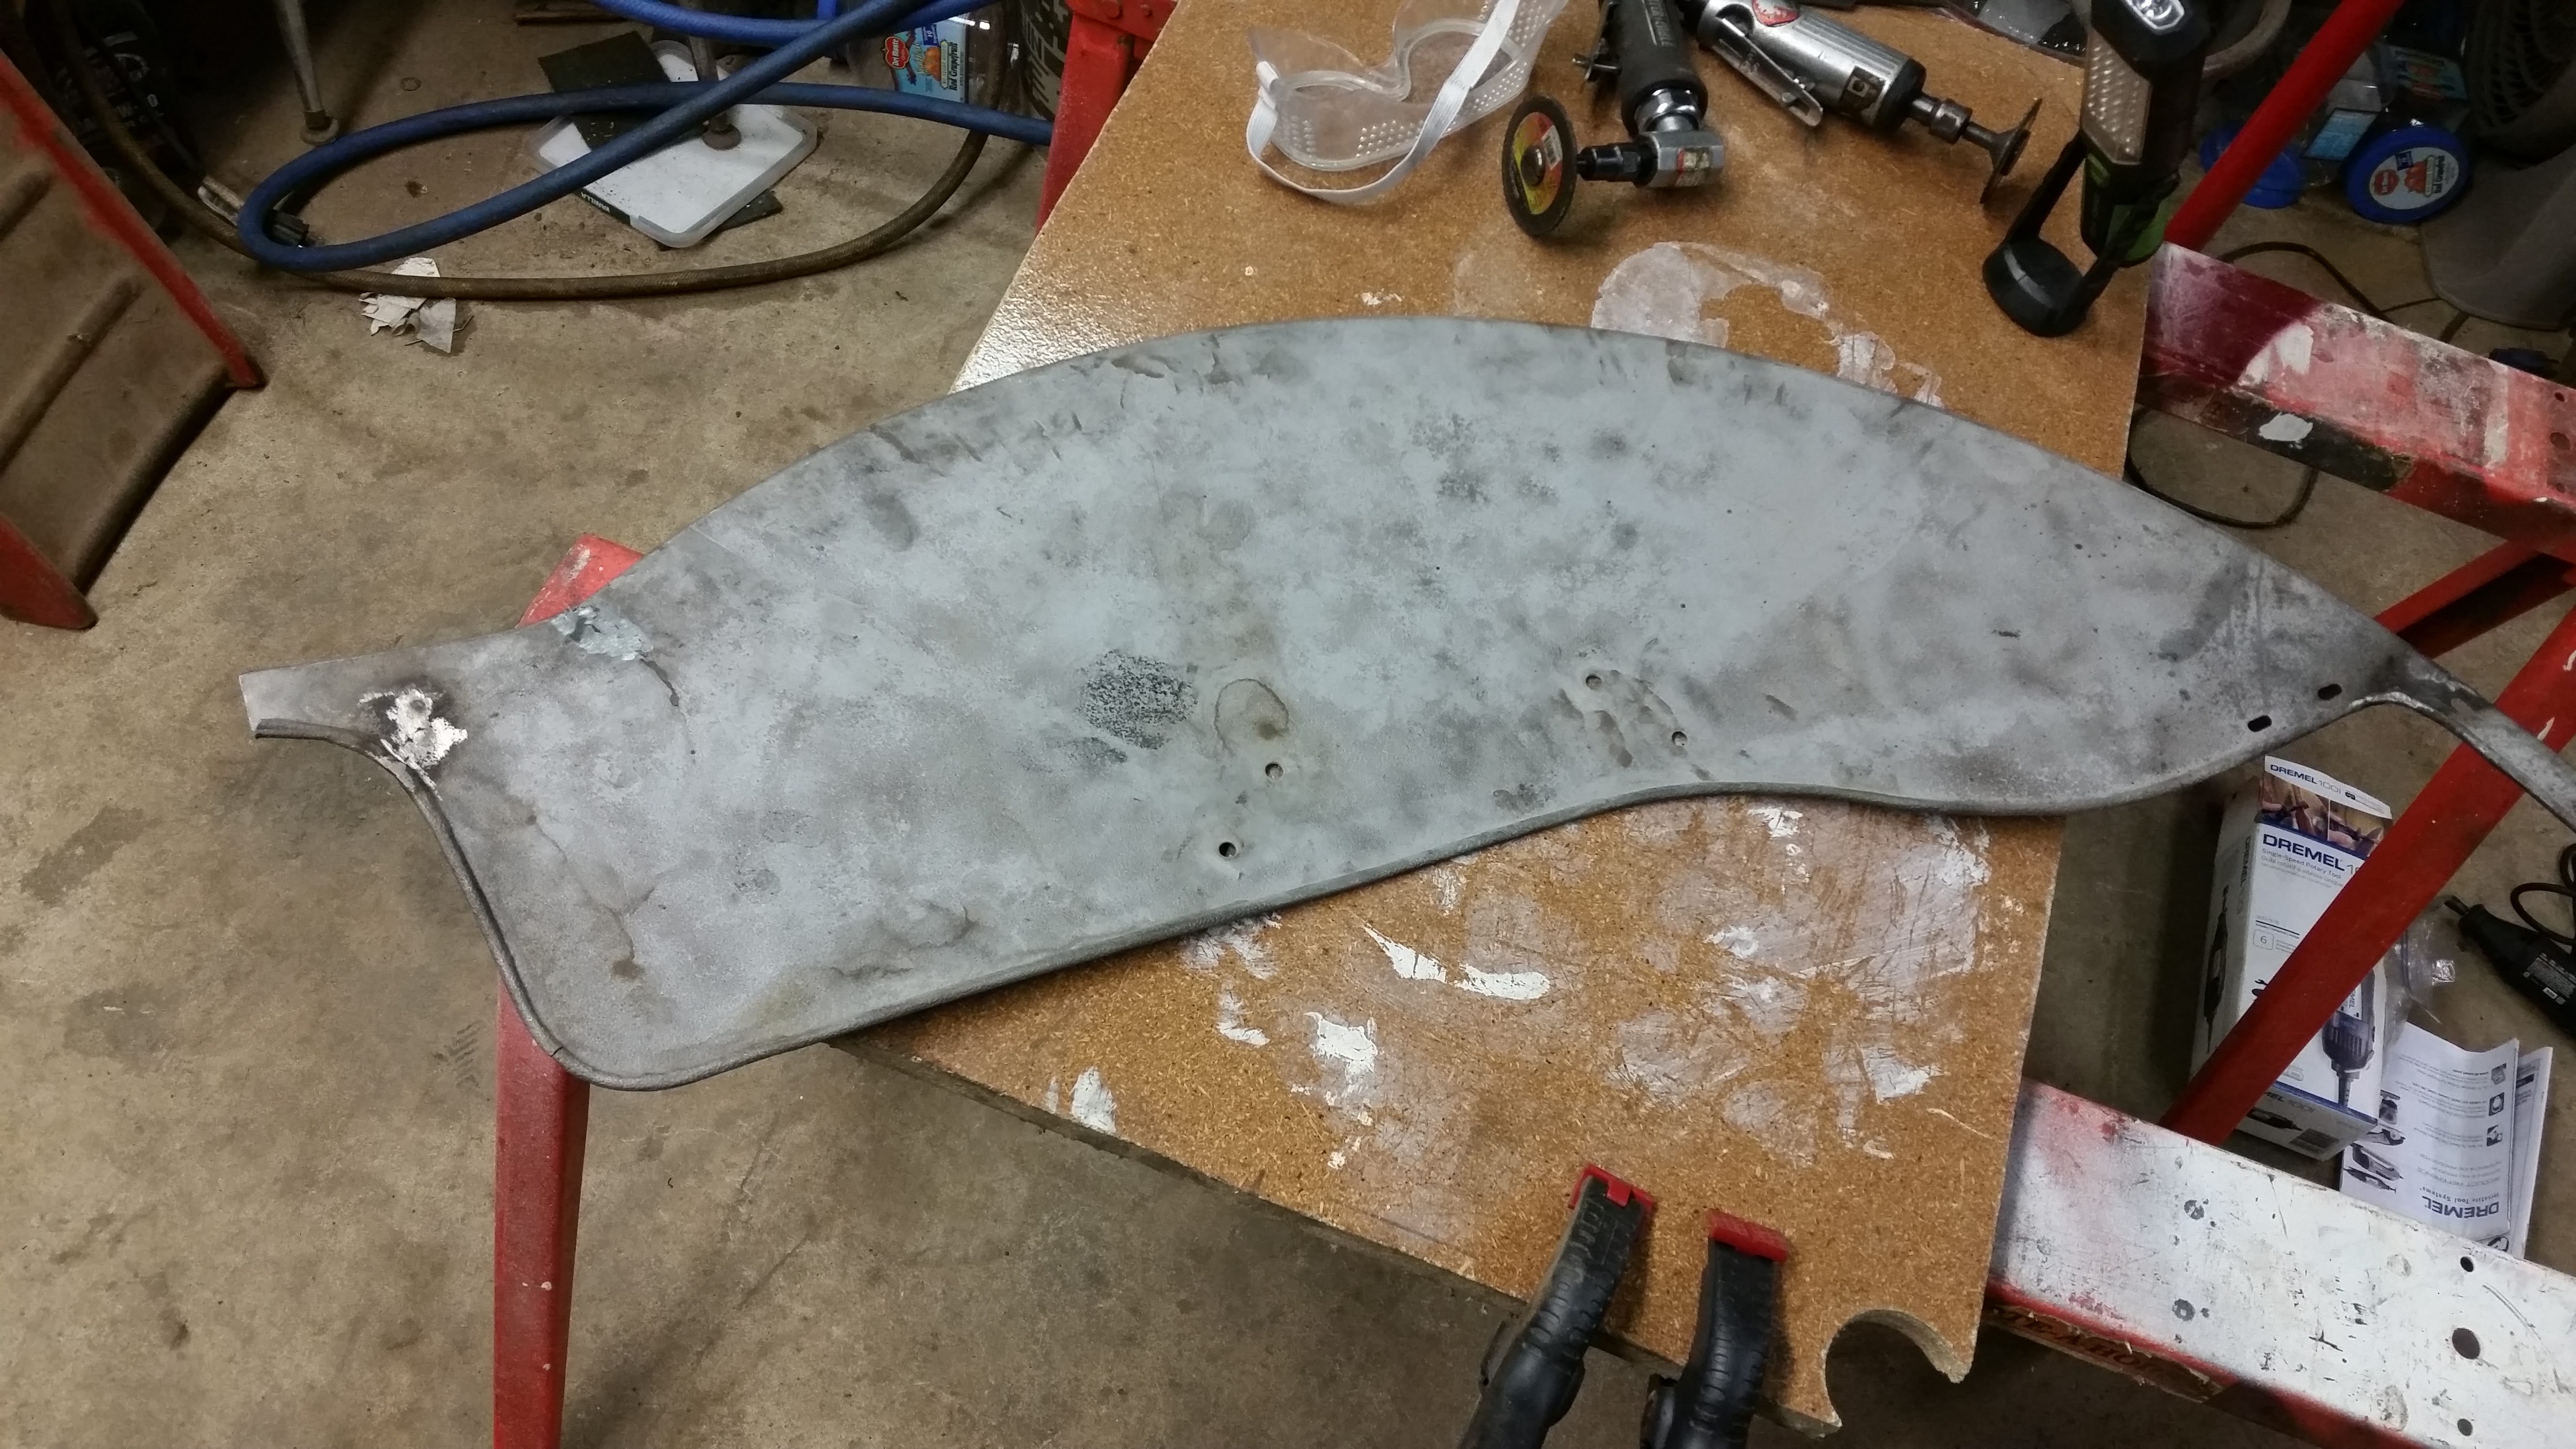
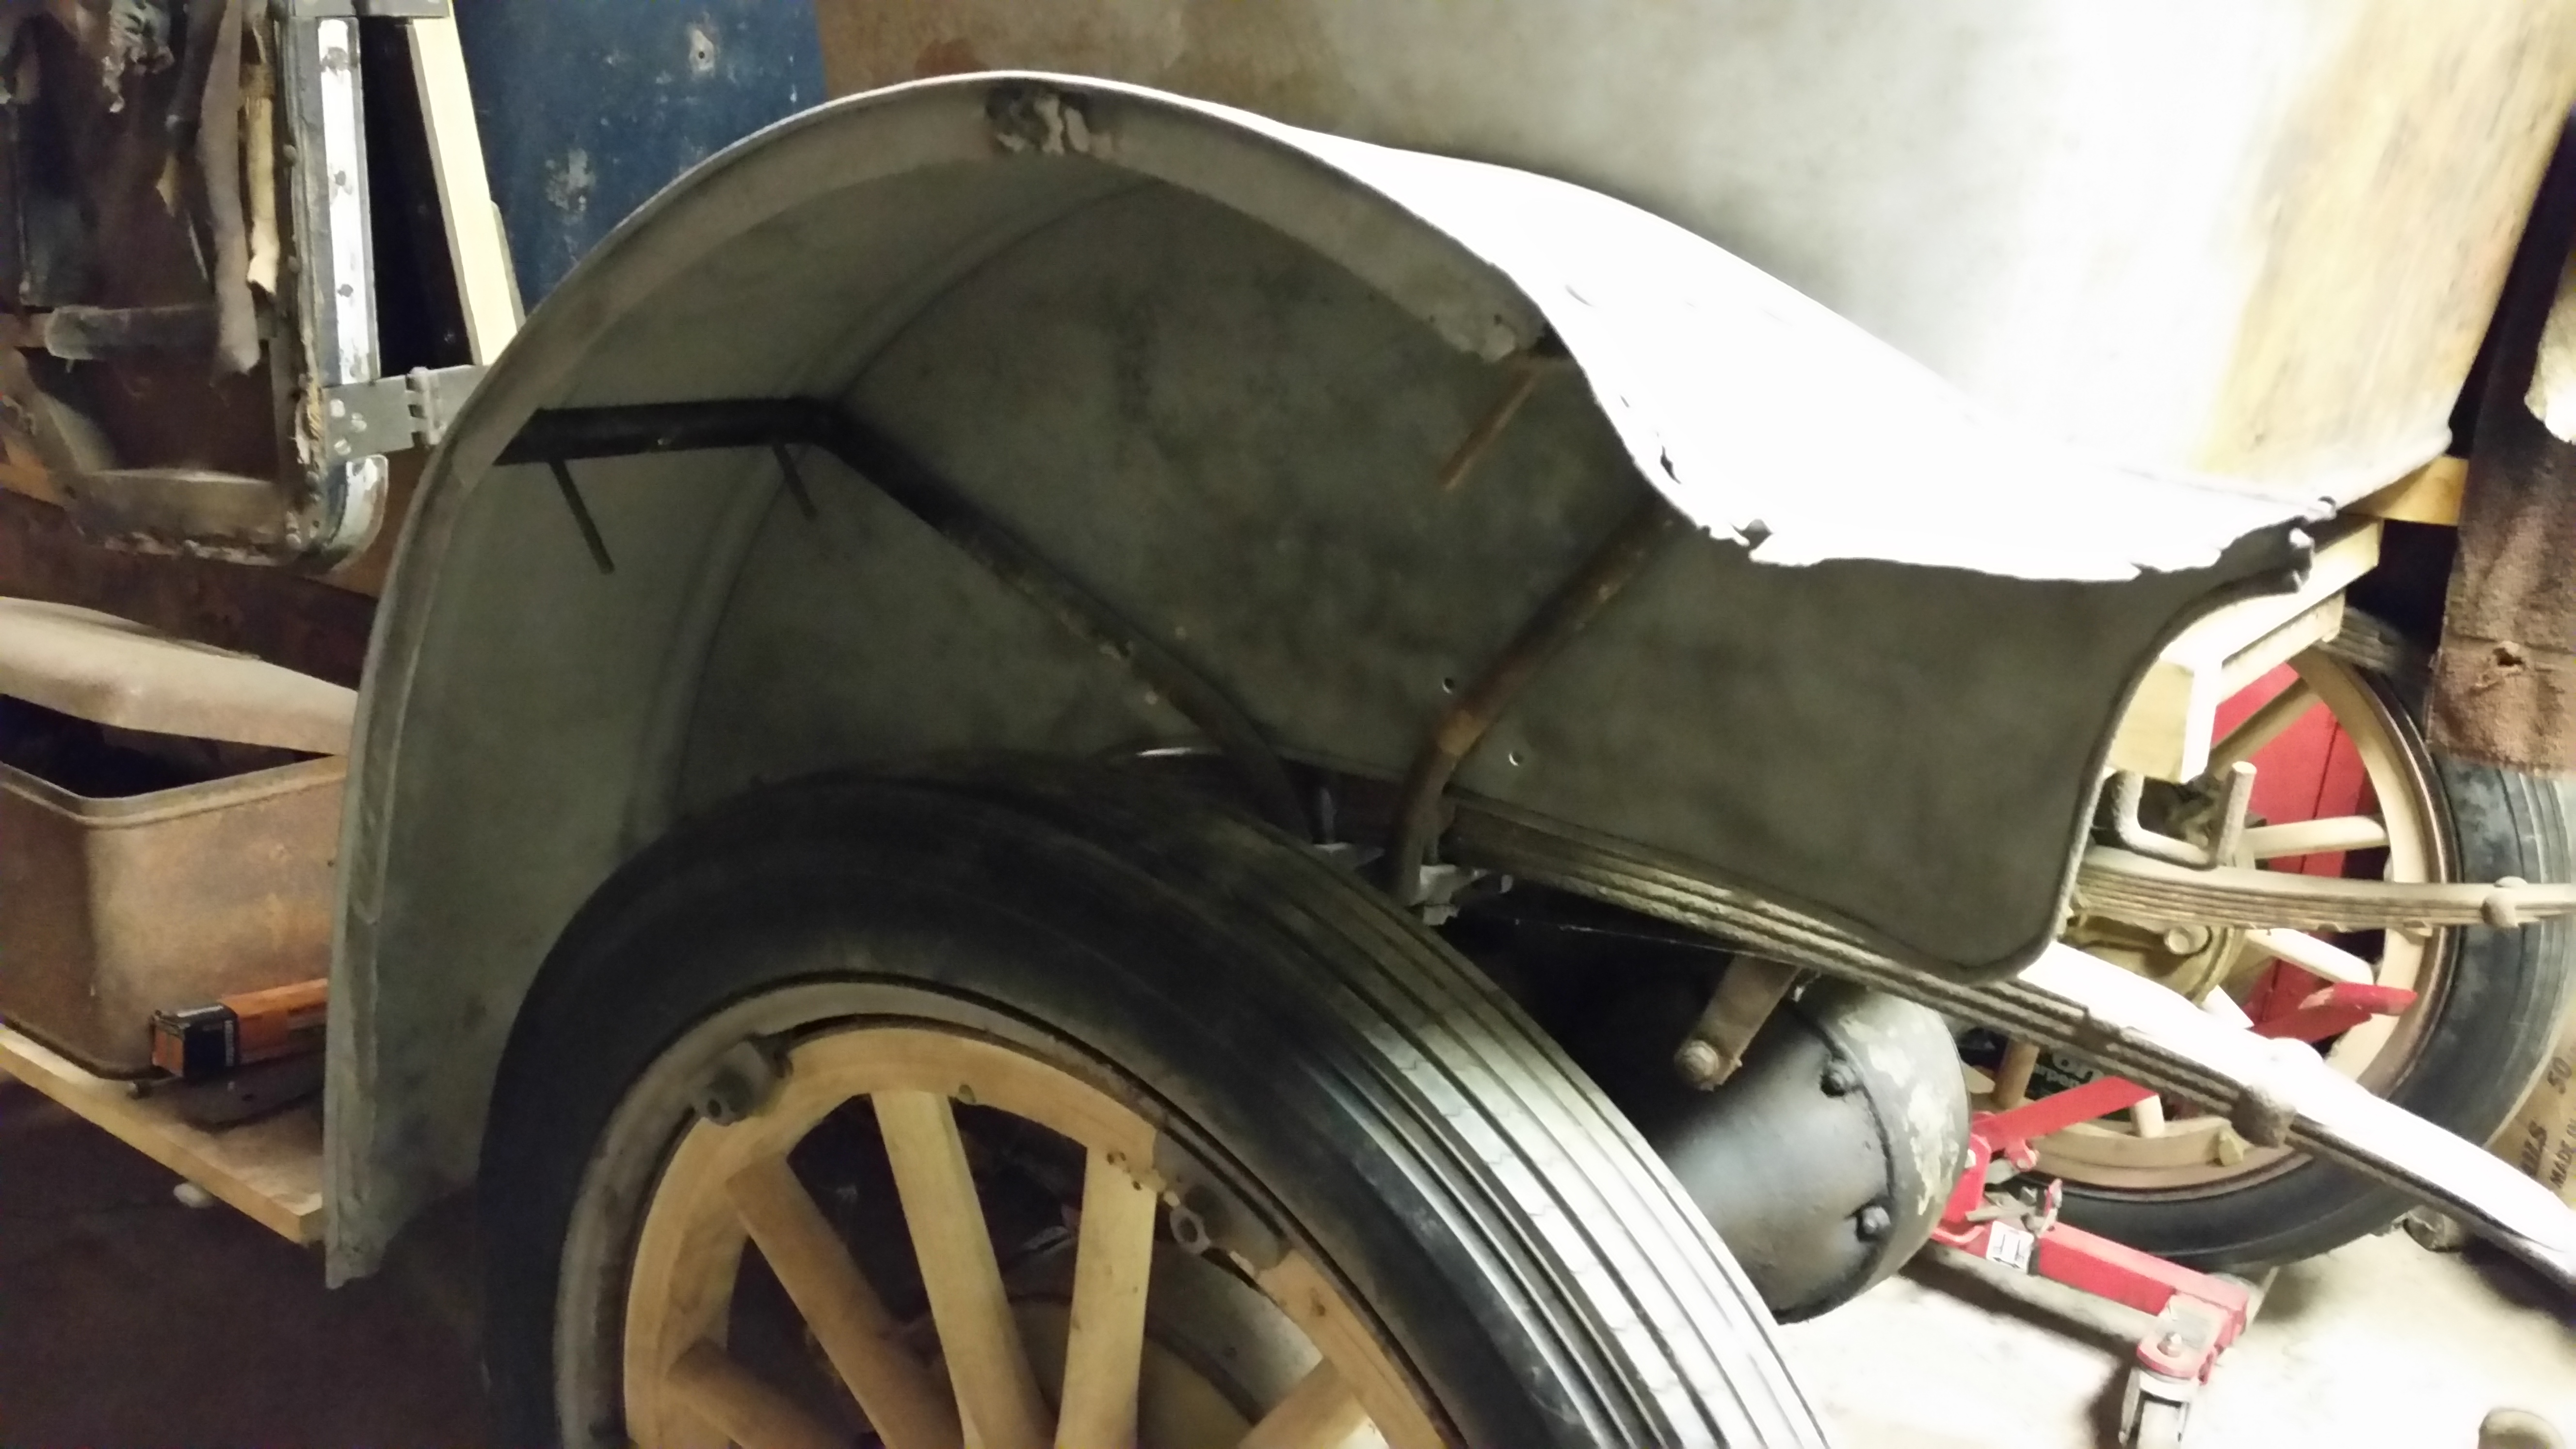
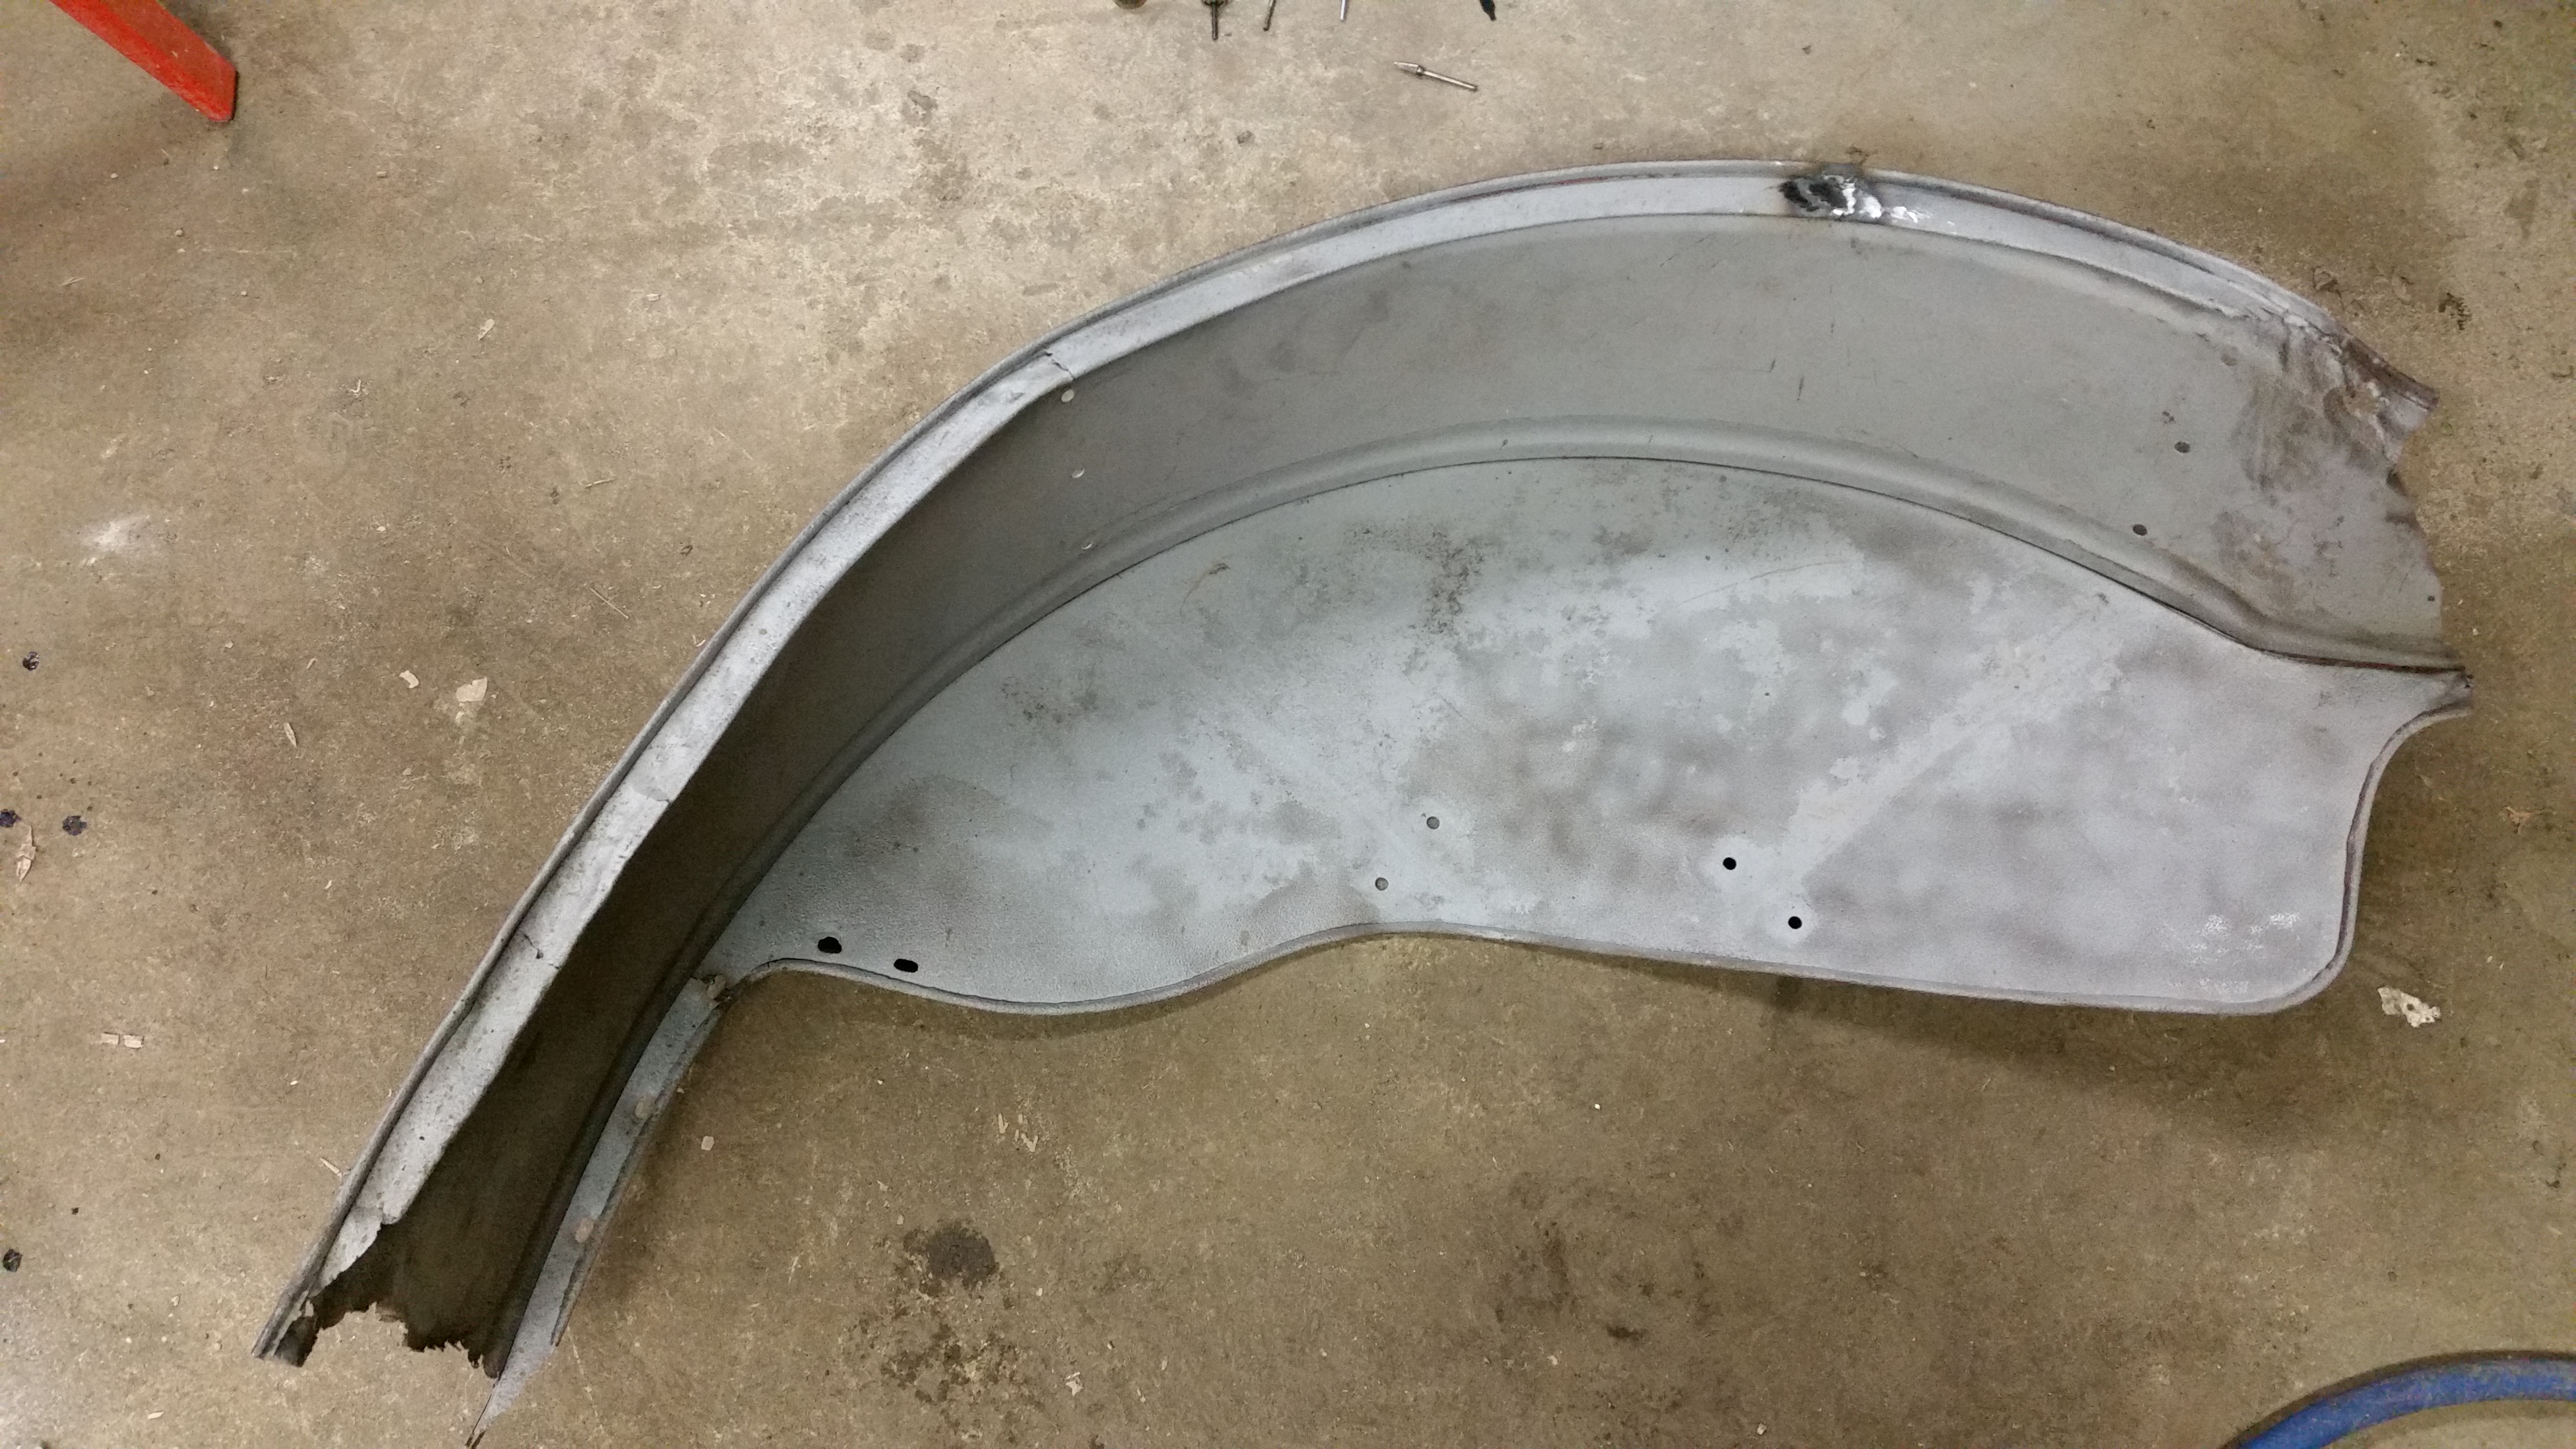
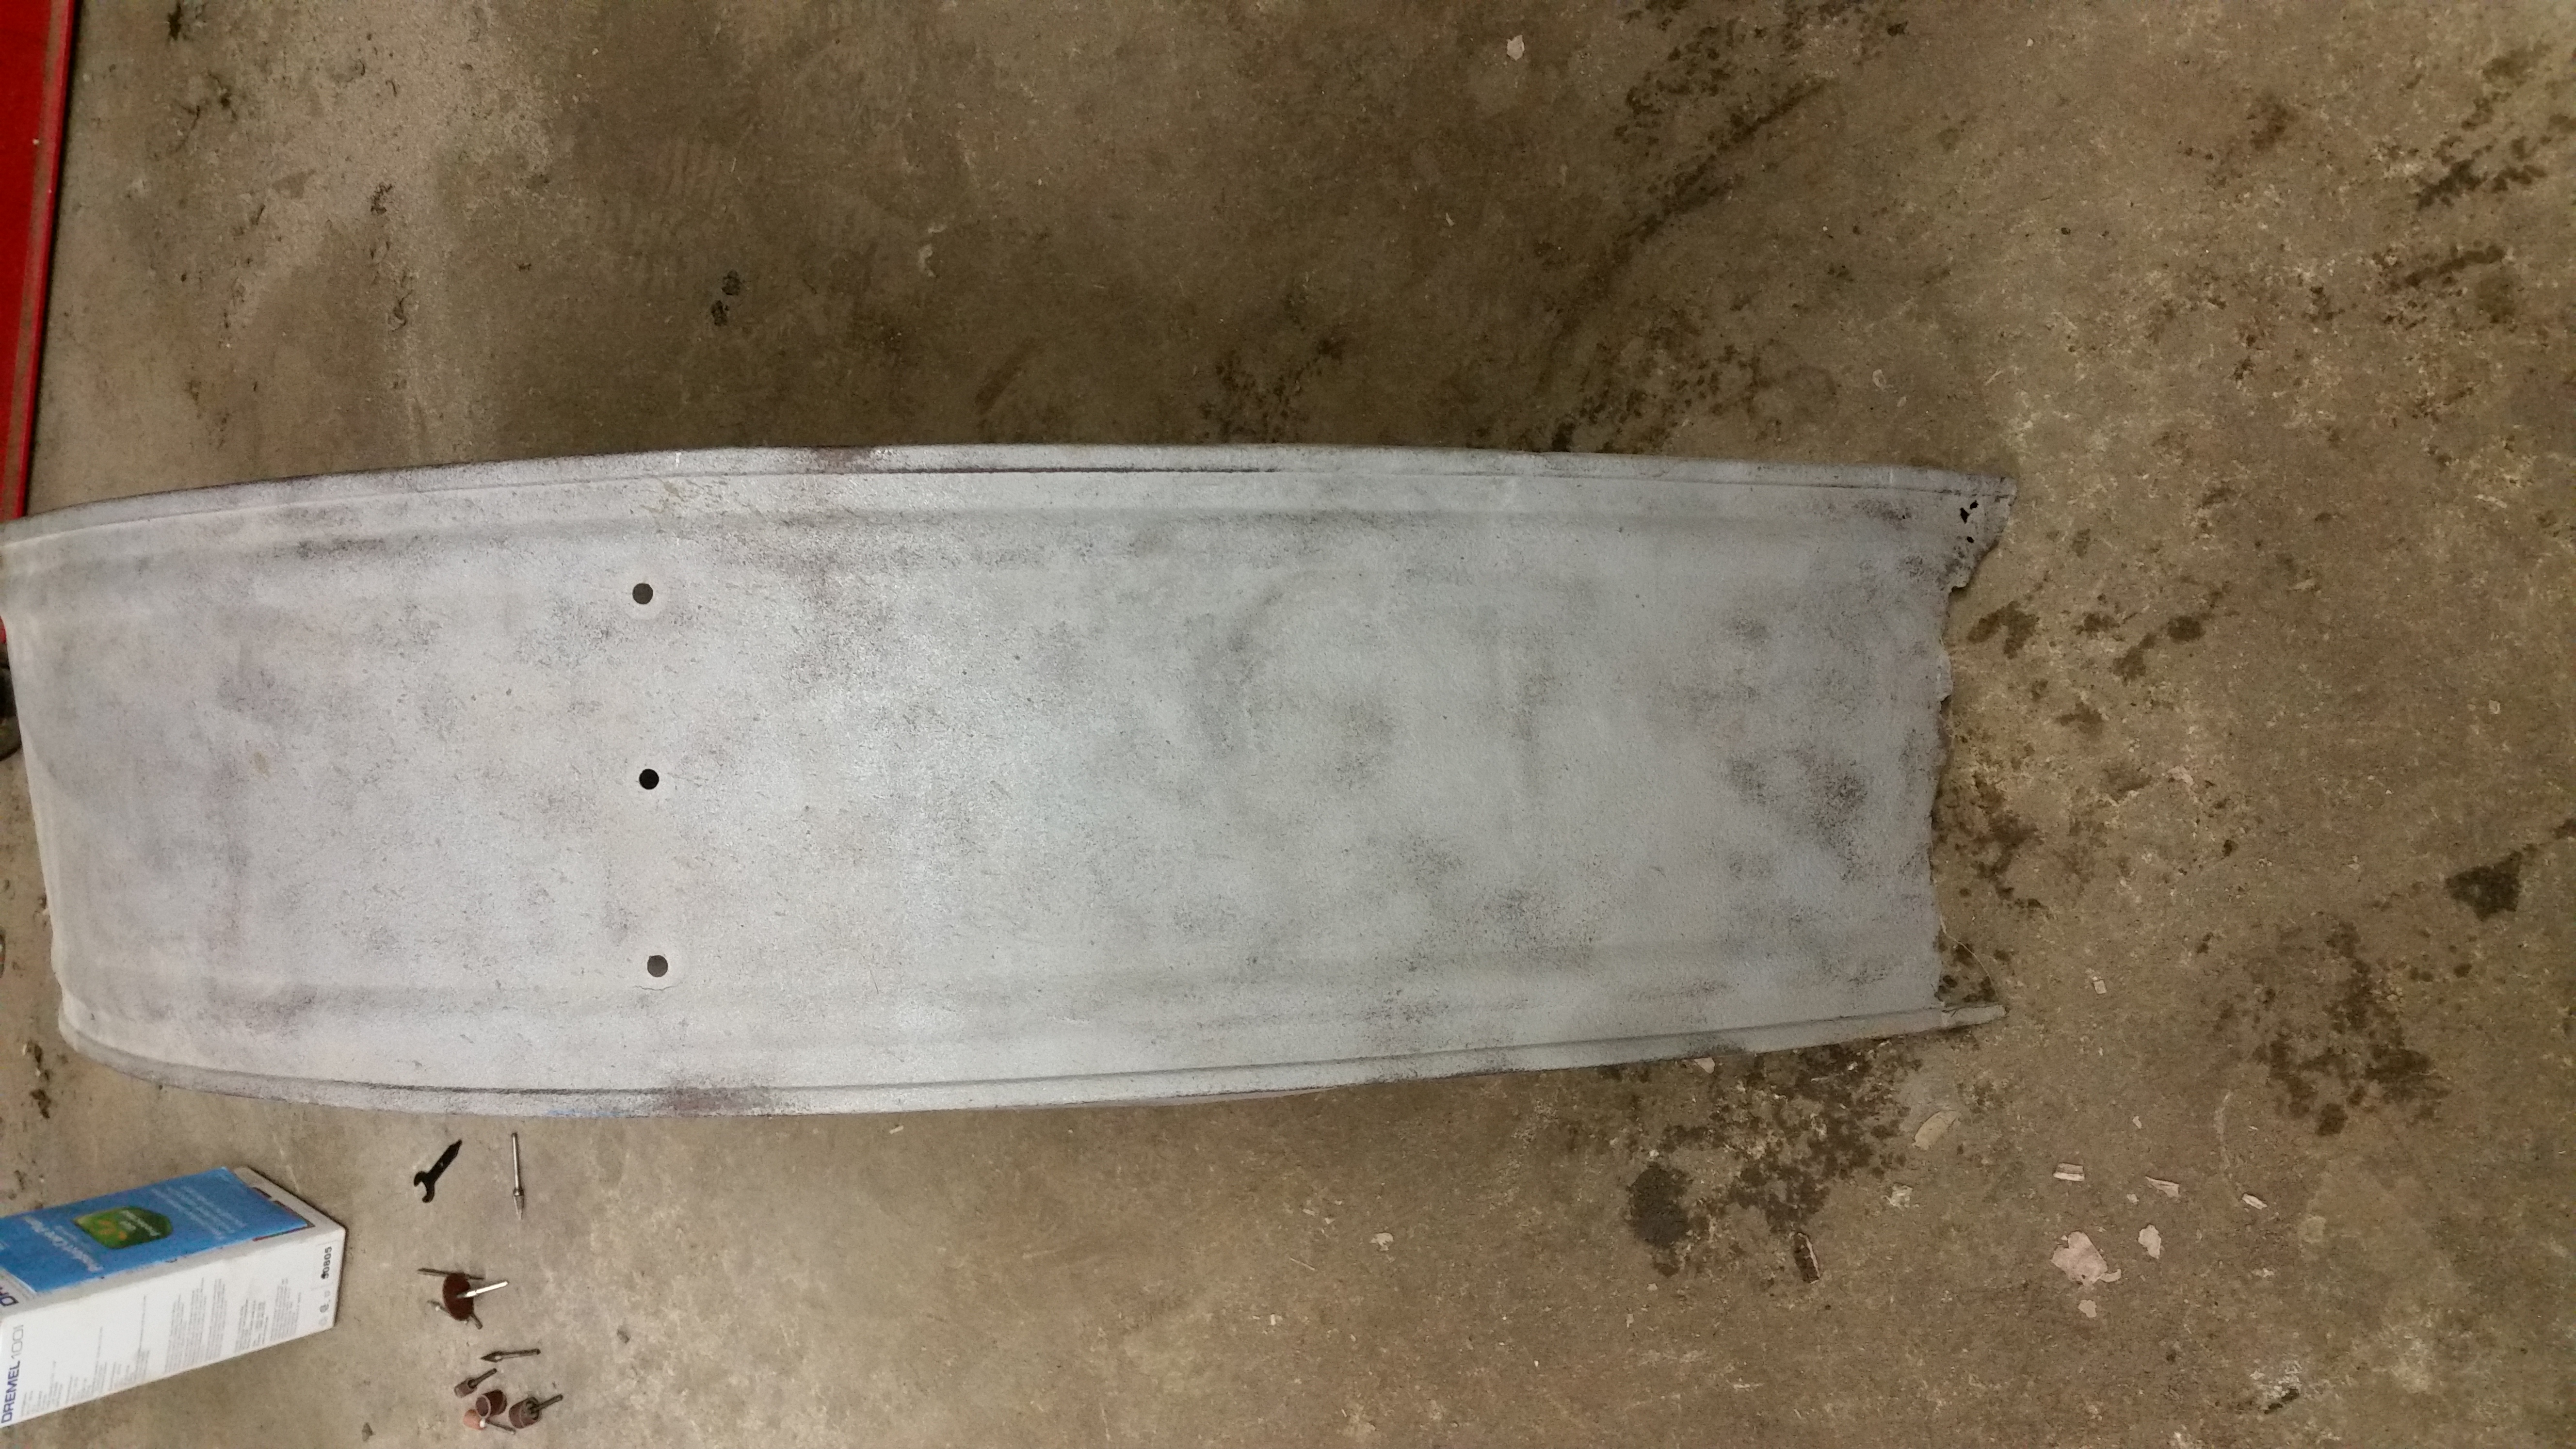
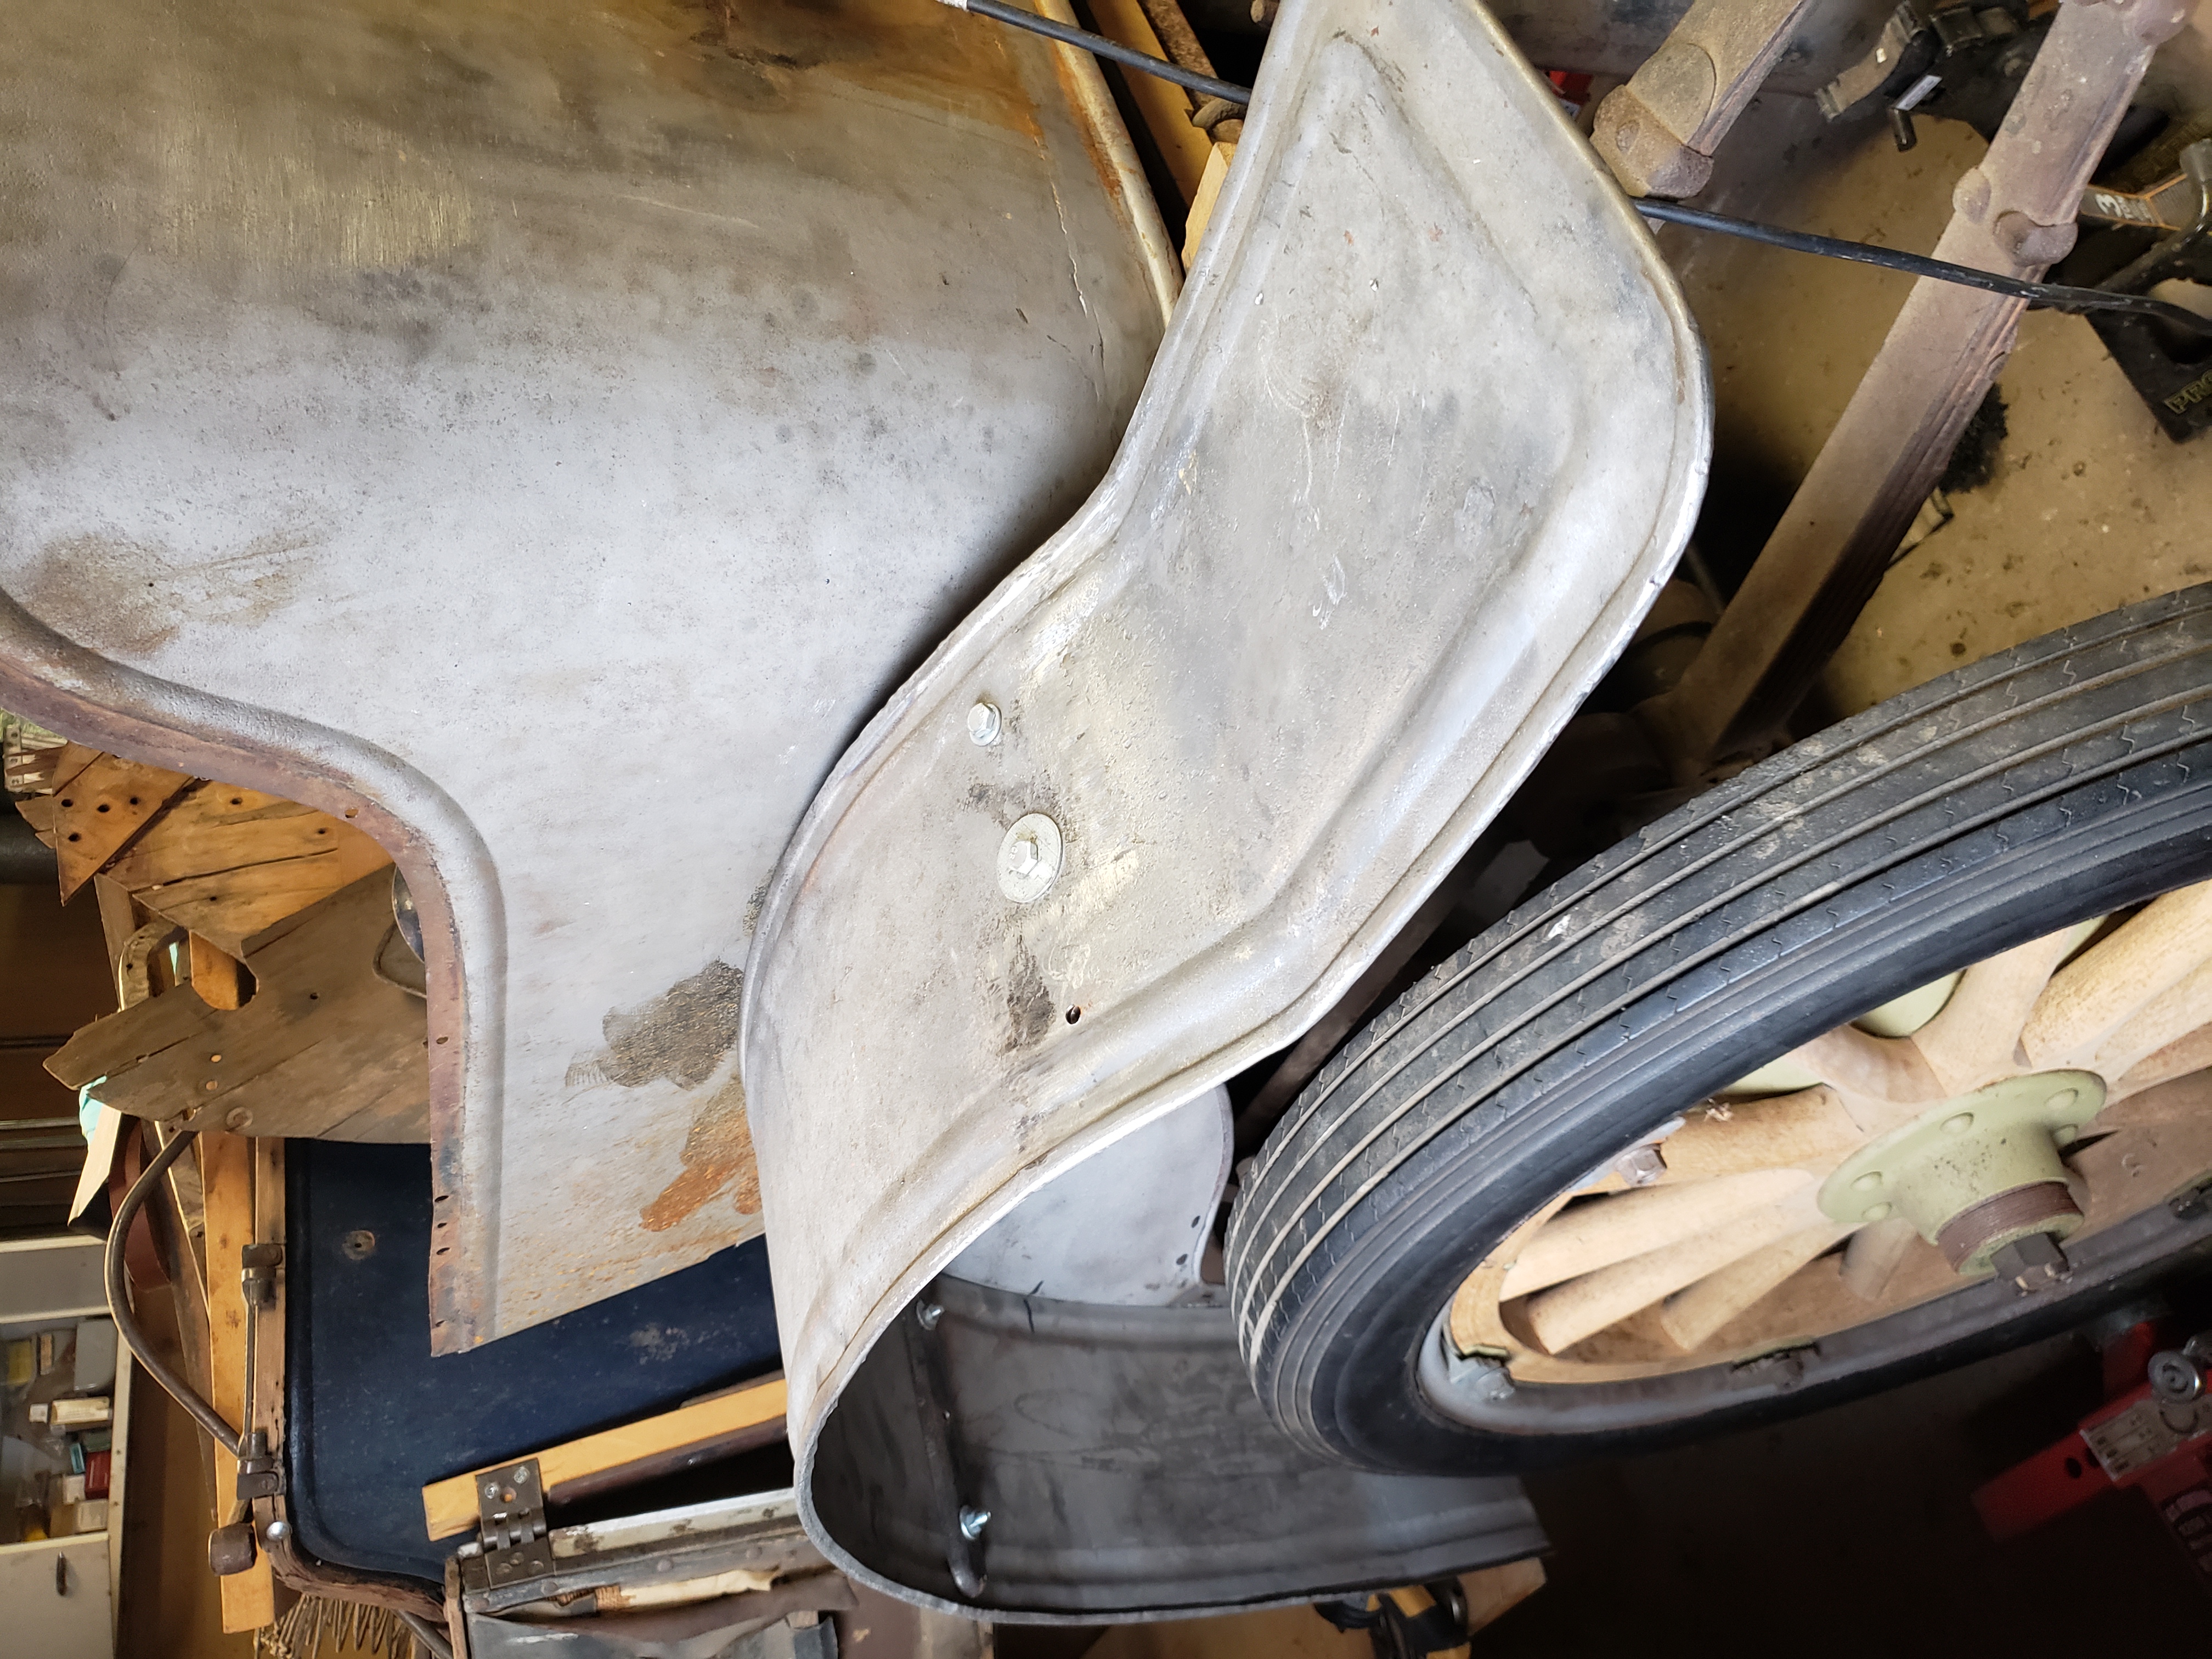
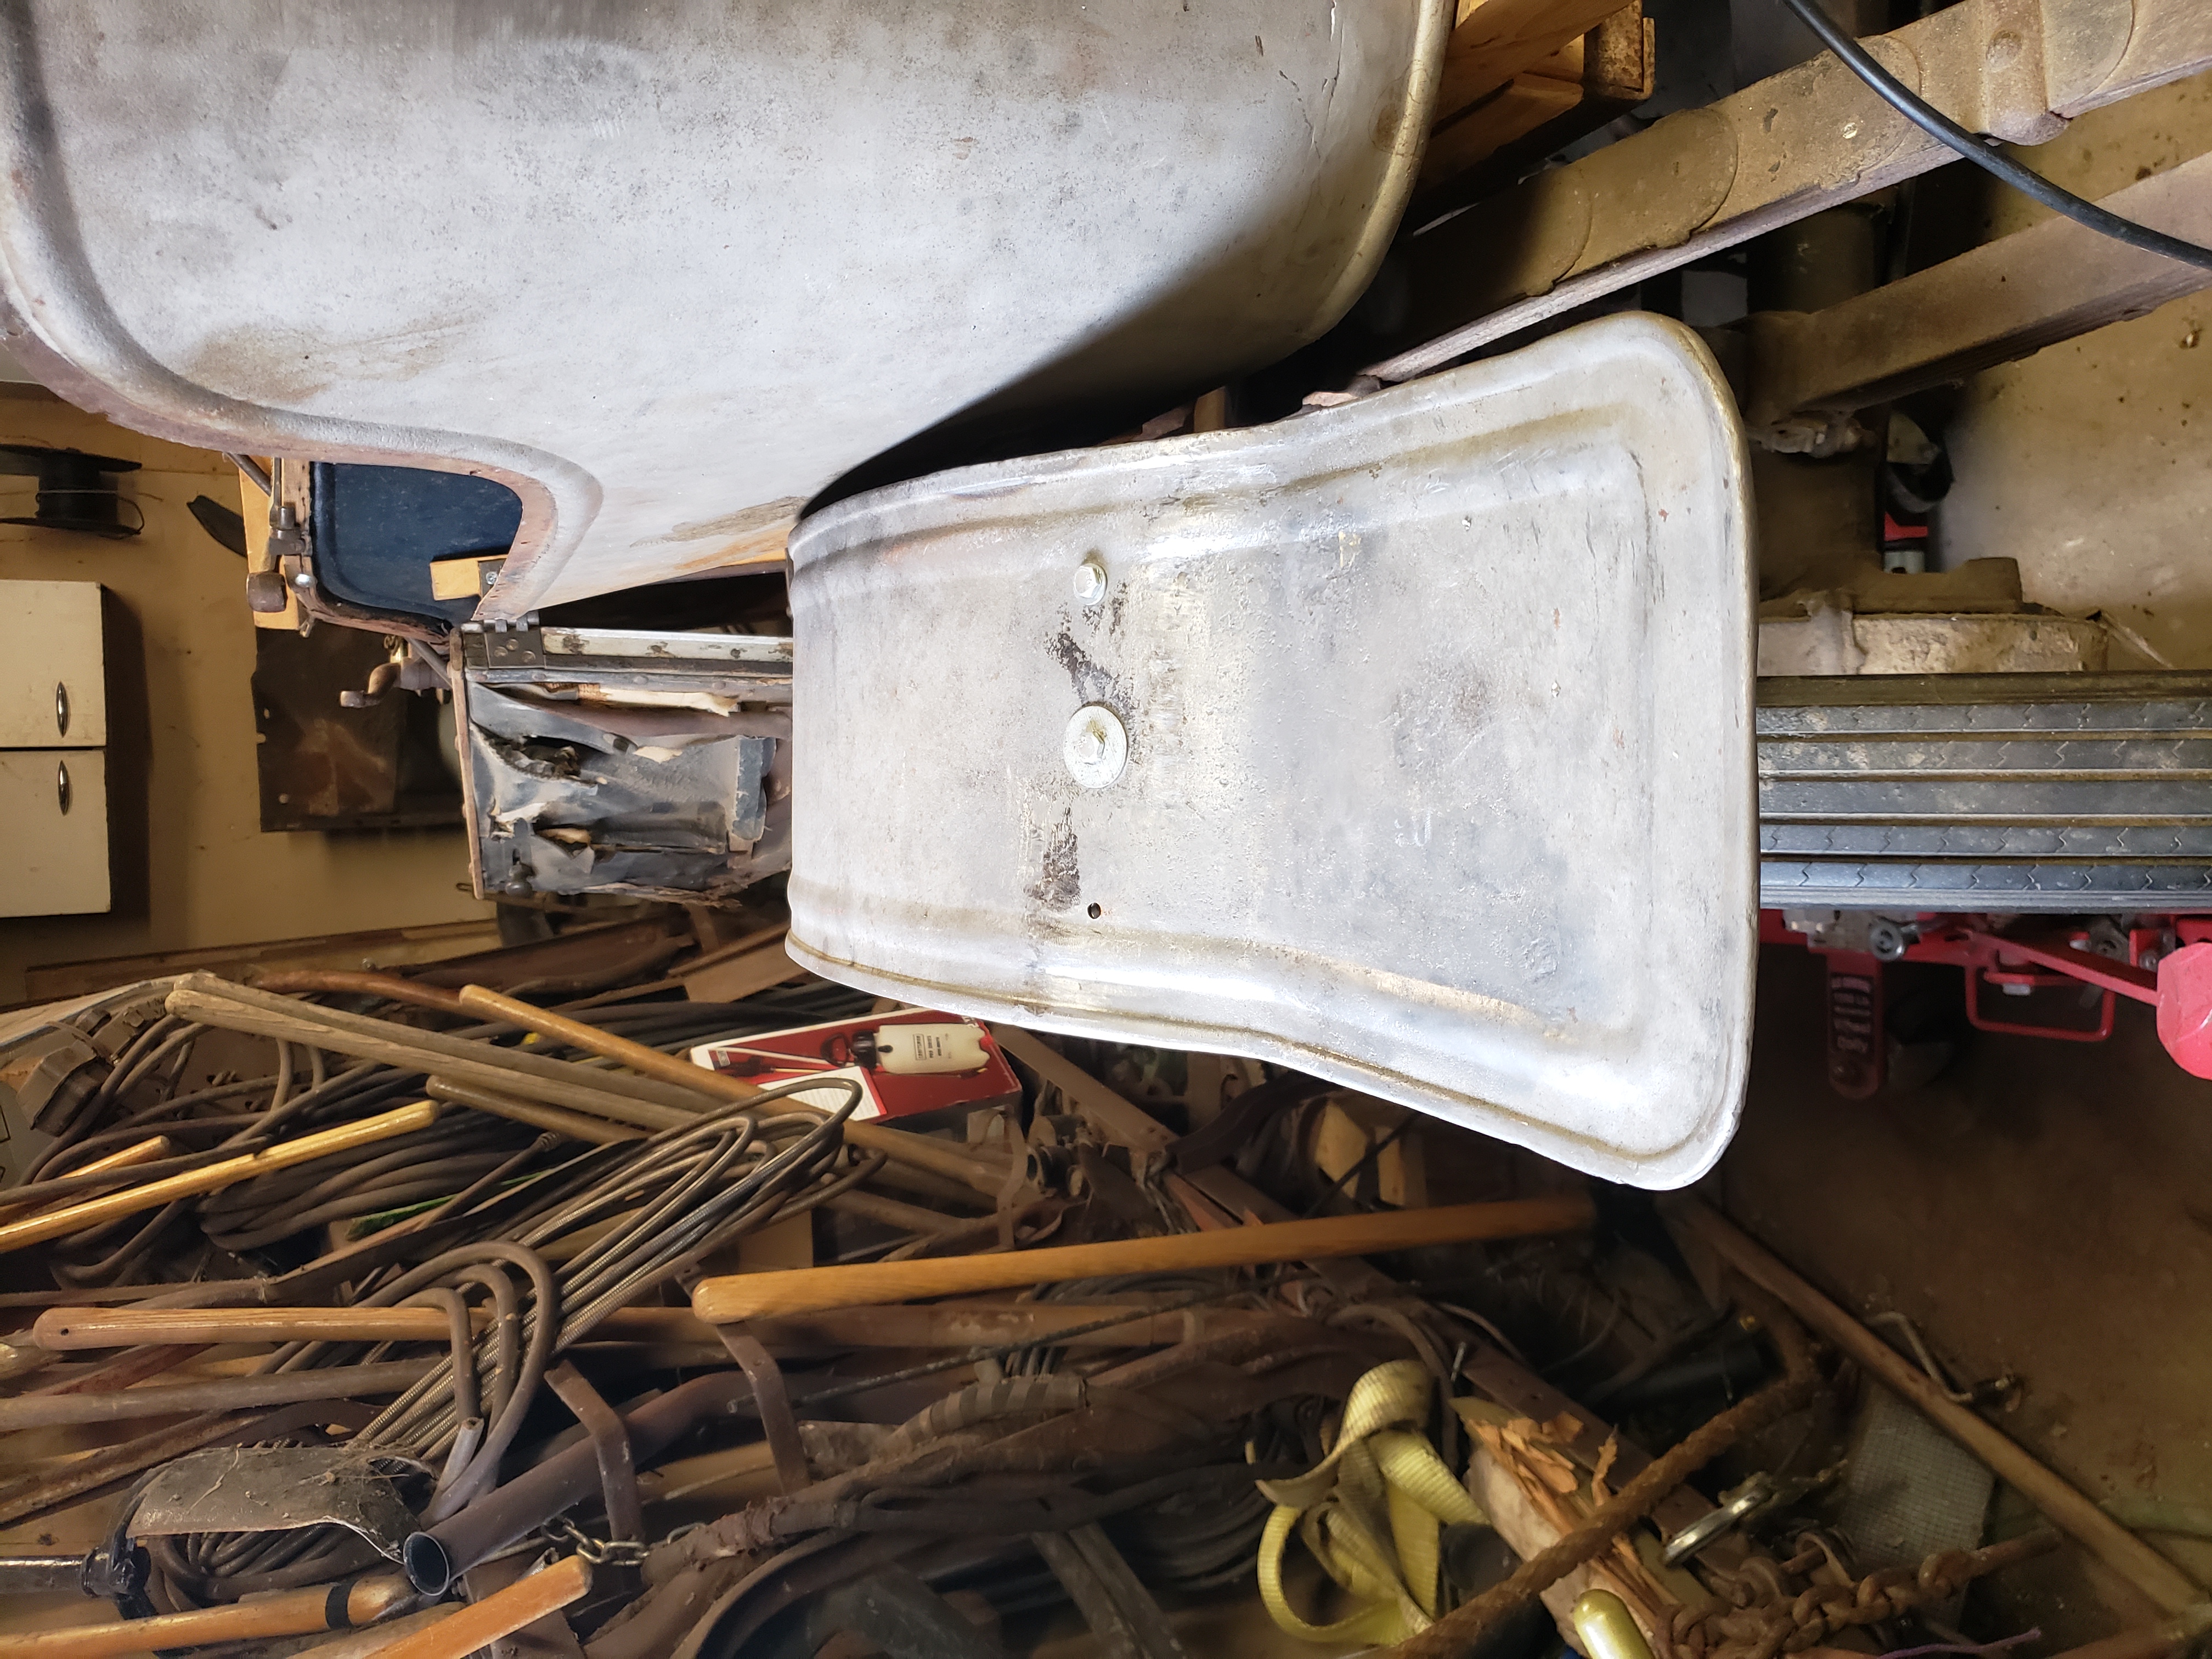
| Right Rear Fender on the ground showing inner panel. Click on the picture to see the full size. | Right Rear Fender in approximate orientation showing back part bent down. Click on the picture to see the full size. |
The right picture above shows the fender in the approximate position it would sit on the car. Notice how the back of it is bent down. It should be parallel to the ground. I believe I have actually tried to pull it back up into position a bit. I am not sure I can get this all straightened out. We will see.
|
|
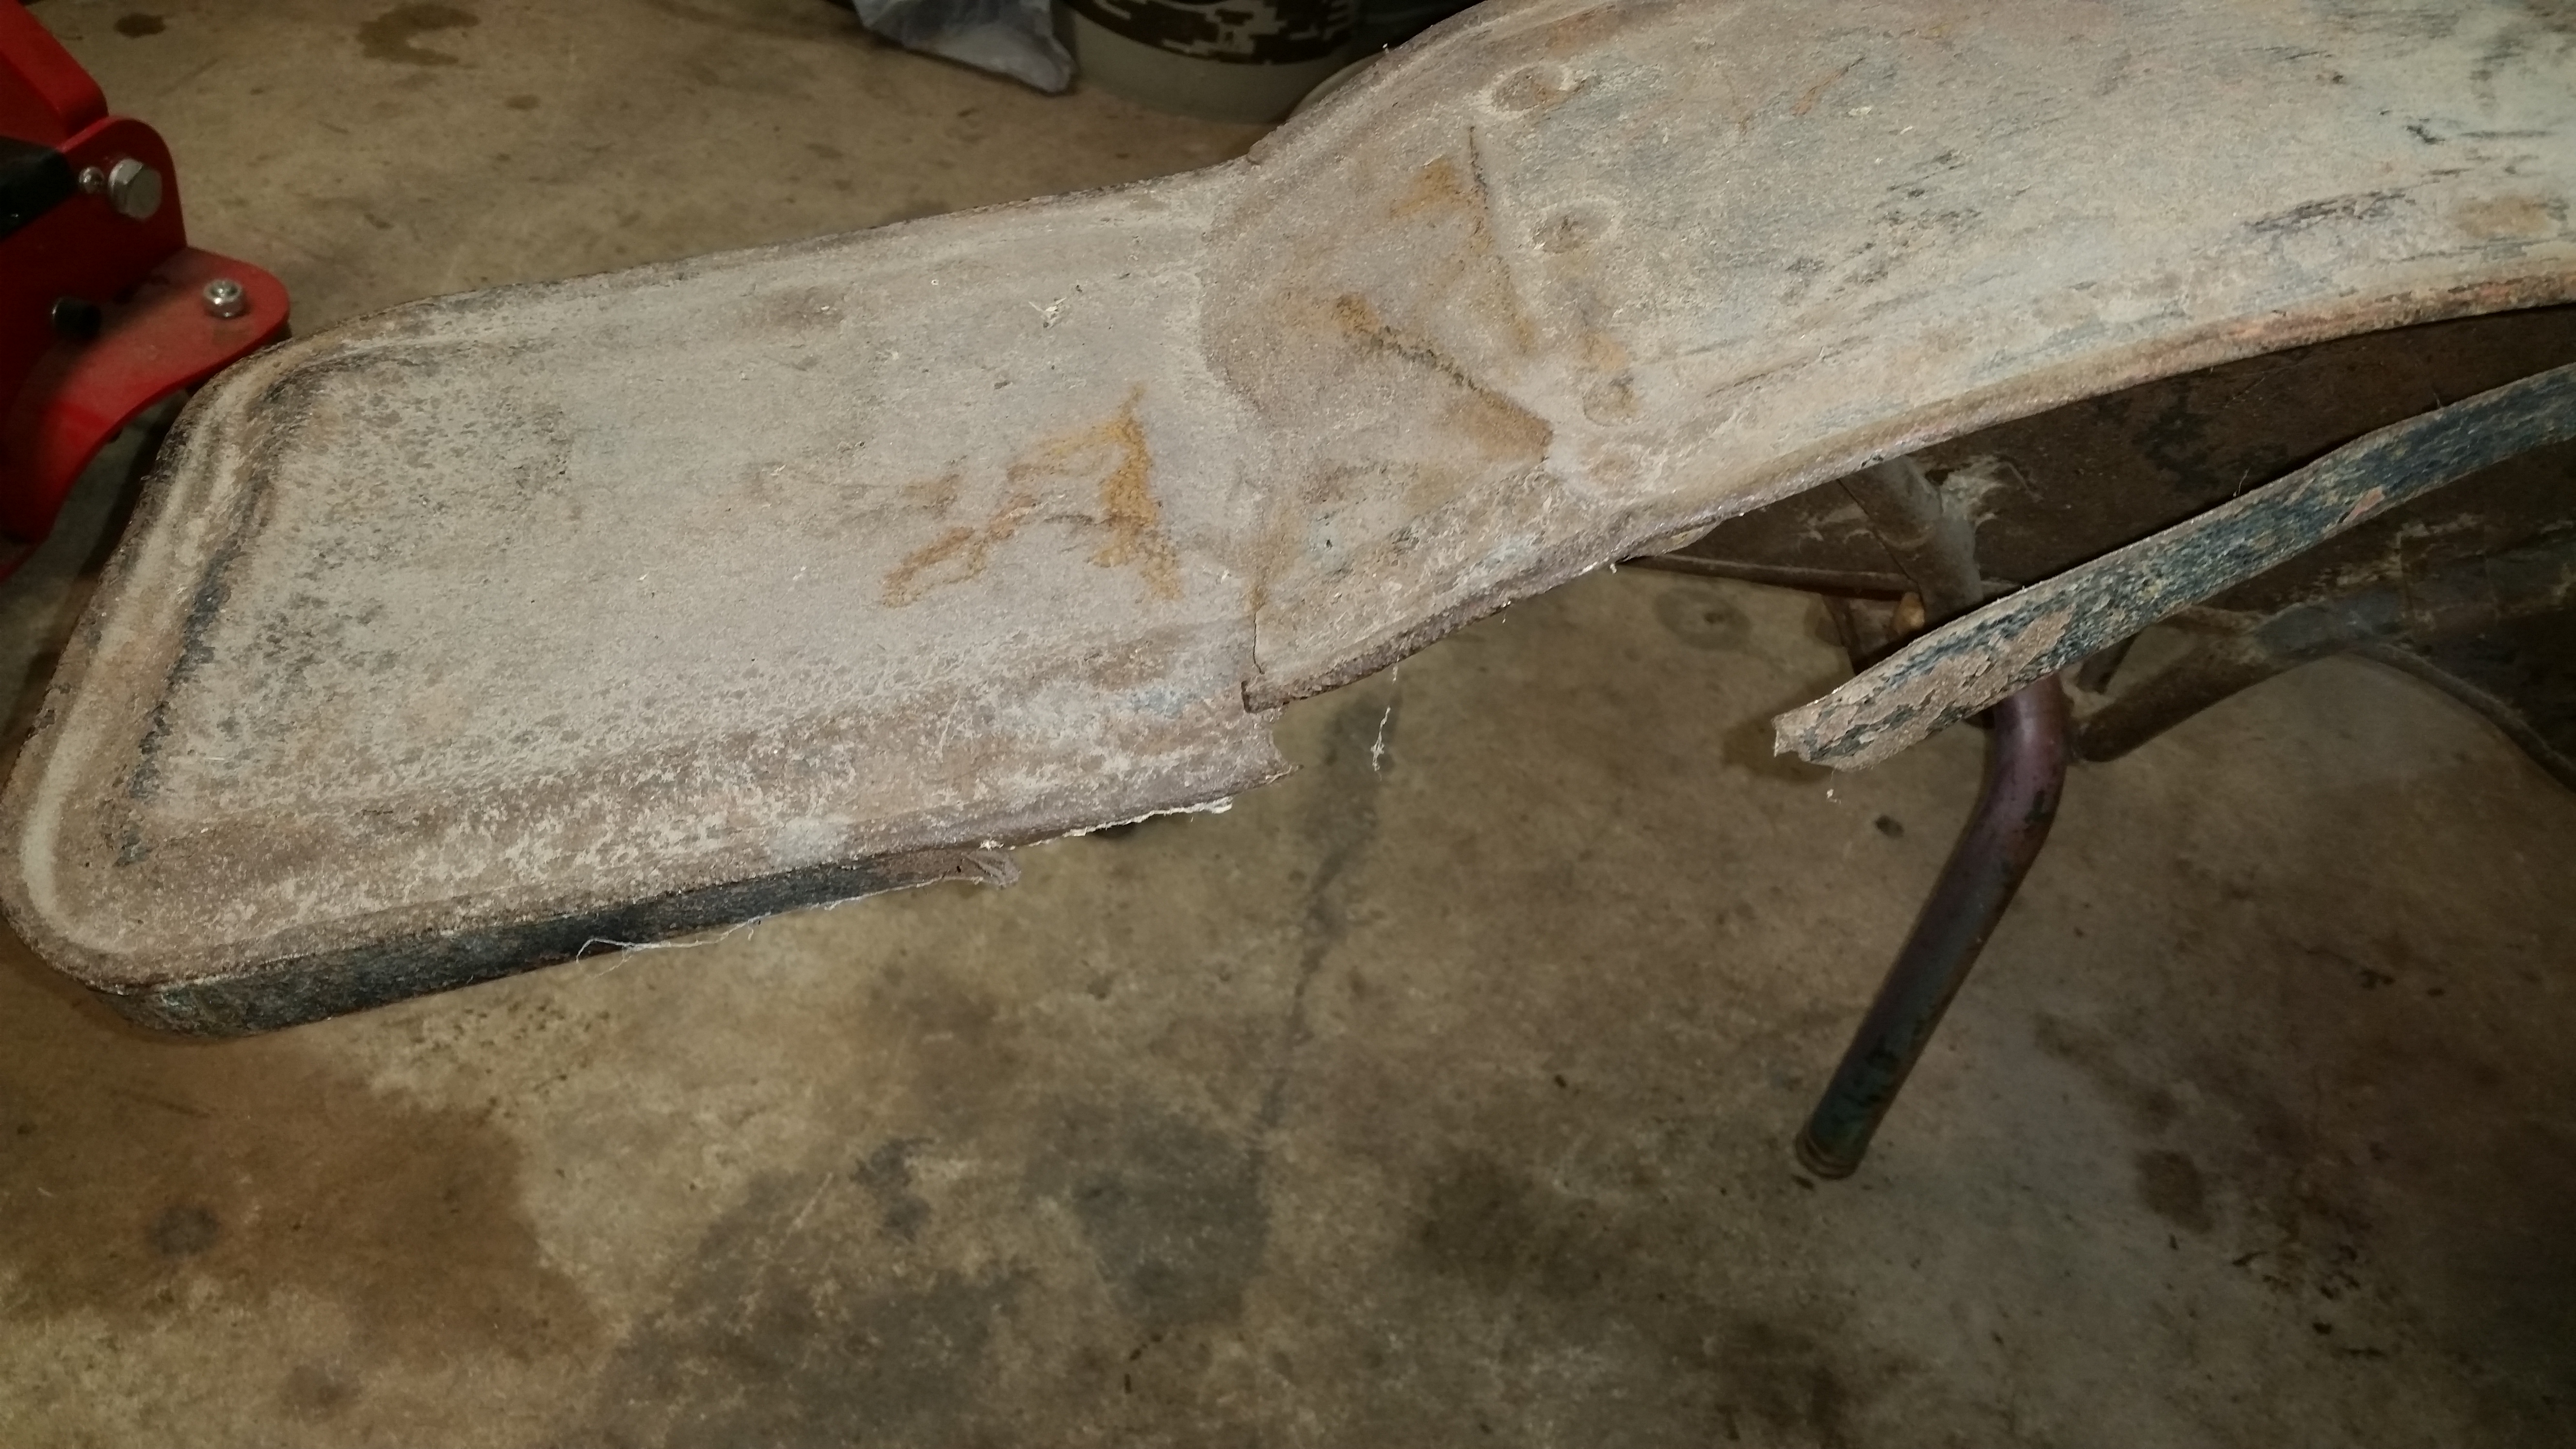
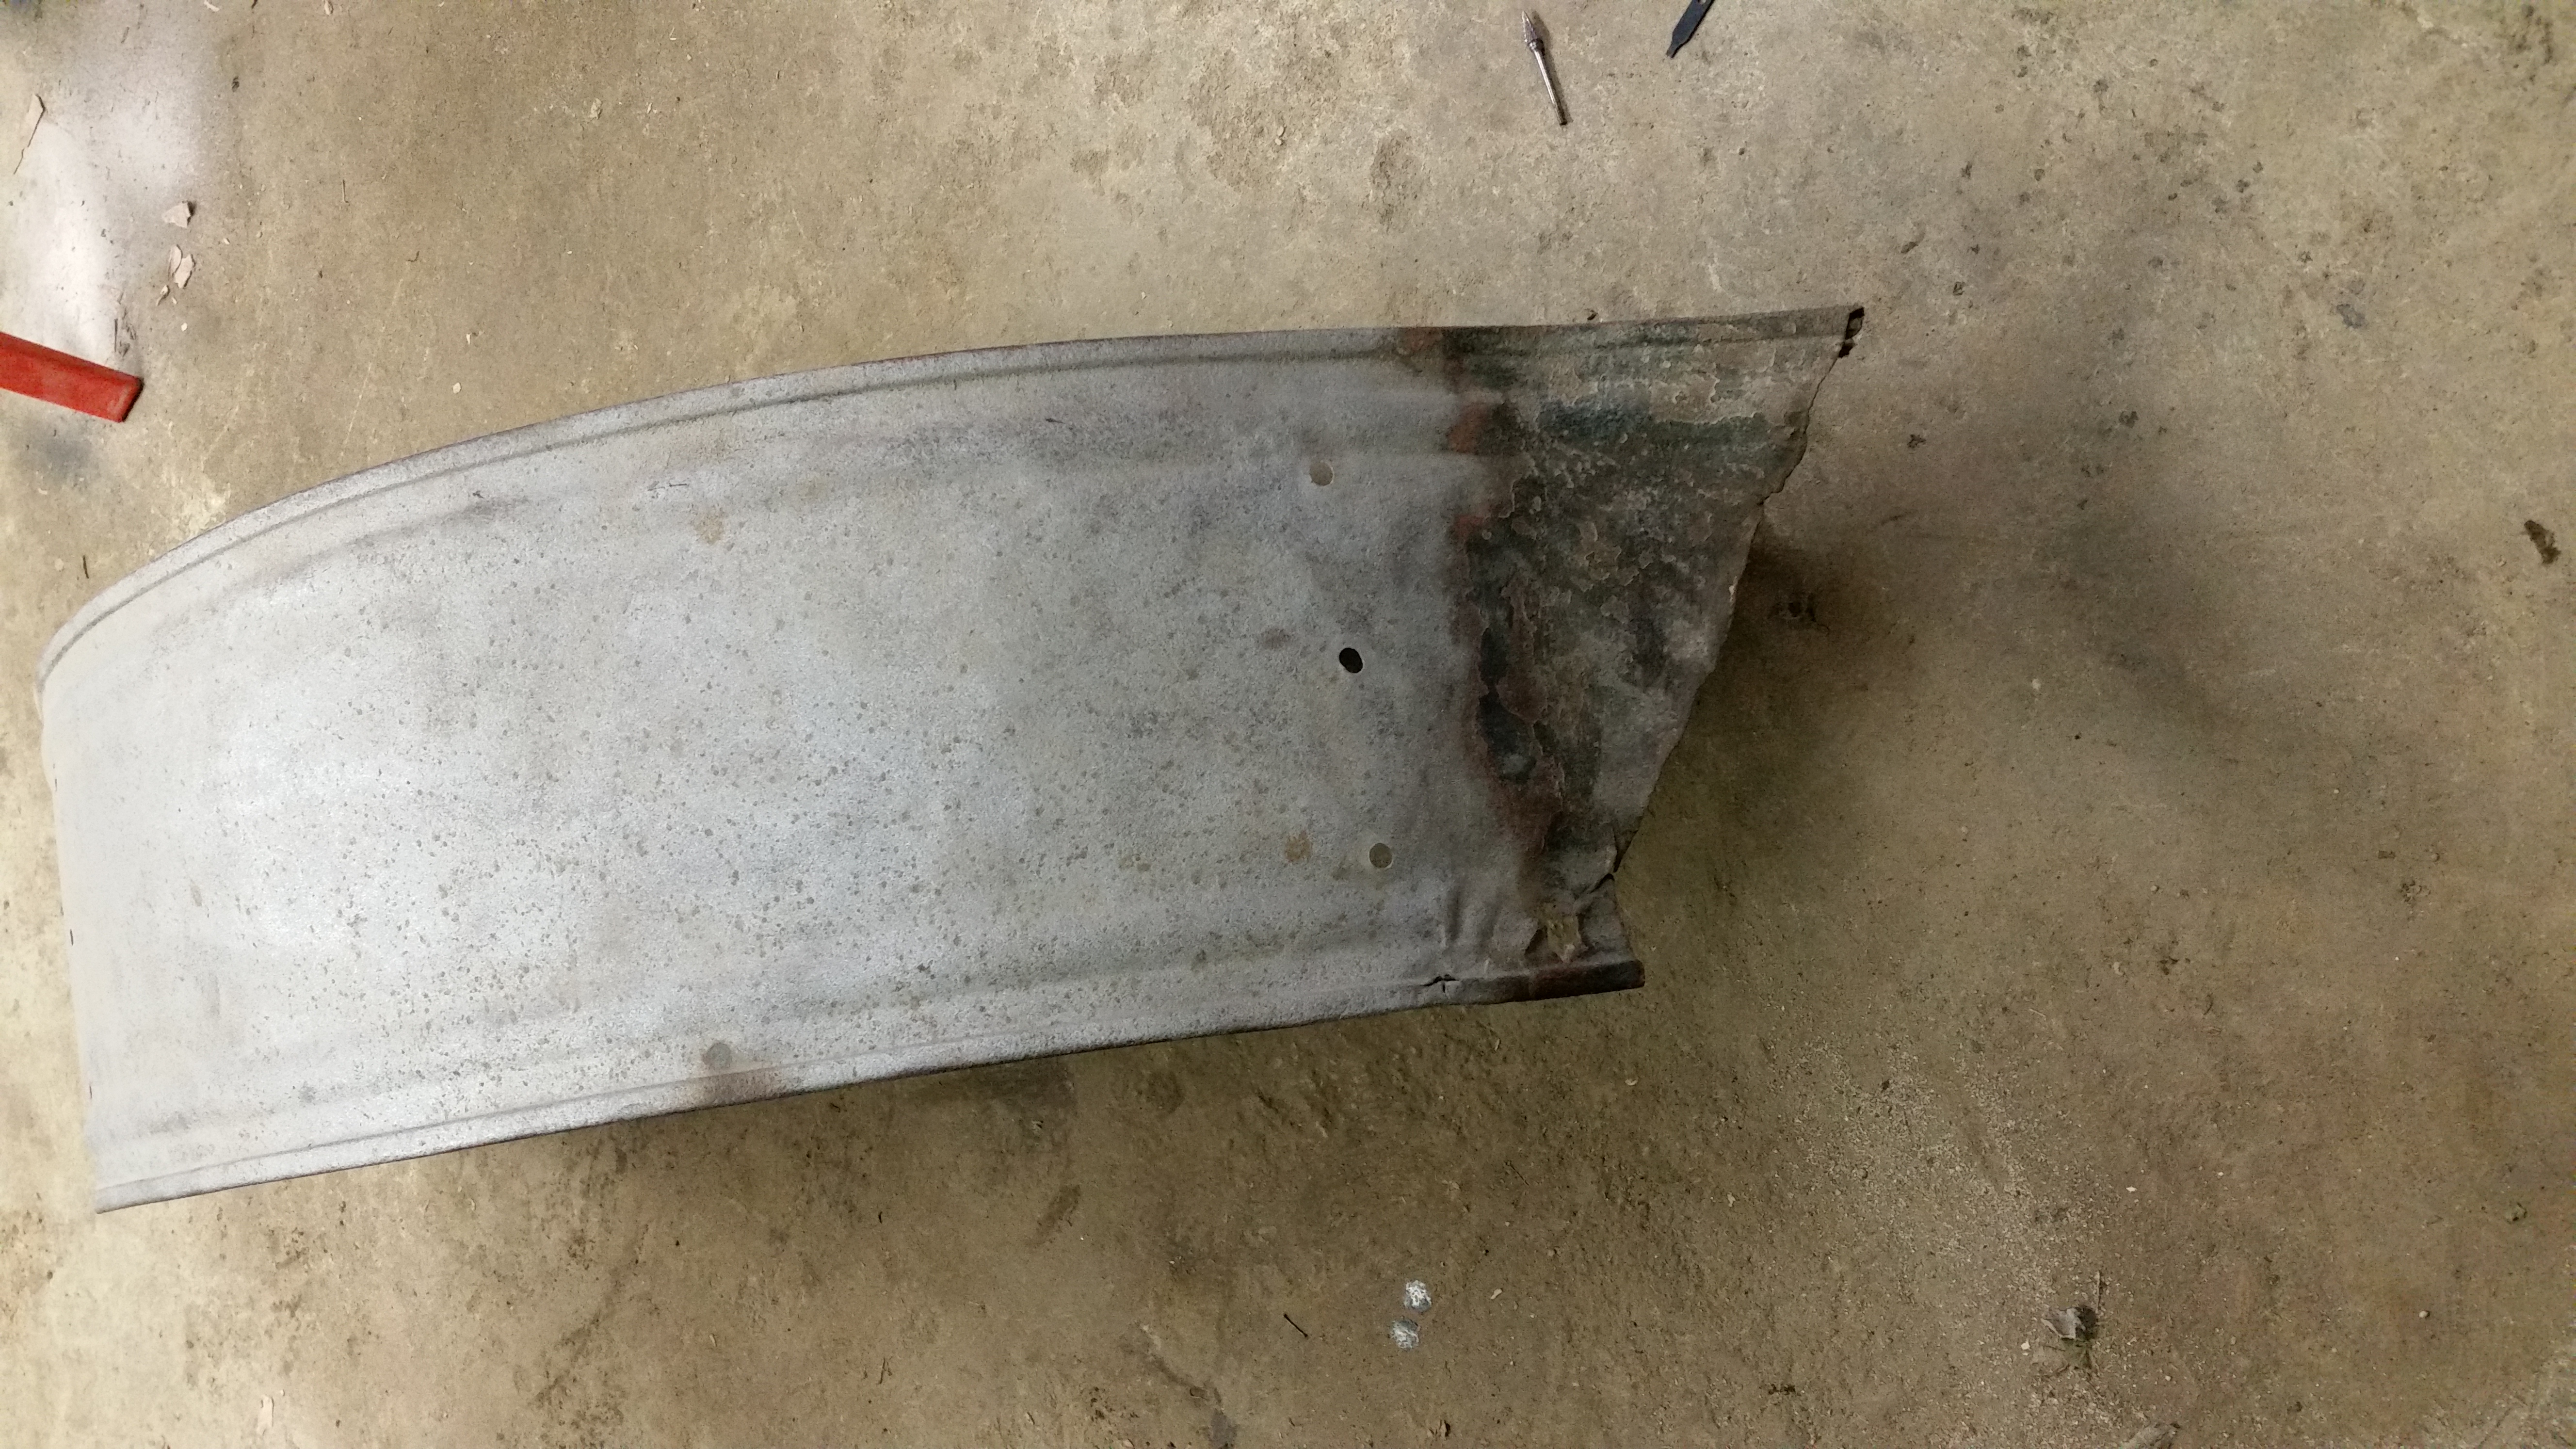
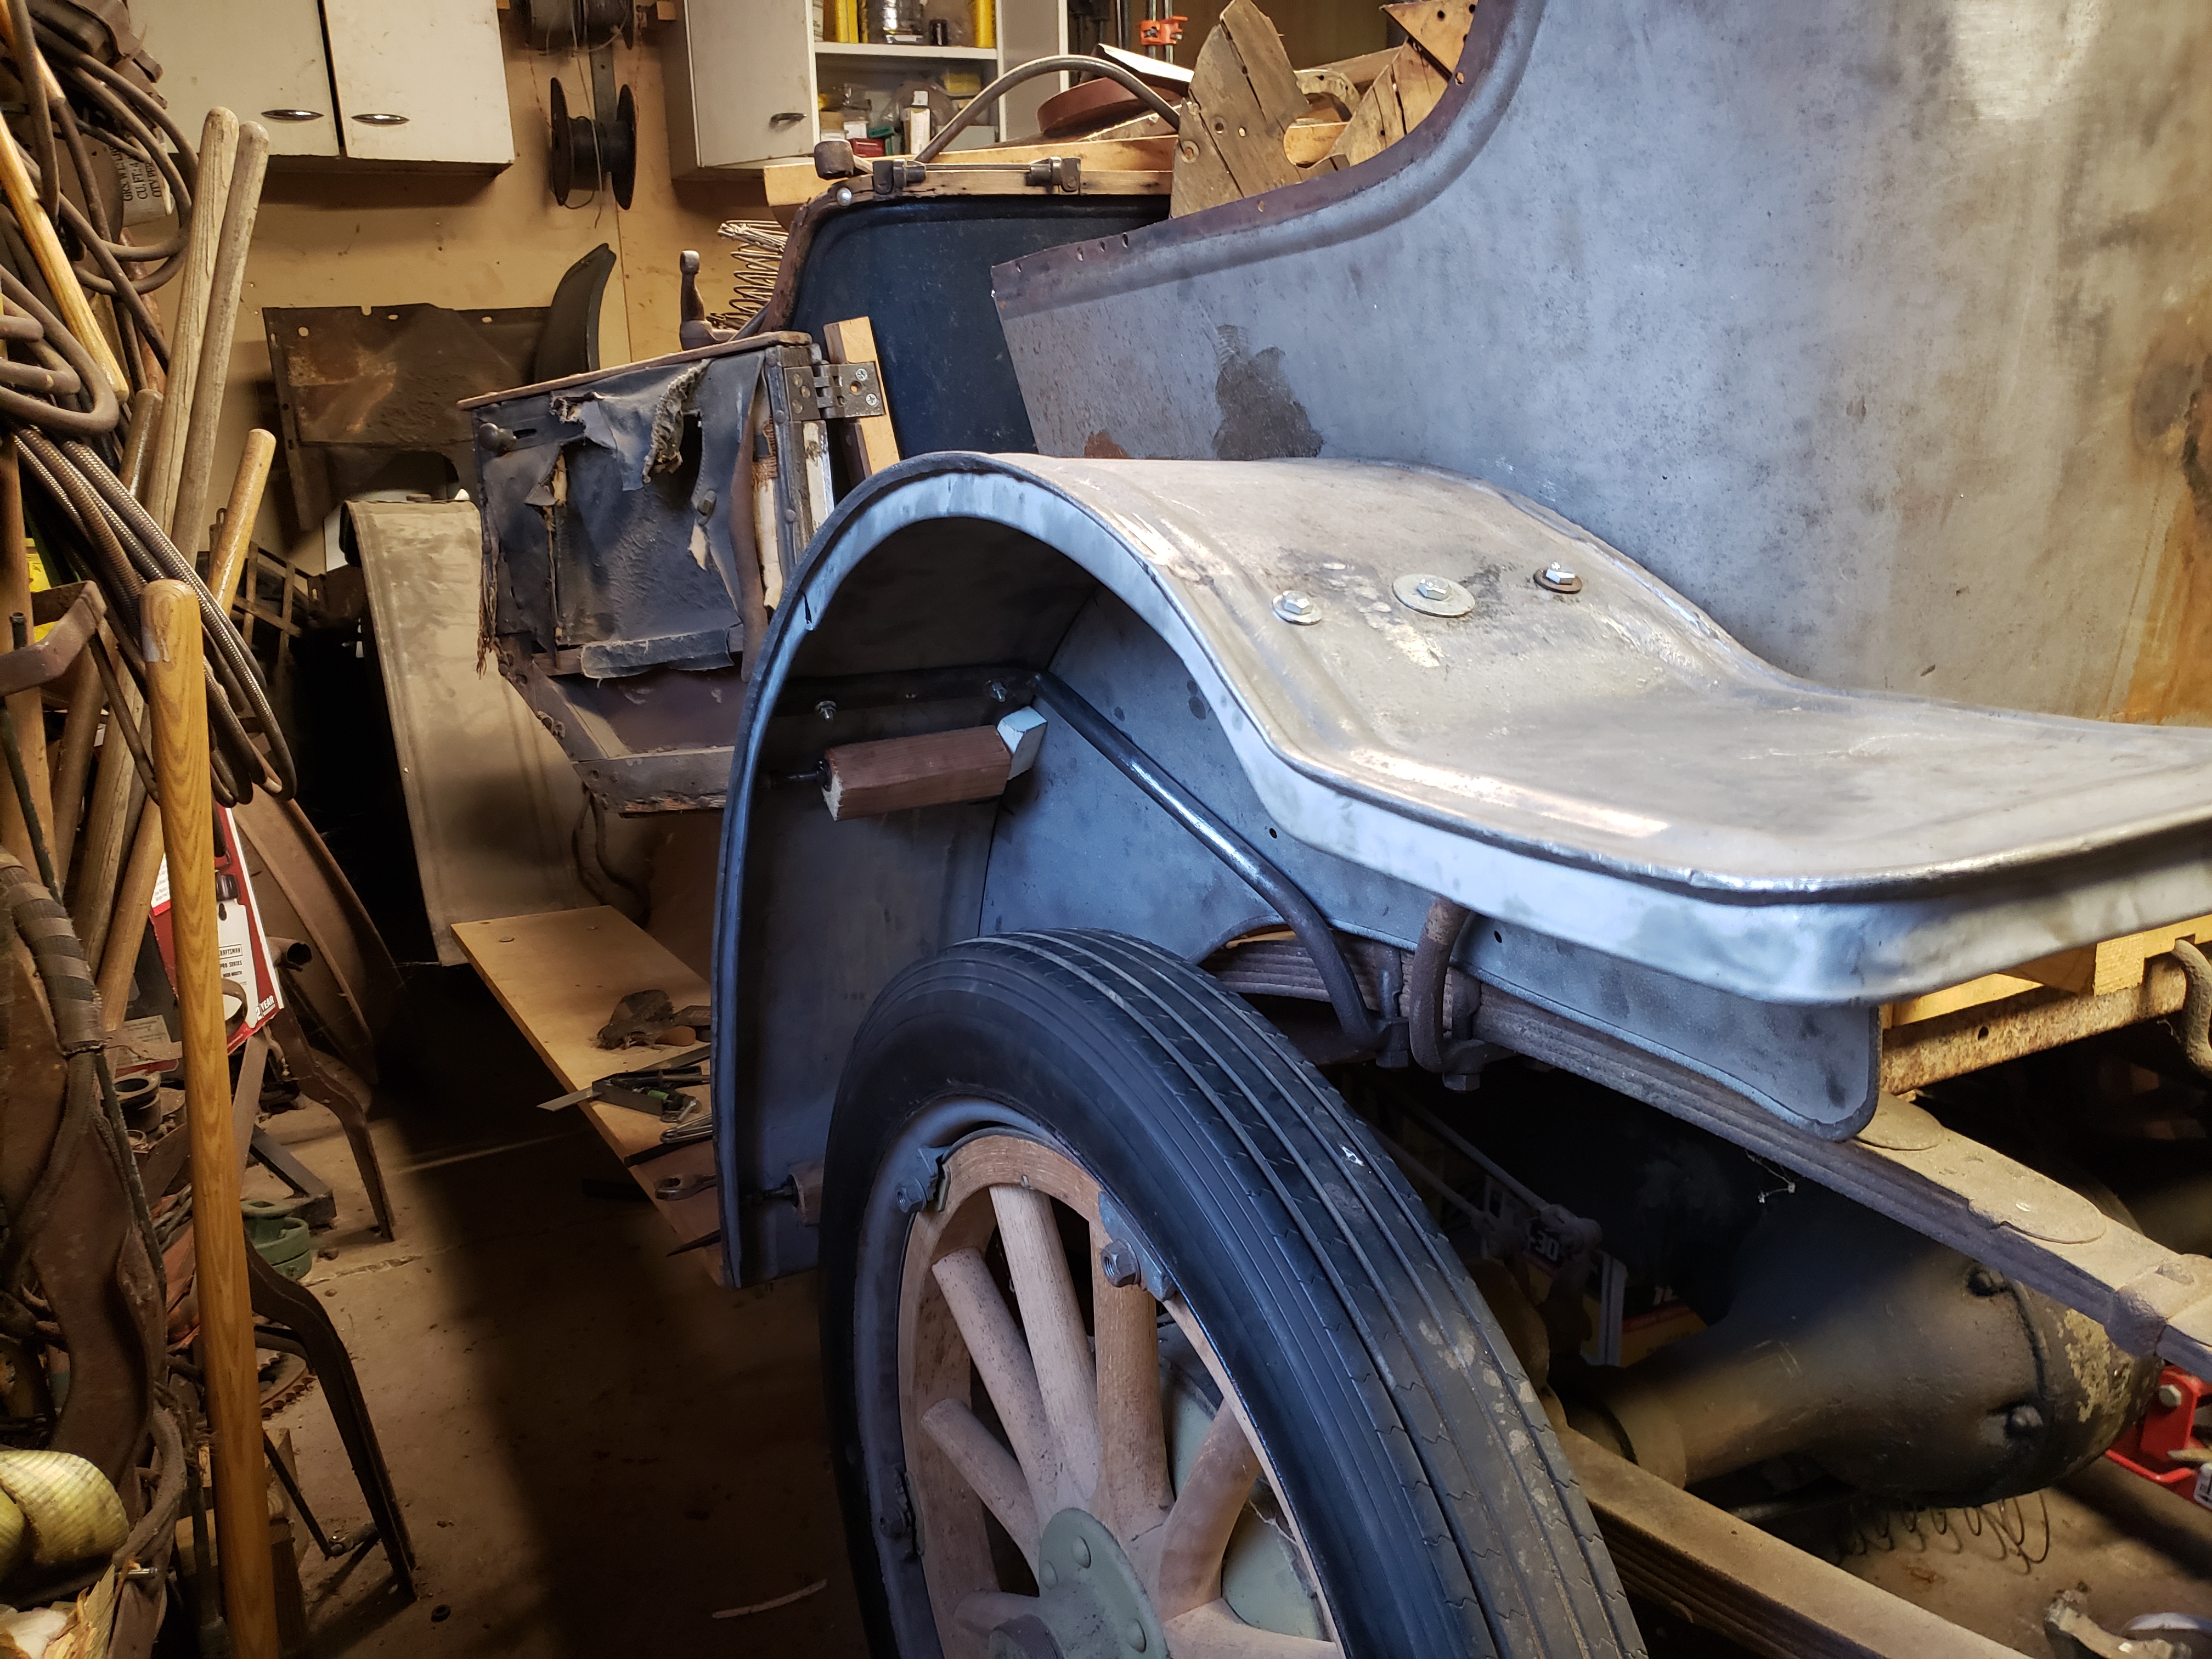
| In this picture you can see the creasing in the back panel when the rear lip of the fender was bent down. Click on the picture to see the full size. | Notice the creasing in the top part of the fender and the missing piece of the supporting outside edge. Click on the picture to see the full size. |
If you look at the right picture above, you can see the creasing in the top part of the fender. Notice where the fender iron is riveted on is creades as well. What ever they backed into, they hit it hard.
Also notice that the supporting edge around the outside is missing many inches of material. This will be interesting. I with I could just find some new fenders for the back. That is likely not going to happen.

|

|
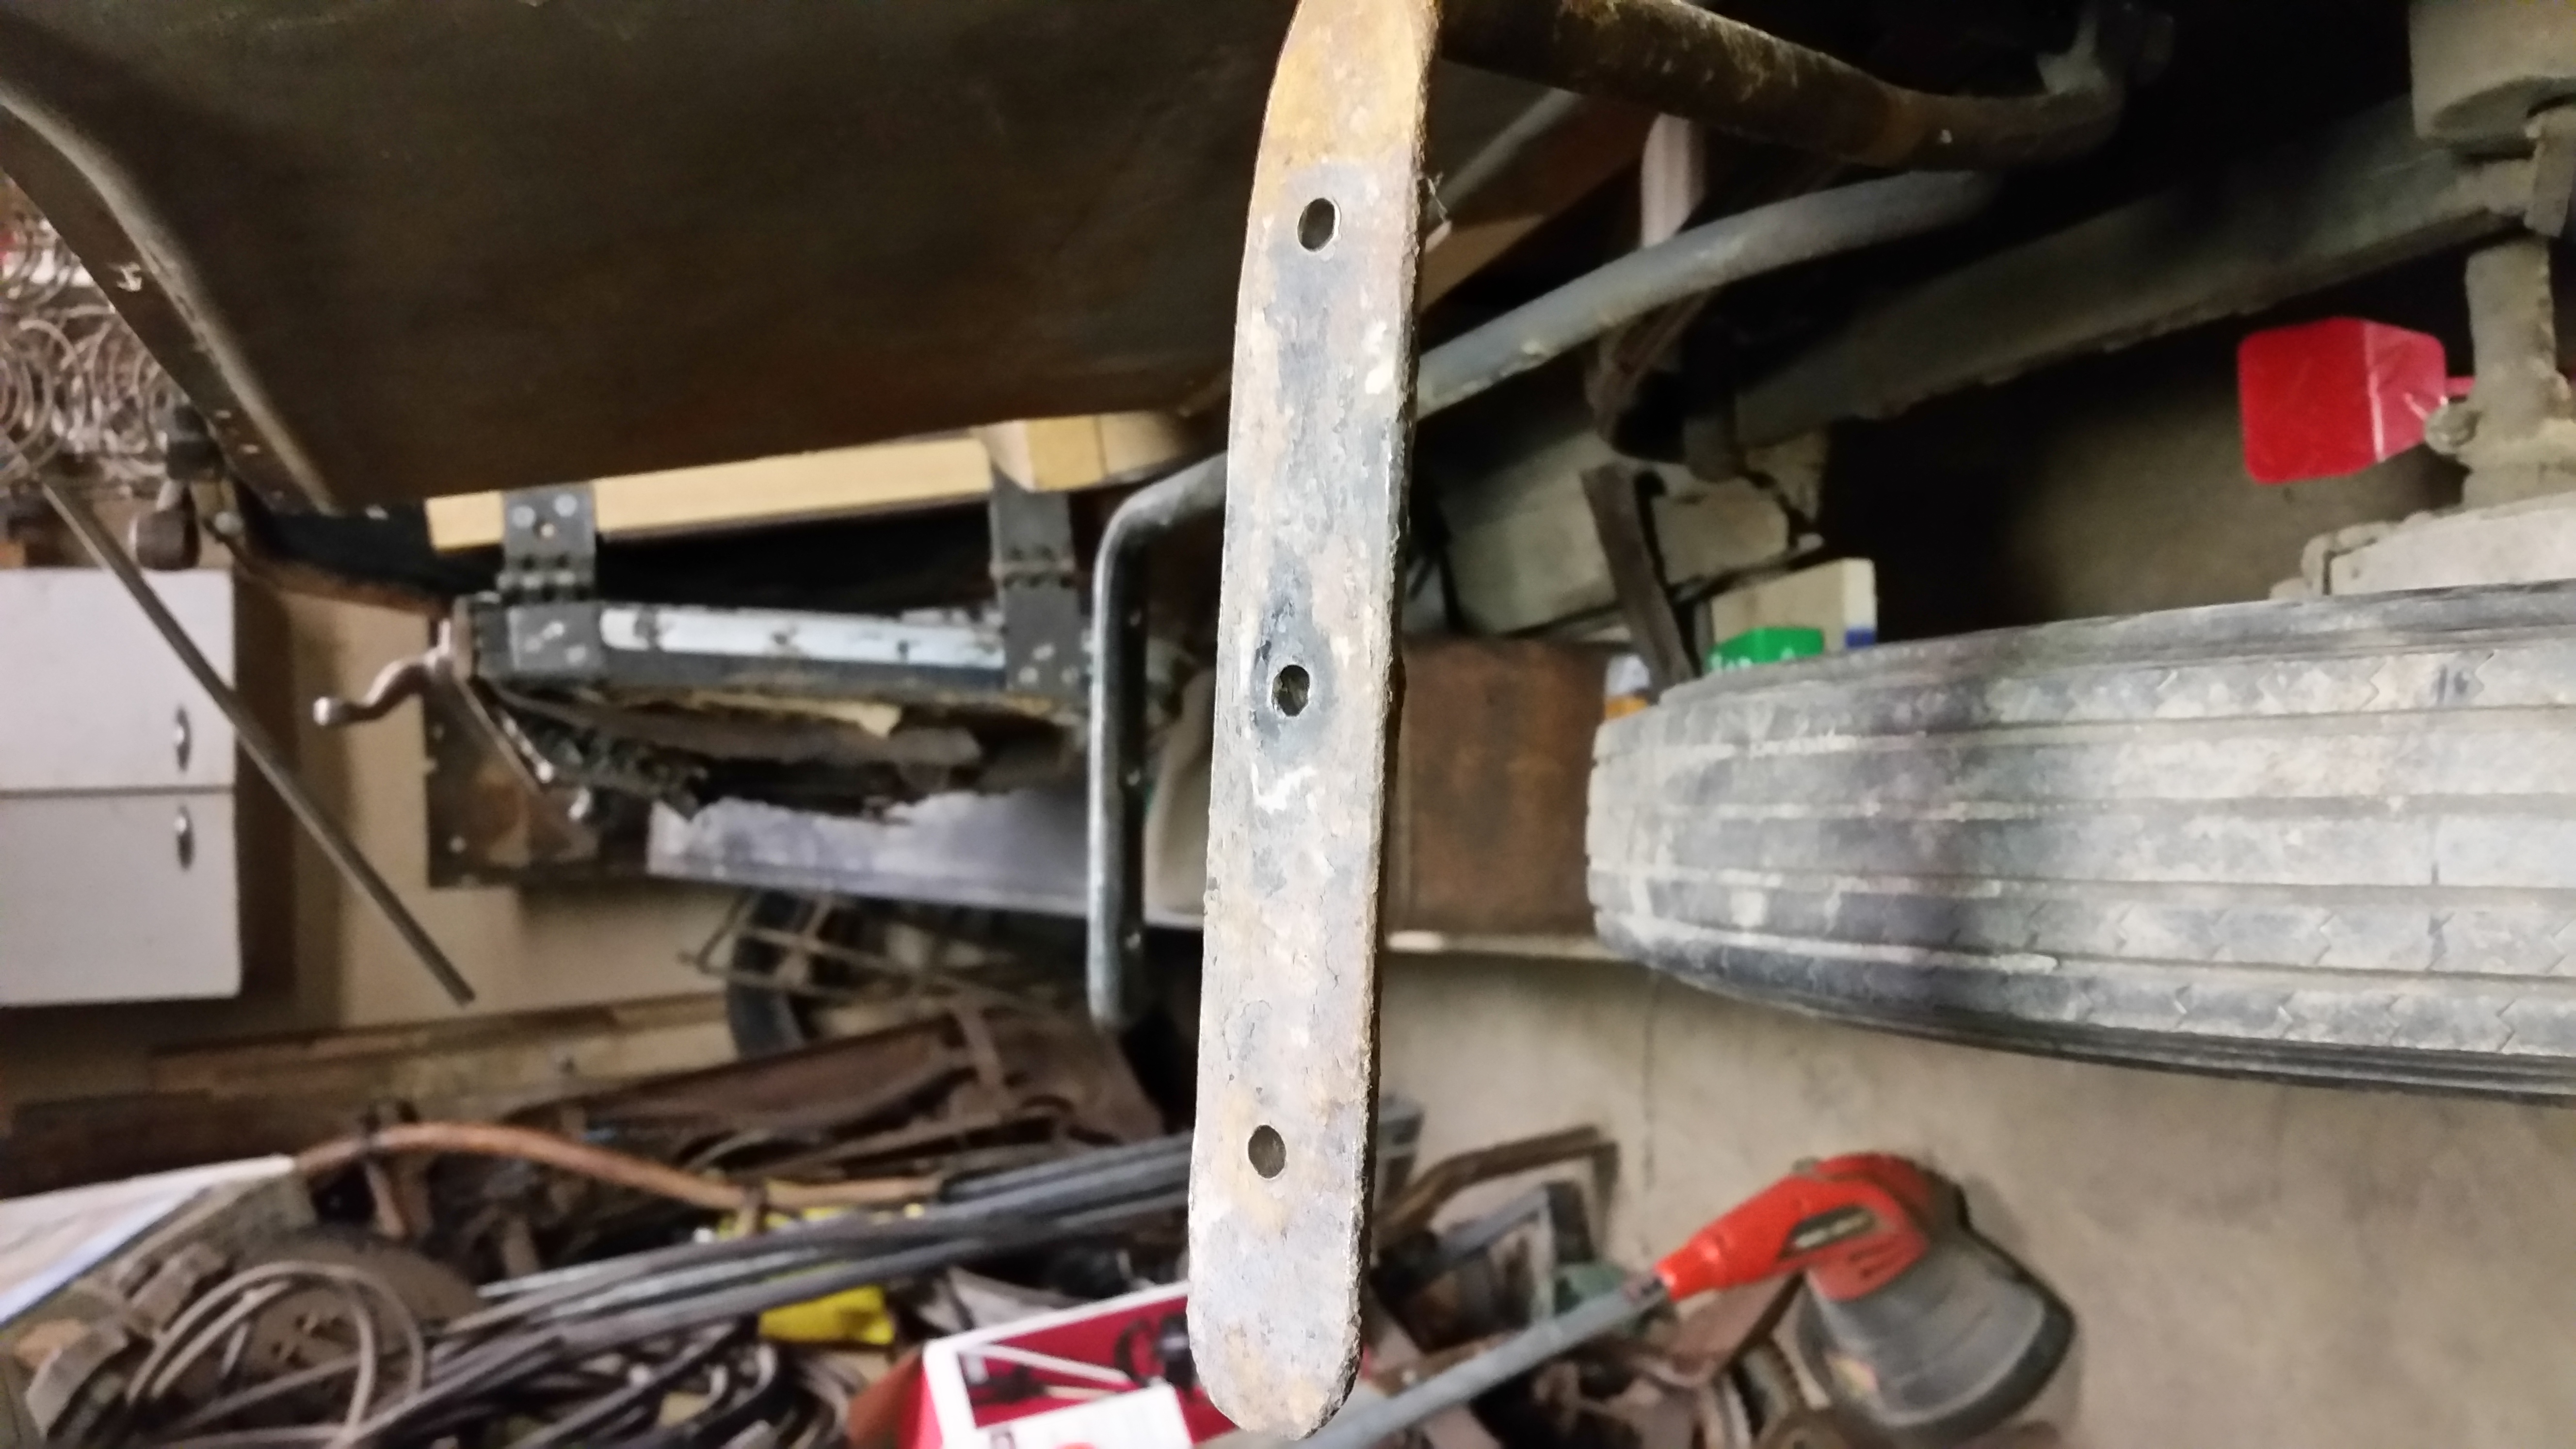
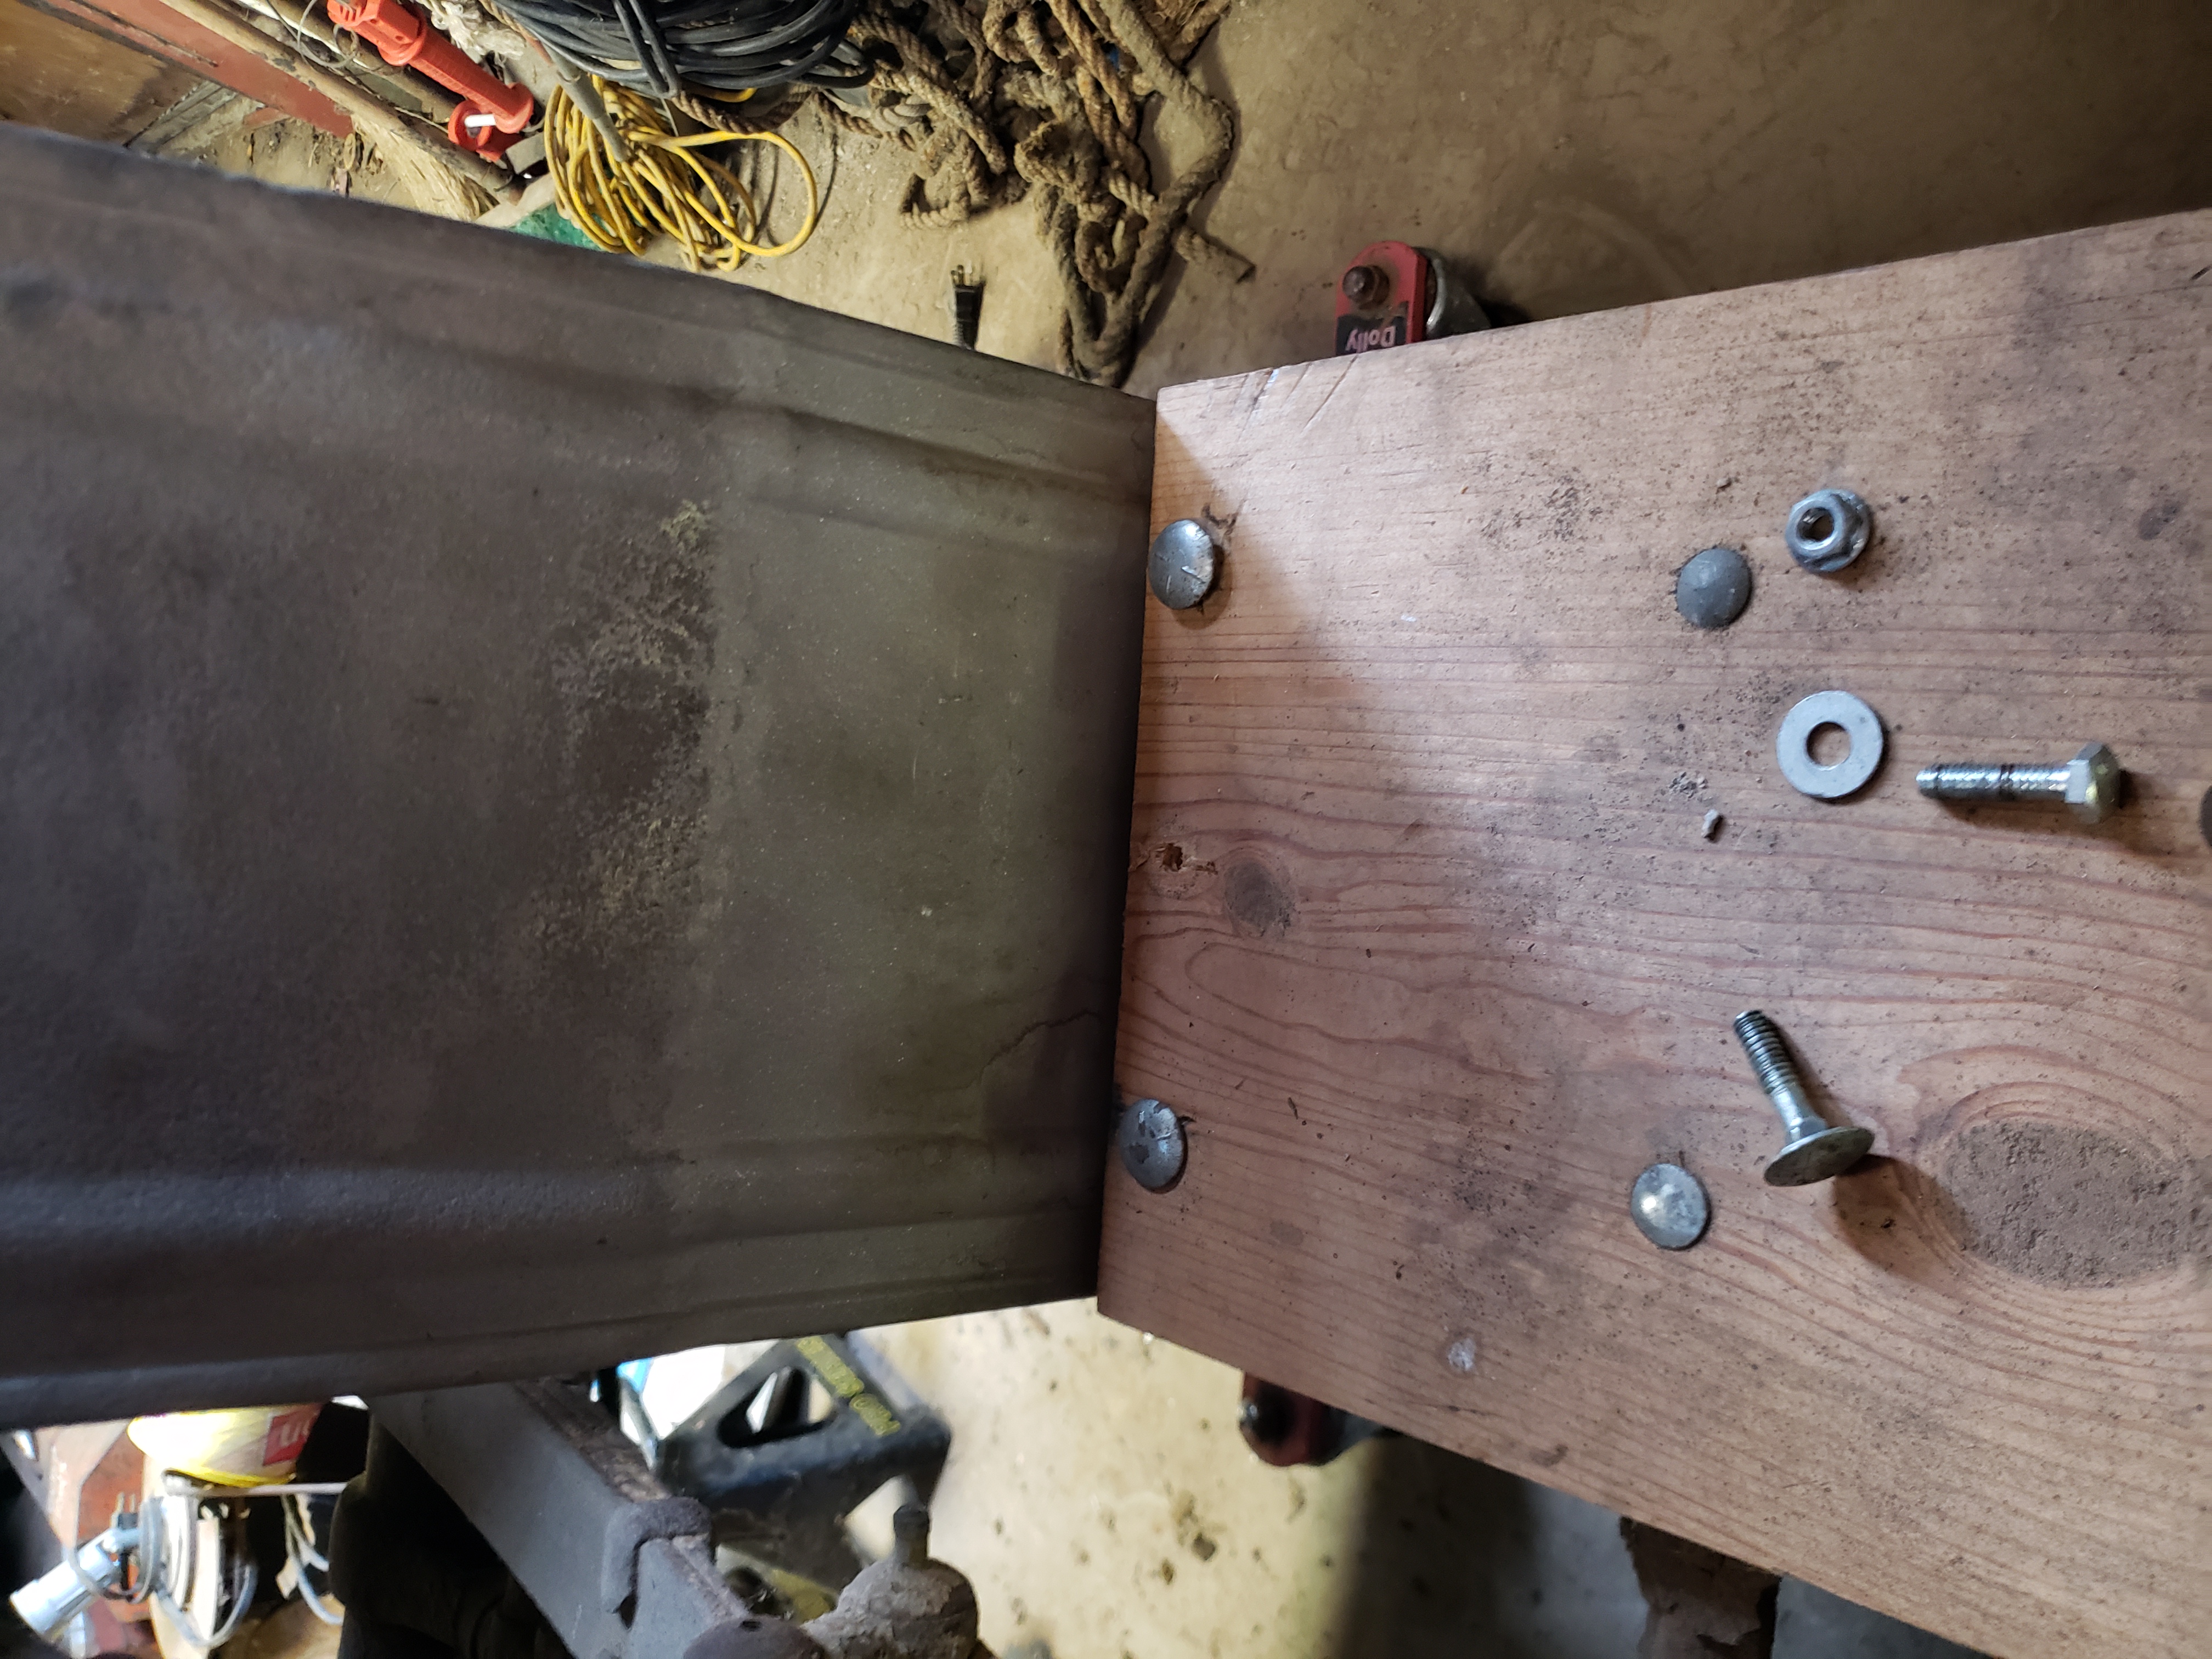
| There is not much left of the part that attaches the fender to the running board. Click on the picture to see the full size. | New patch panel fabricated and waiting to weld in. Click on the picture to see the full size. |
I used the tool I made for putting the bead in and made a patch panel to weld into the fender. The right picture above shows the patch sitting against the fender approximately where it goes.
|
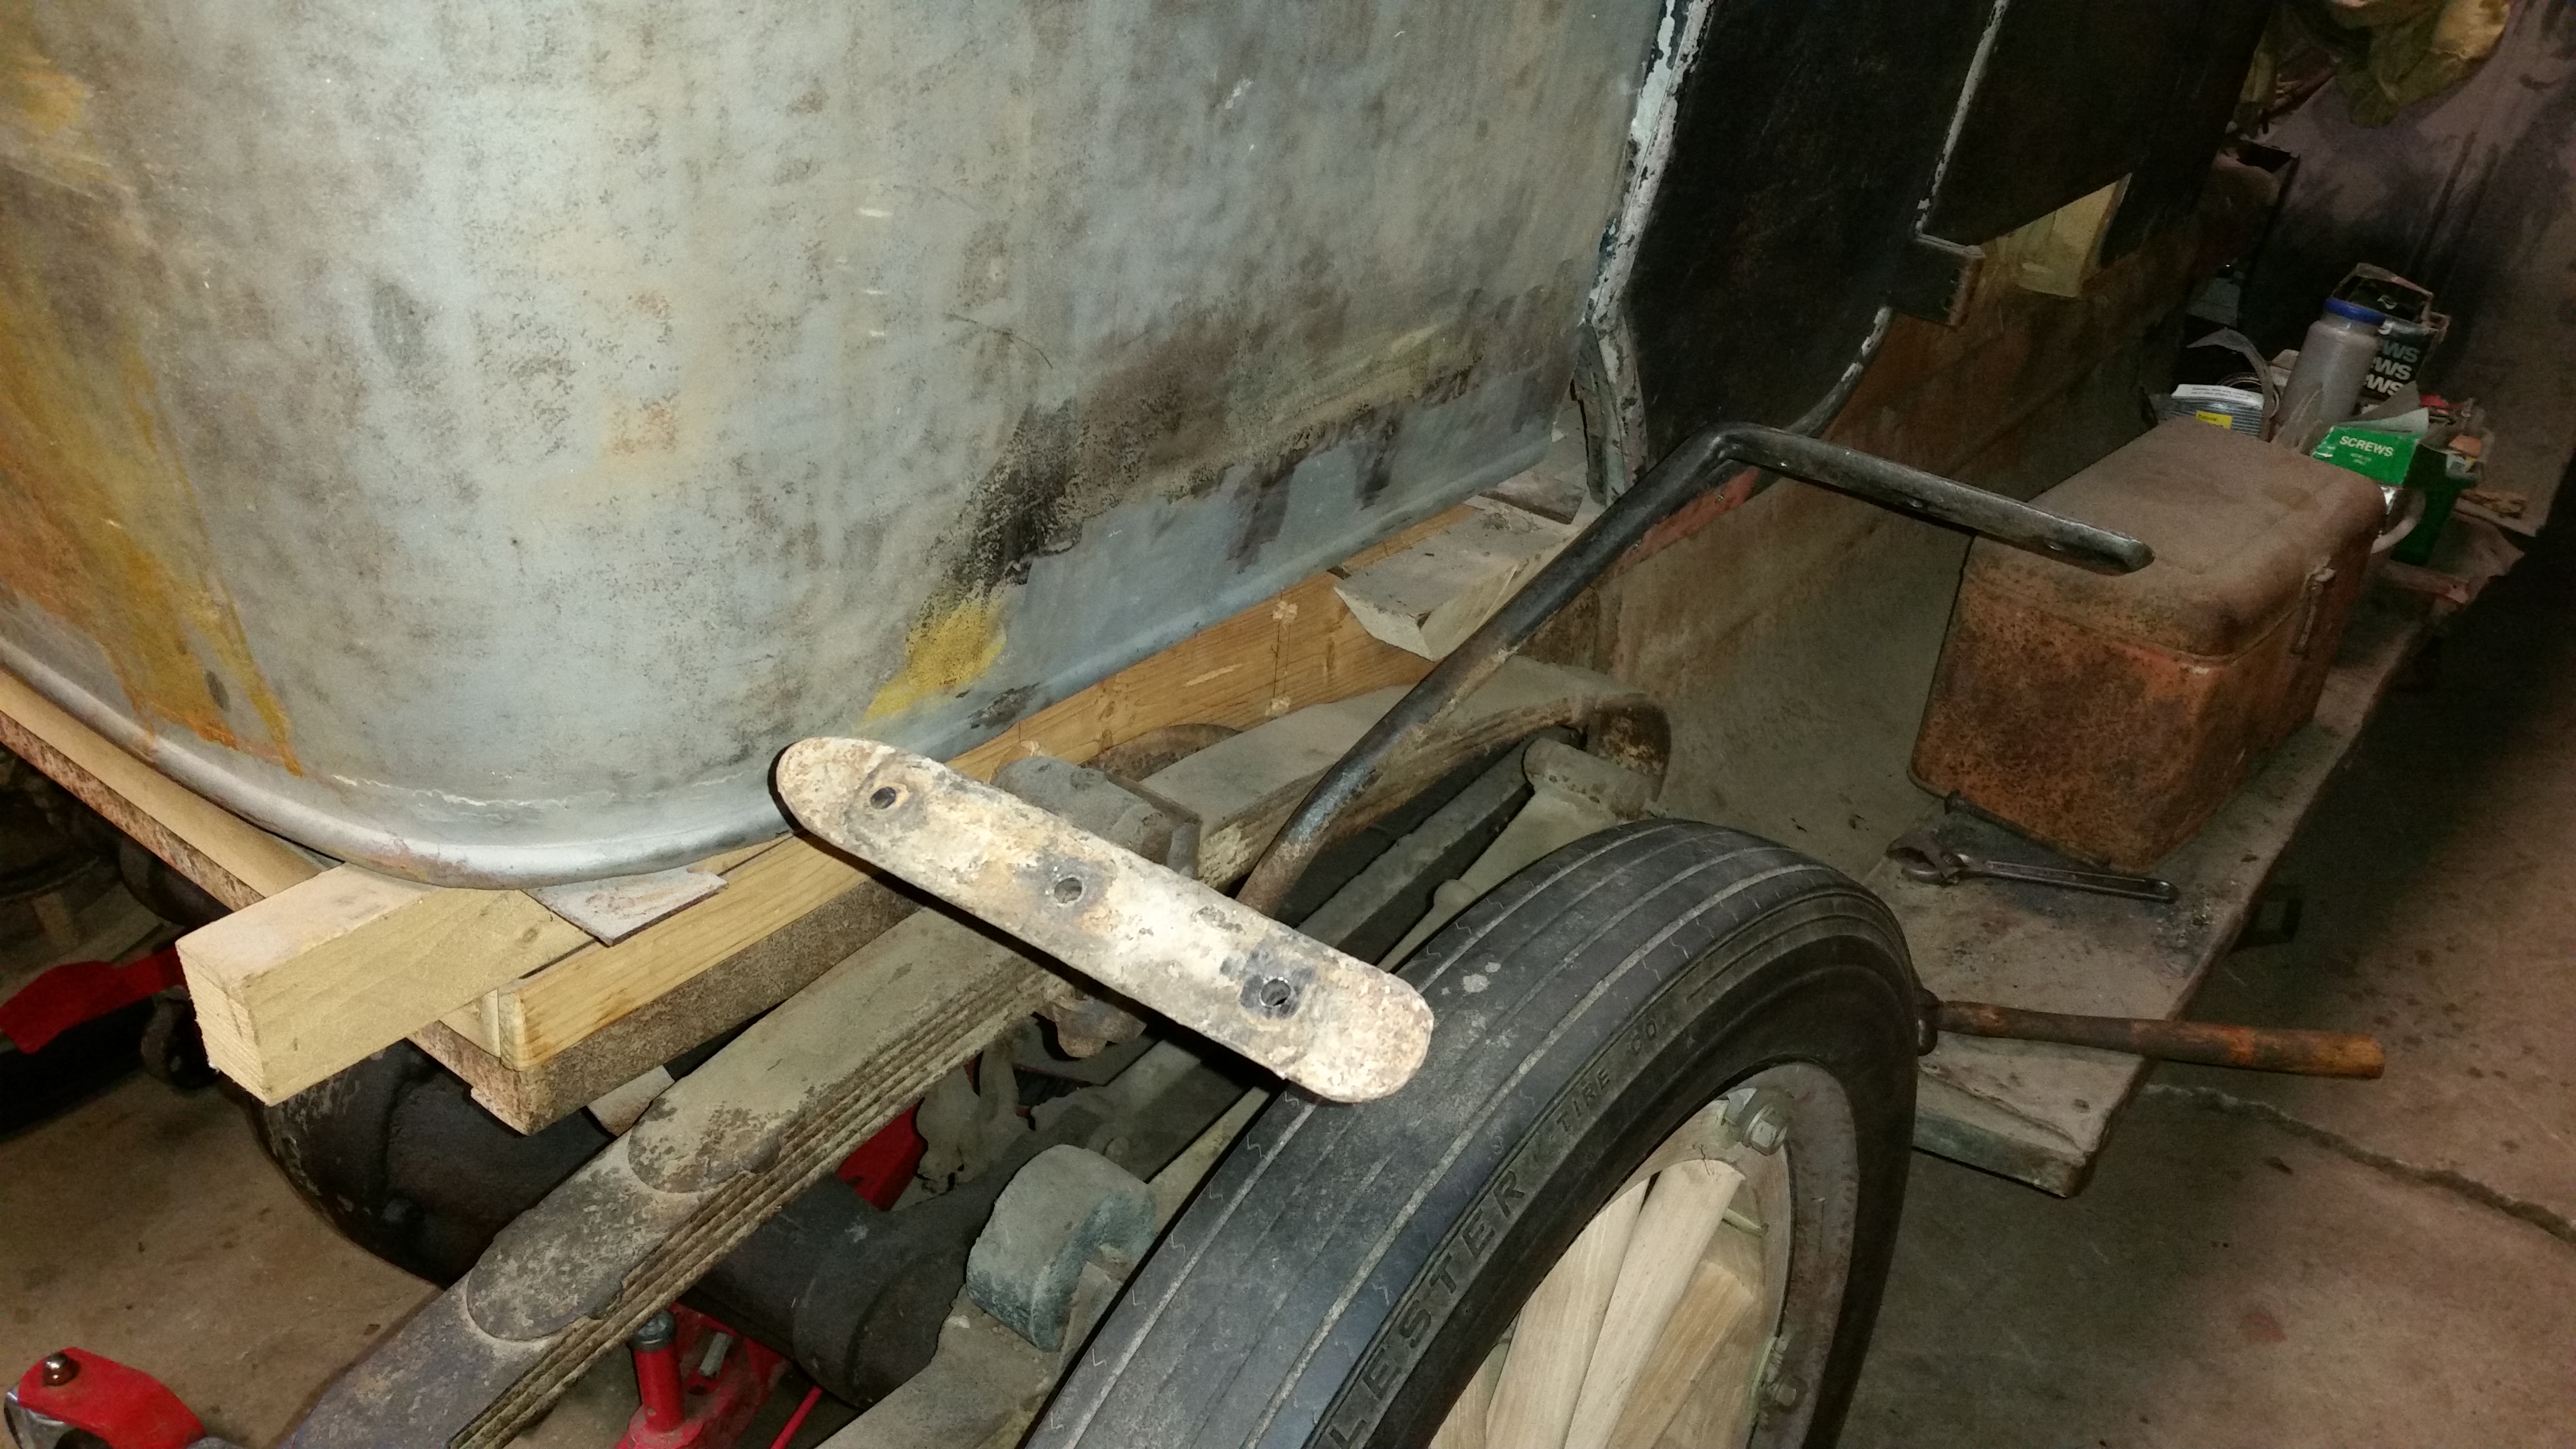
| Fender irons mounted without fender. Click on the picture to see the full size. |
Sunday, November 12, 2017 5:37 PM
|

|
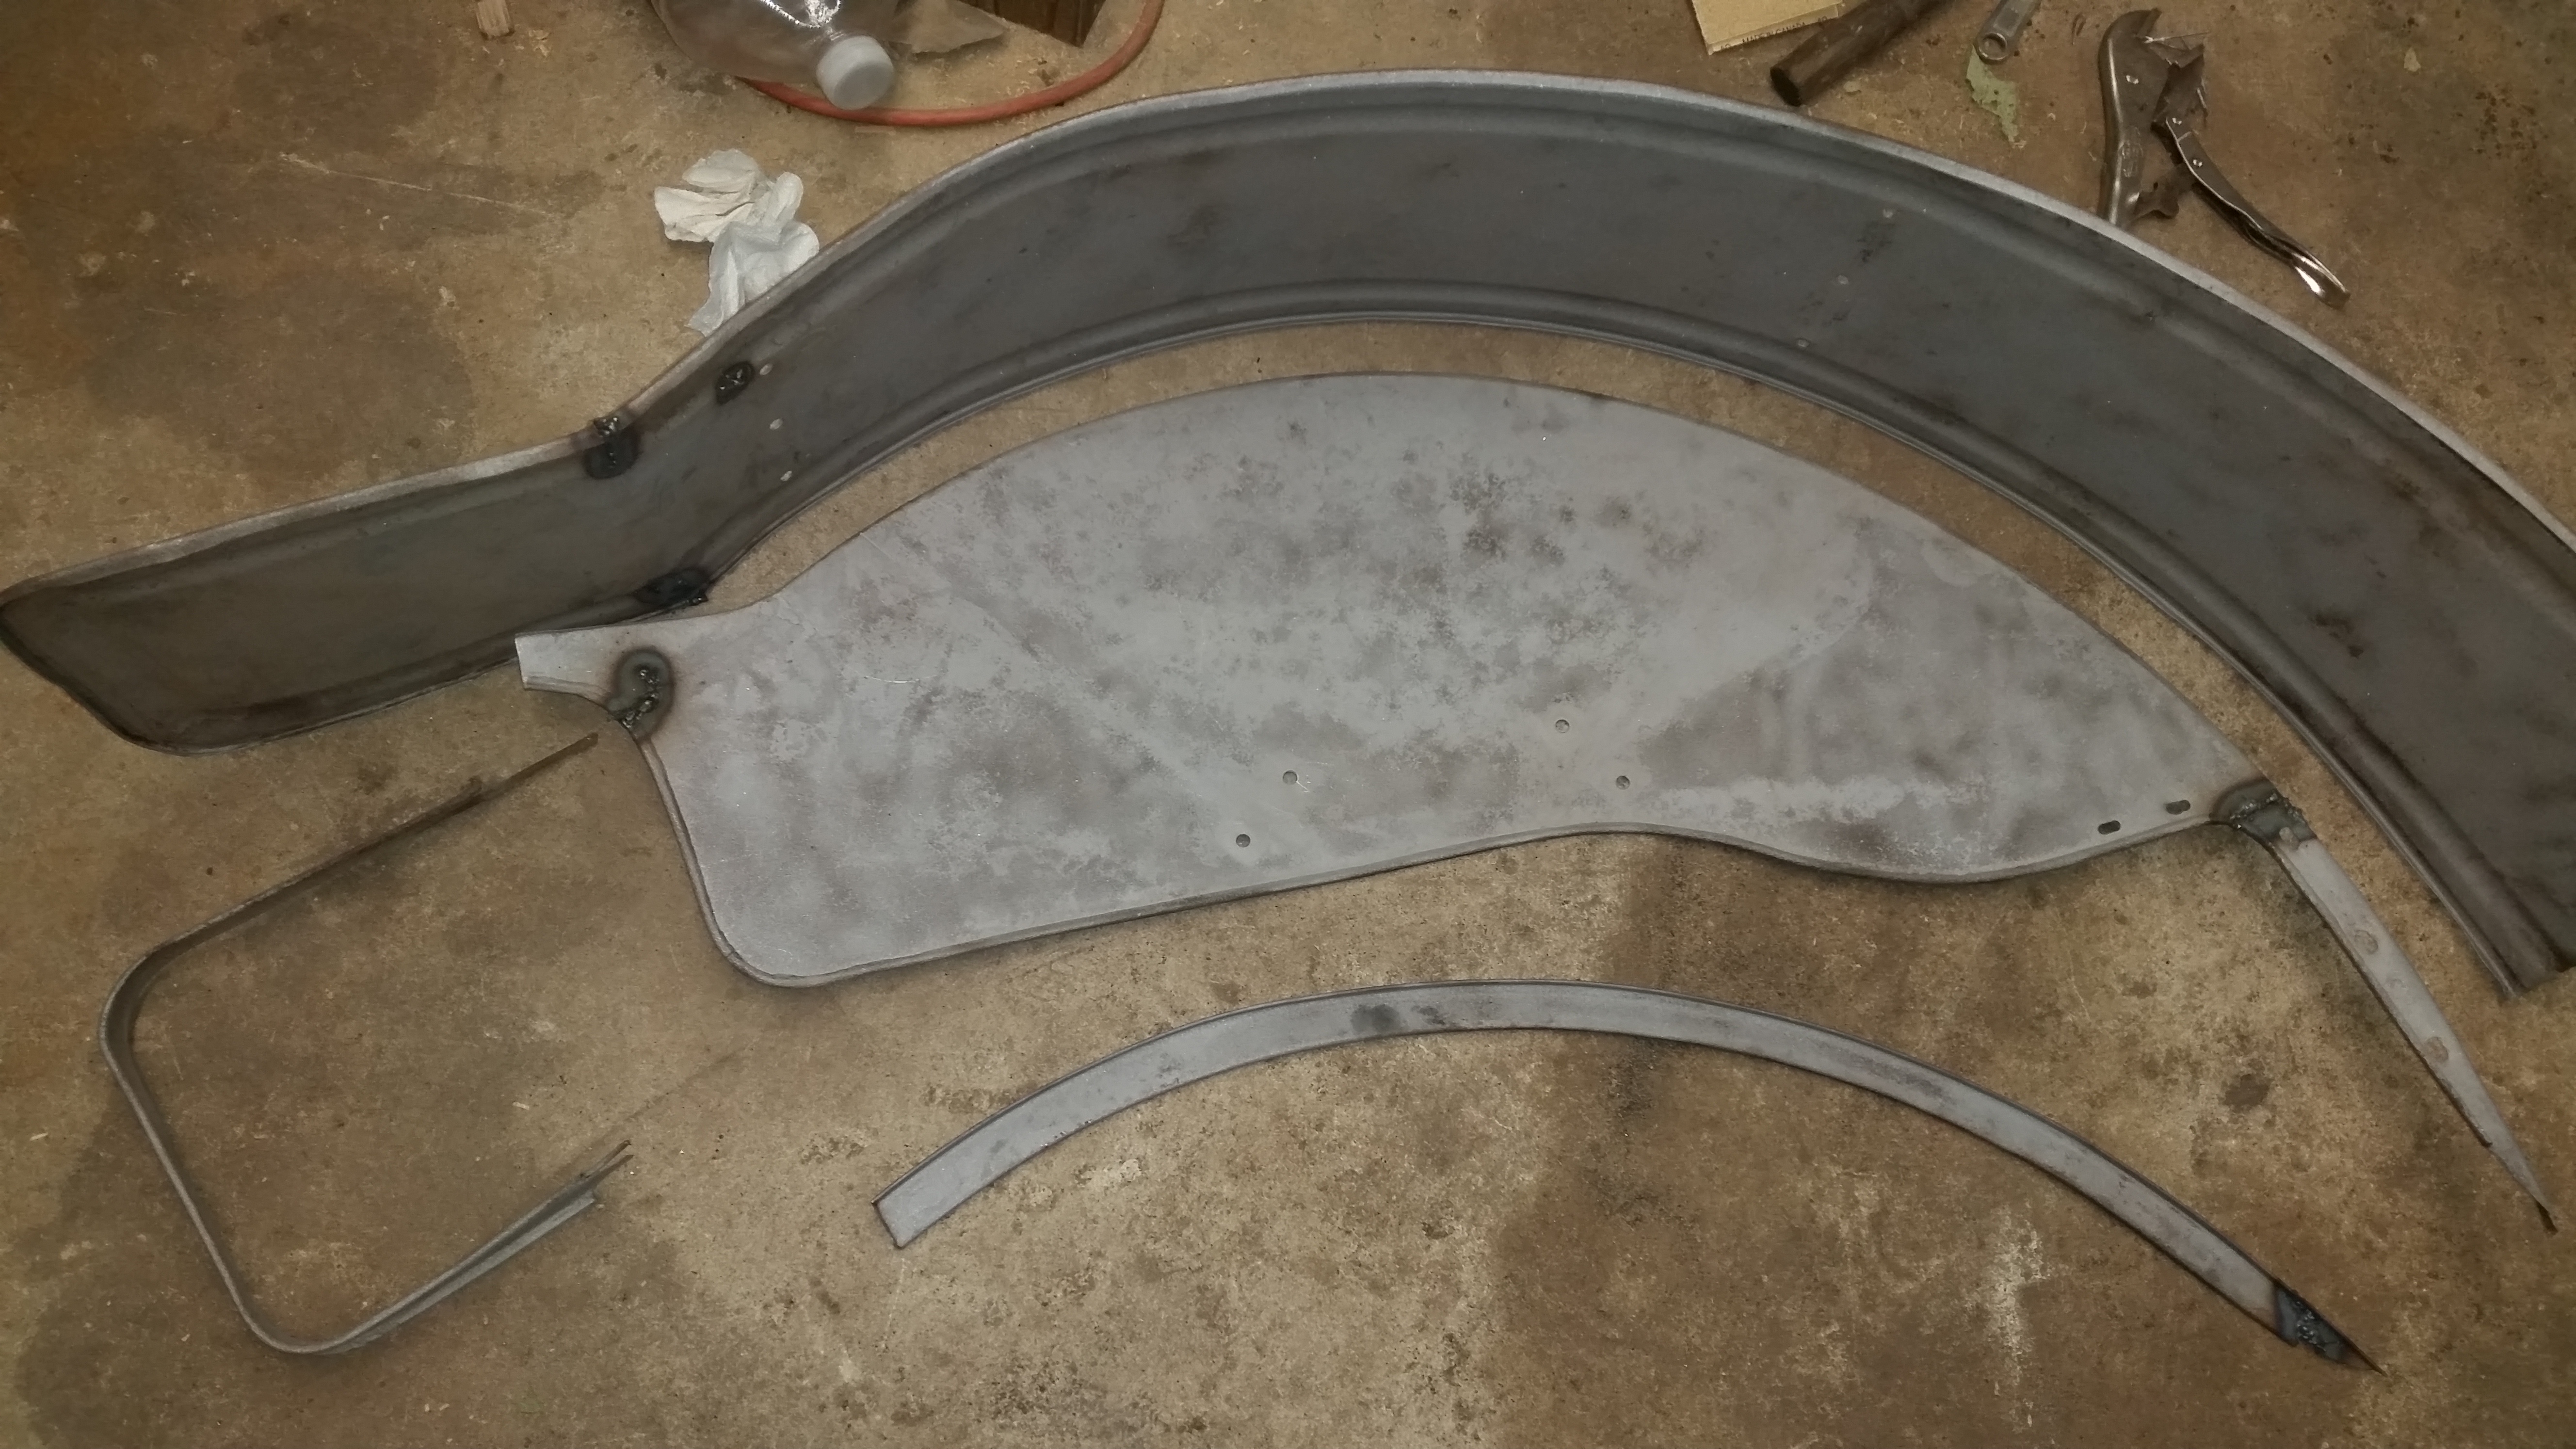
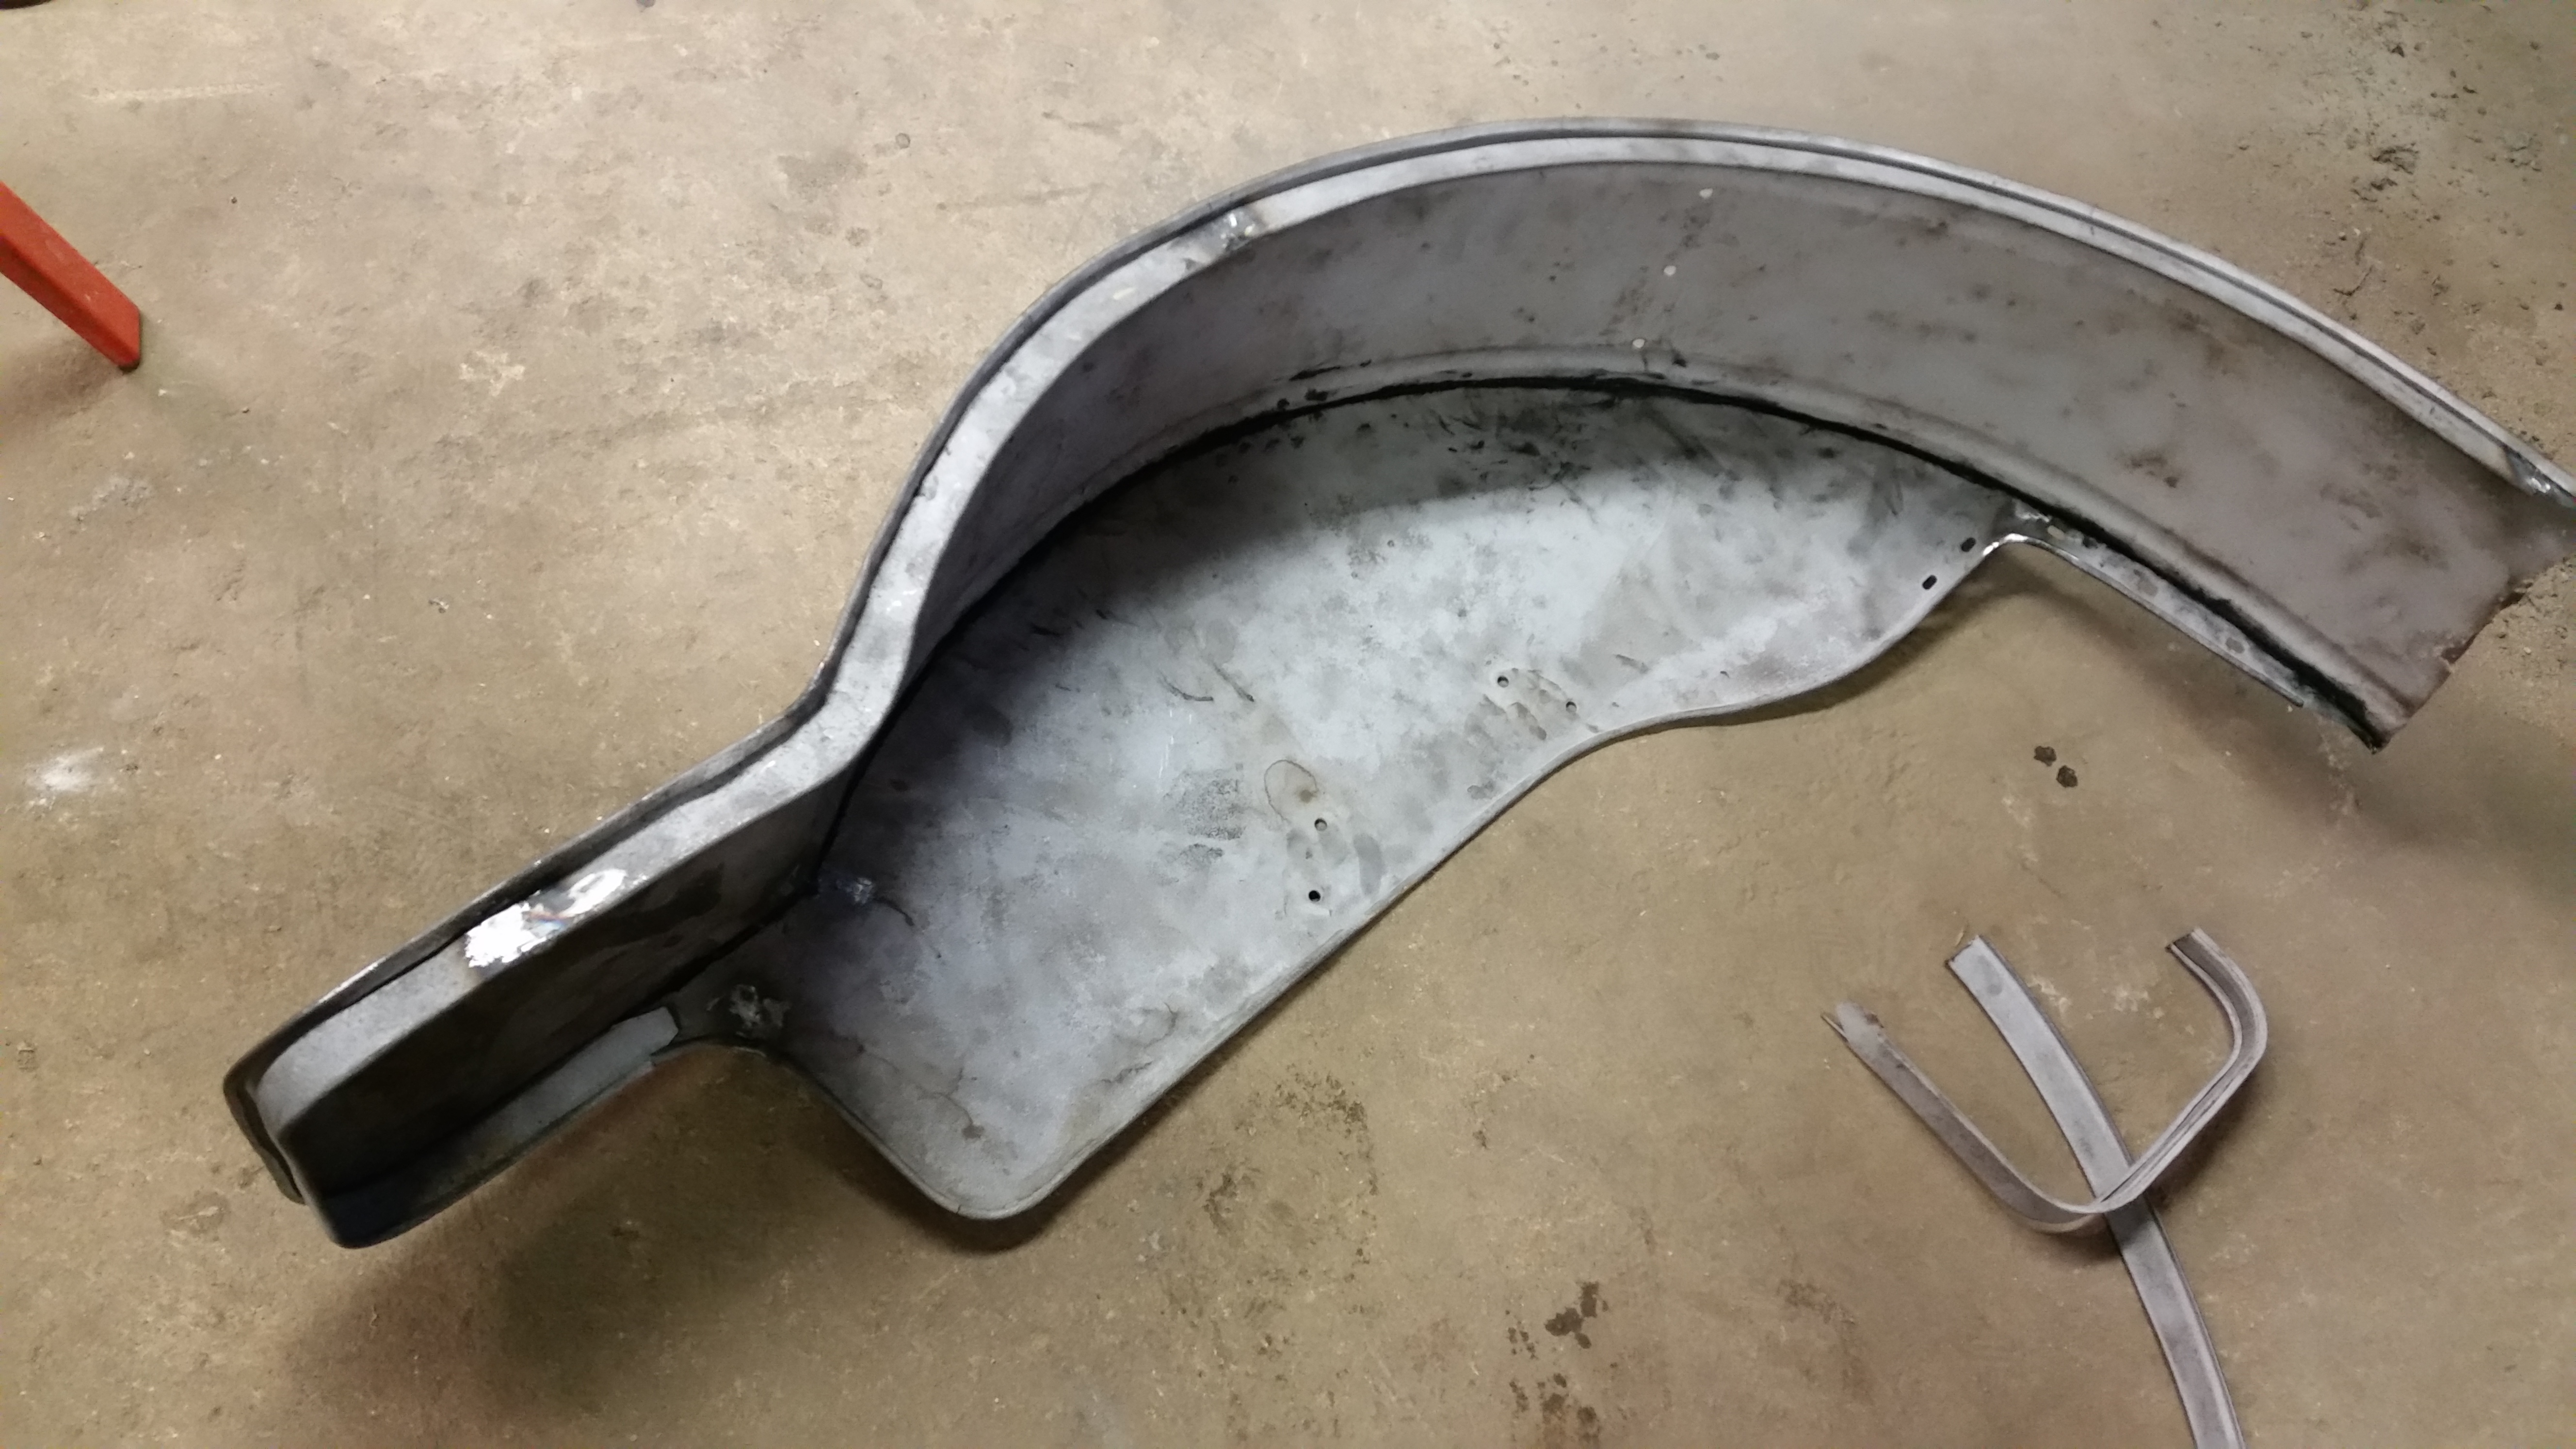
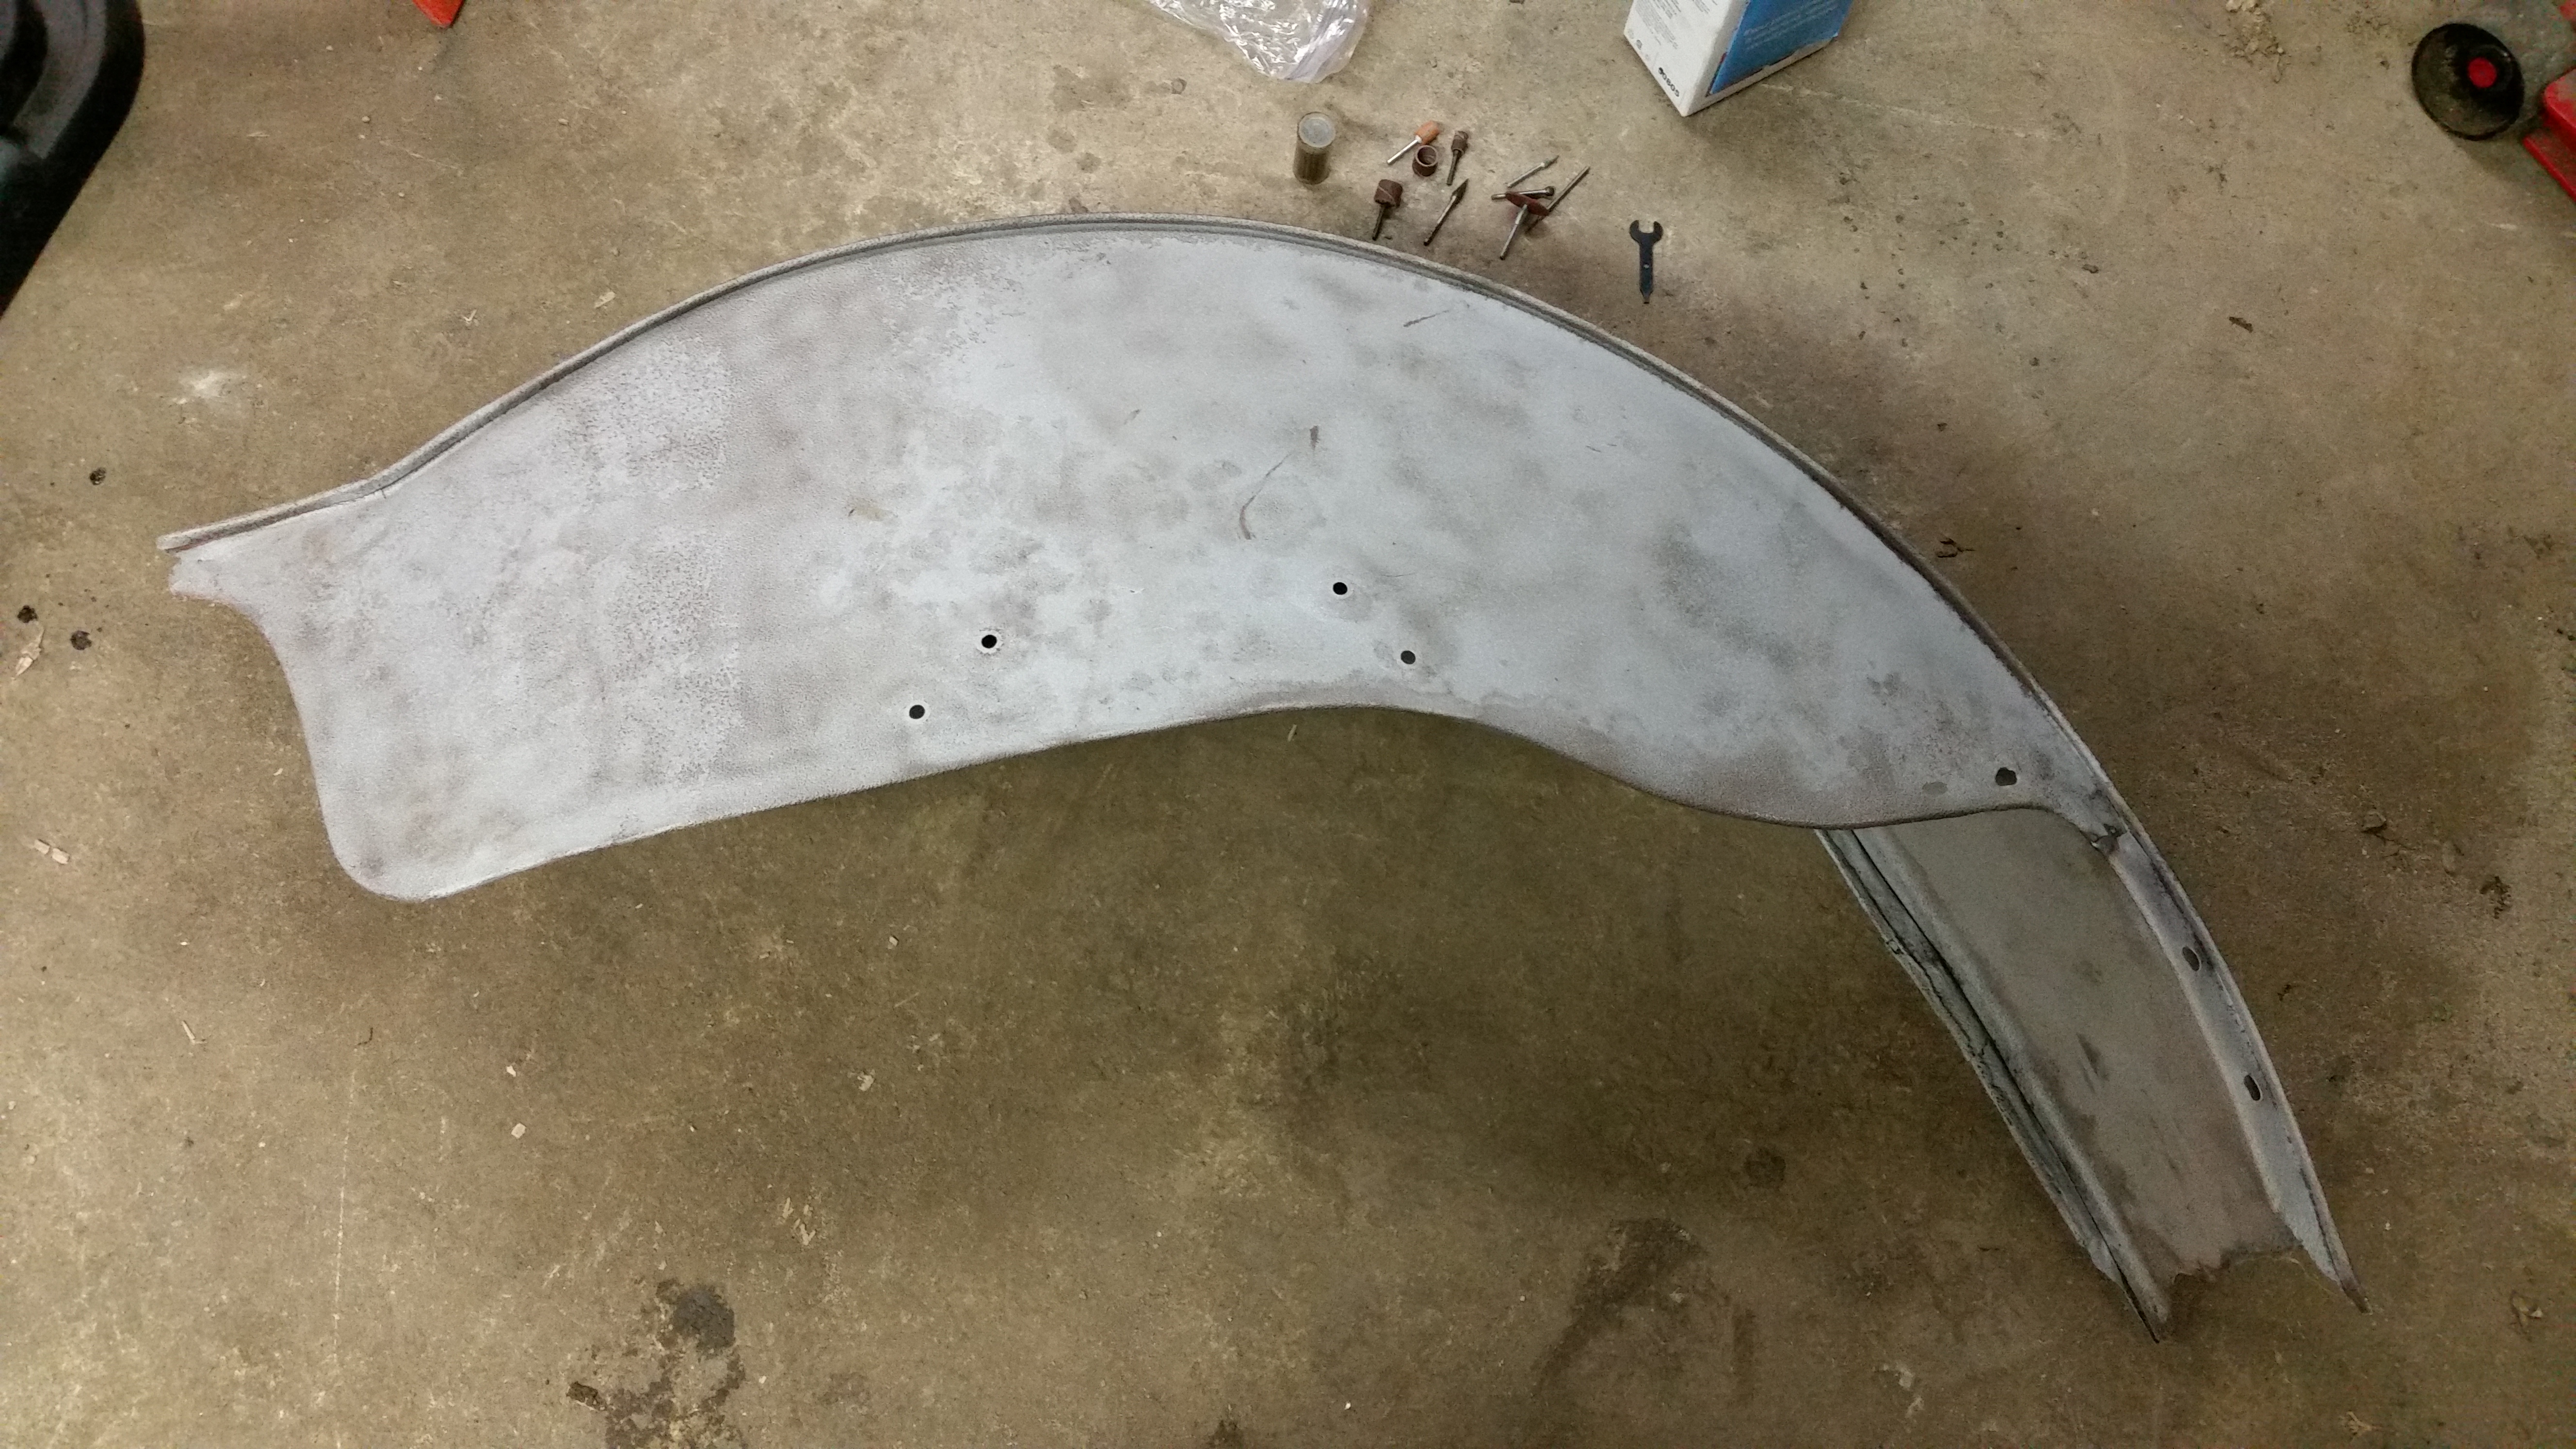
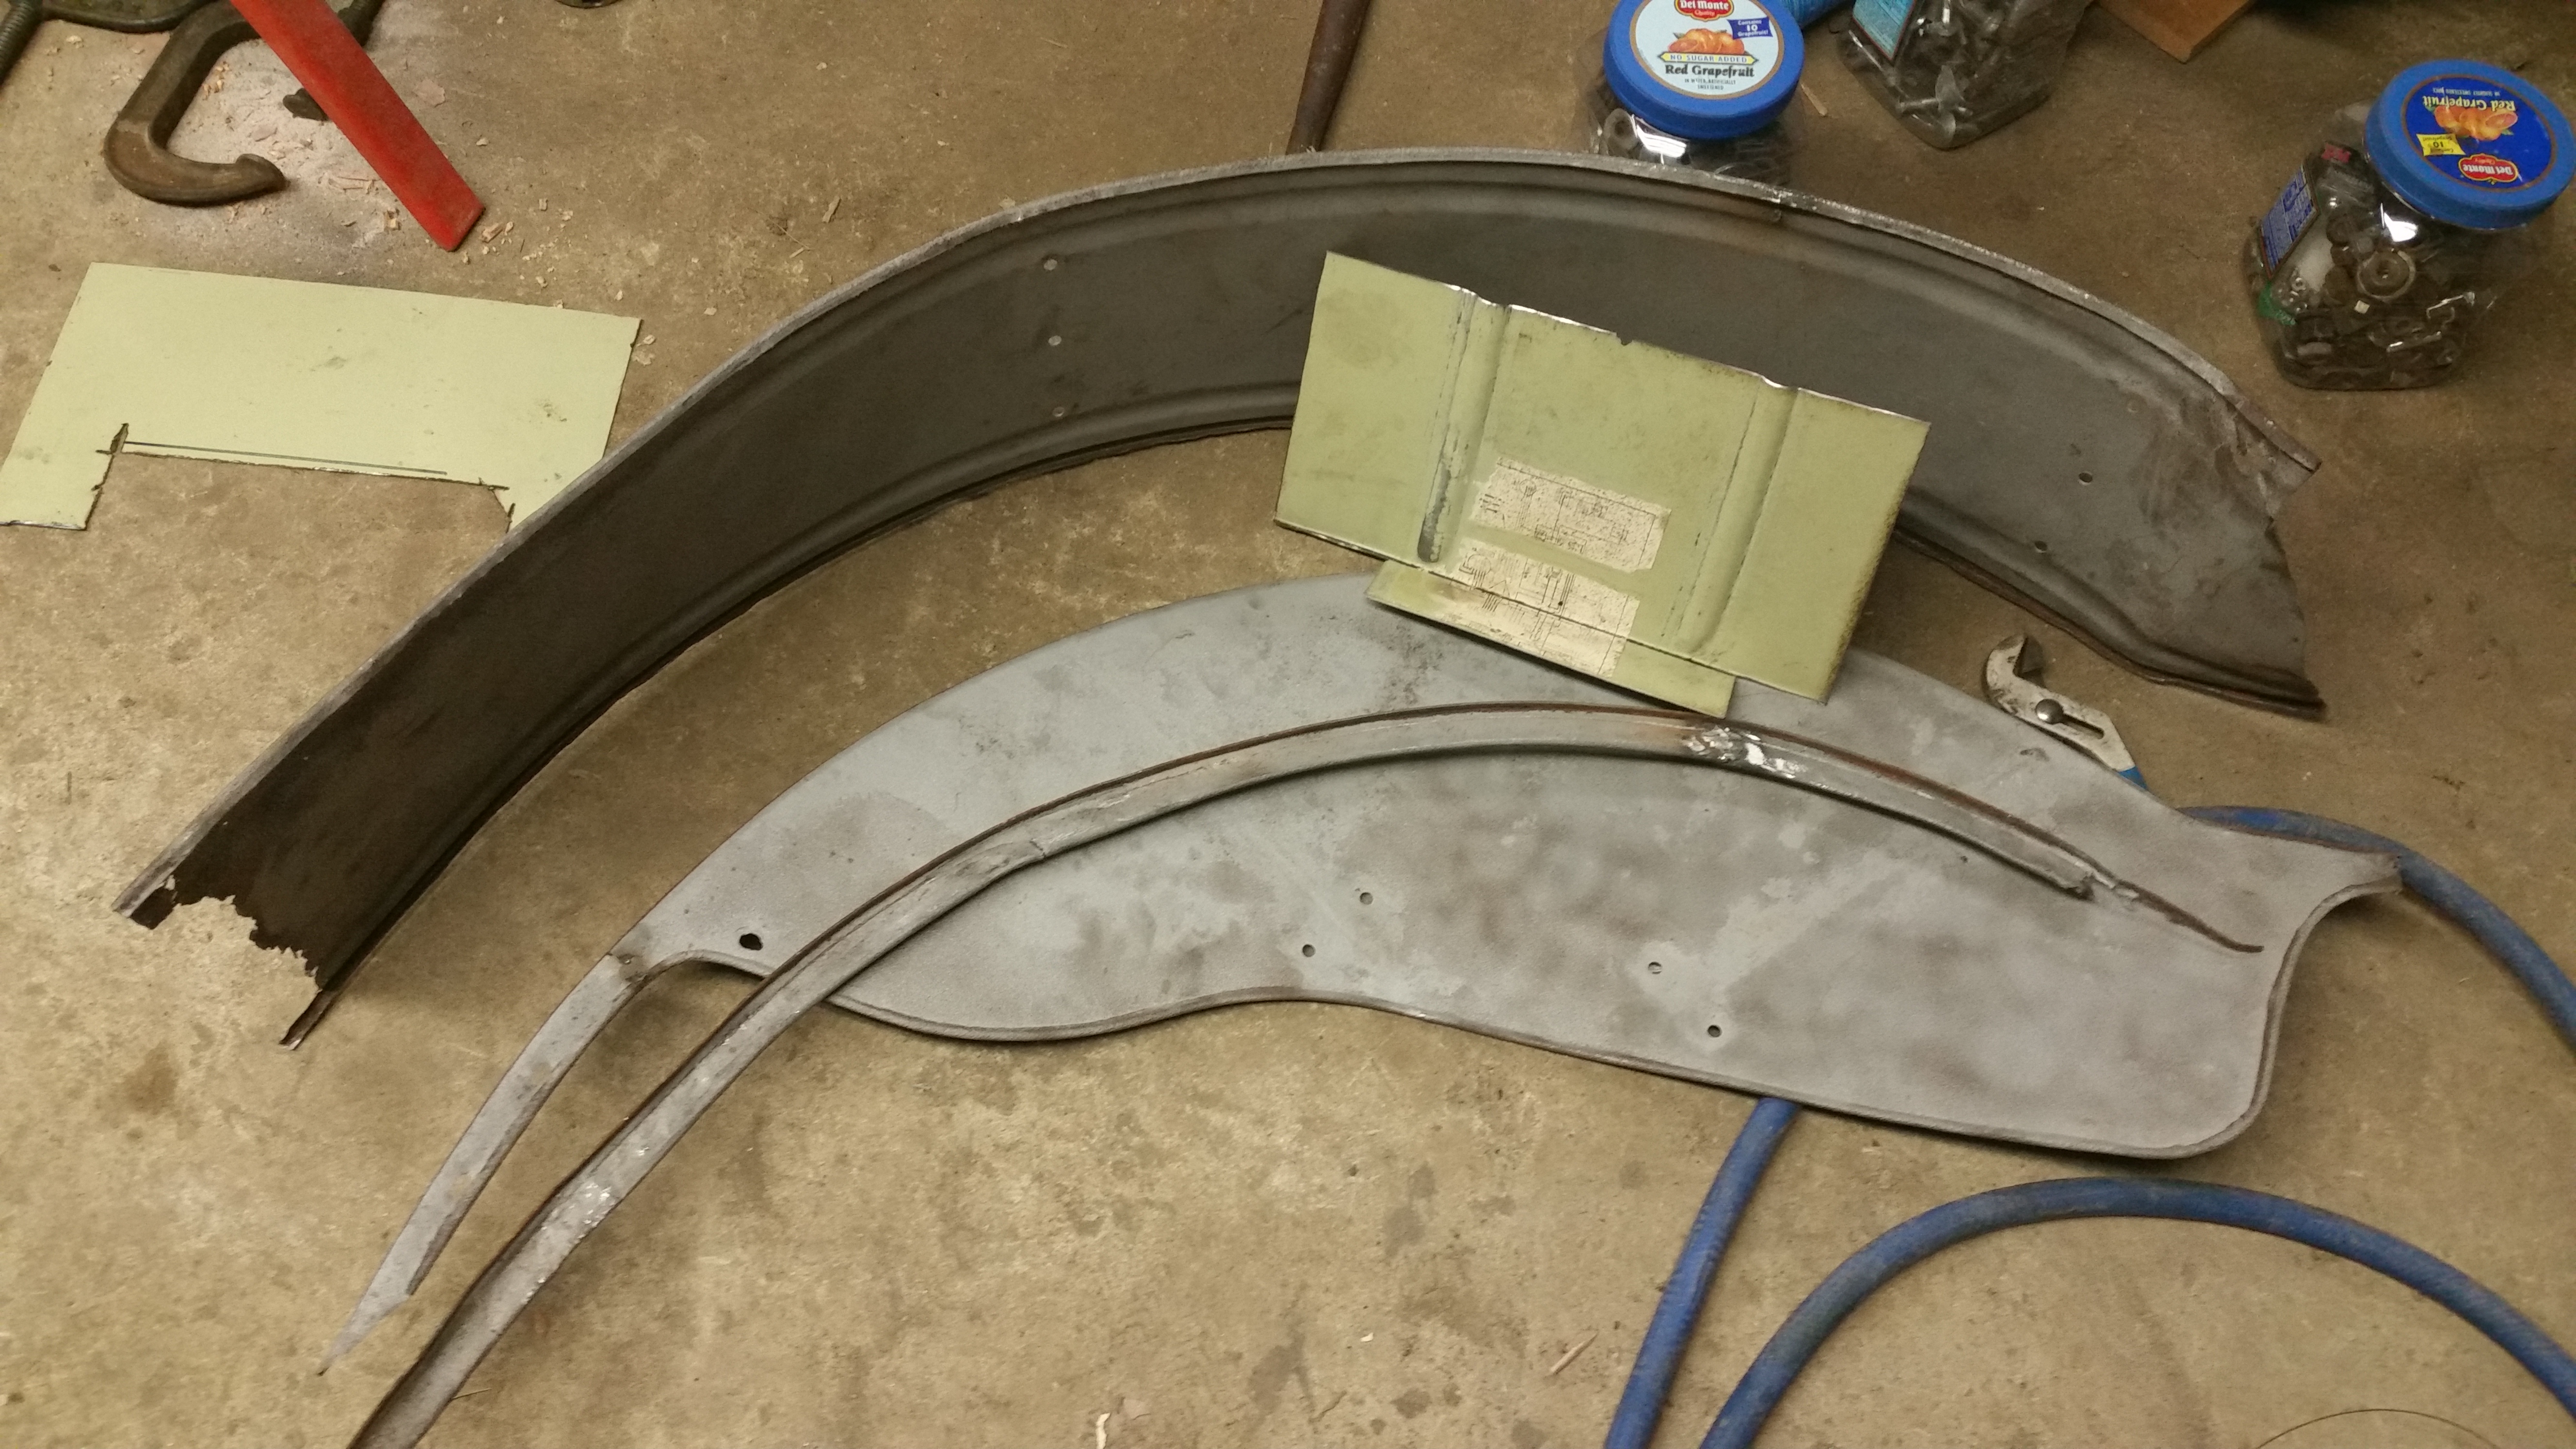
| The right rear fender seperated into its three individual pieces. Click on the picture to see the full size. | Pieces of the edge from my fender along with a complete edge from a donor fender from a 5-Passenger touring. Click on the picture to see the full size. |
You can see in the picture on the left above the three pieces separated and sitting on the floor in the garage. "The edge" part is in two pieces because part of it was missing. I was going to use and "edge" from a spare 5-Passenger touring fender. You can see this "edge" in the picture on the right above along with the pieces from the fender from my car. Problem with this plan is that the arc is not quite the same. So my plan is to take pieces from the donor fender "edge" and piece together an "edge" which will work using the main arc from my original fender.

|
|
| A couple of views of the tool I used to open the bead holding the fender together. Click on the picture to see the full size. | The Main Part of the fender back on the fender irons working on straightening and aligning. Click on the picture to see the full size. |
Once the parts were separated, I was able to work on the "main part" of the fender and get it much closer to shape. I straightened the back panel and welded up some of the parts of it that needed it. I will be able to use the curve in the "back Panel" to determine the angle of the tail part of the fender which was bent down so bad.
One final note on this entry. Something I would do different: I wish I had put a mark on the three pieces before I took them apart to show alignment. Like a sharpie line mark across the joint of the "back panel": and "main part" in several places. I think it would help with alignment as I reassemble. We will see how that goes.
Sunday, January 7, 2018 6:43 PM
|

|
| The back part of the fender with metal work done, waiting to be rejoined to the main part of the fender. Click on the picture to see the full size. | Main part of the fender mounted showing the basic shape is back where it needs to be. Click on the picture to see the full size. |
I have also been working on the "main part" of the fender doing the same type of body work. It looks like it is back into the shape I need it to be and best of all, "back panel" fits in just as it should.
I think I will need a second set of hands to to it and hold everything together as I re-crimp the joint. If all goes well, my next session in the garage will involve this reassembly. Stay tuned.....
Monday, January 15, 2018 7:17 PM
|

|
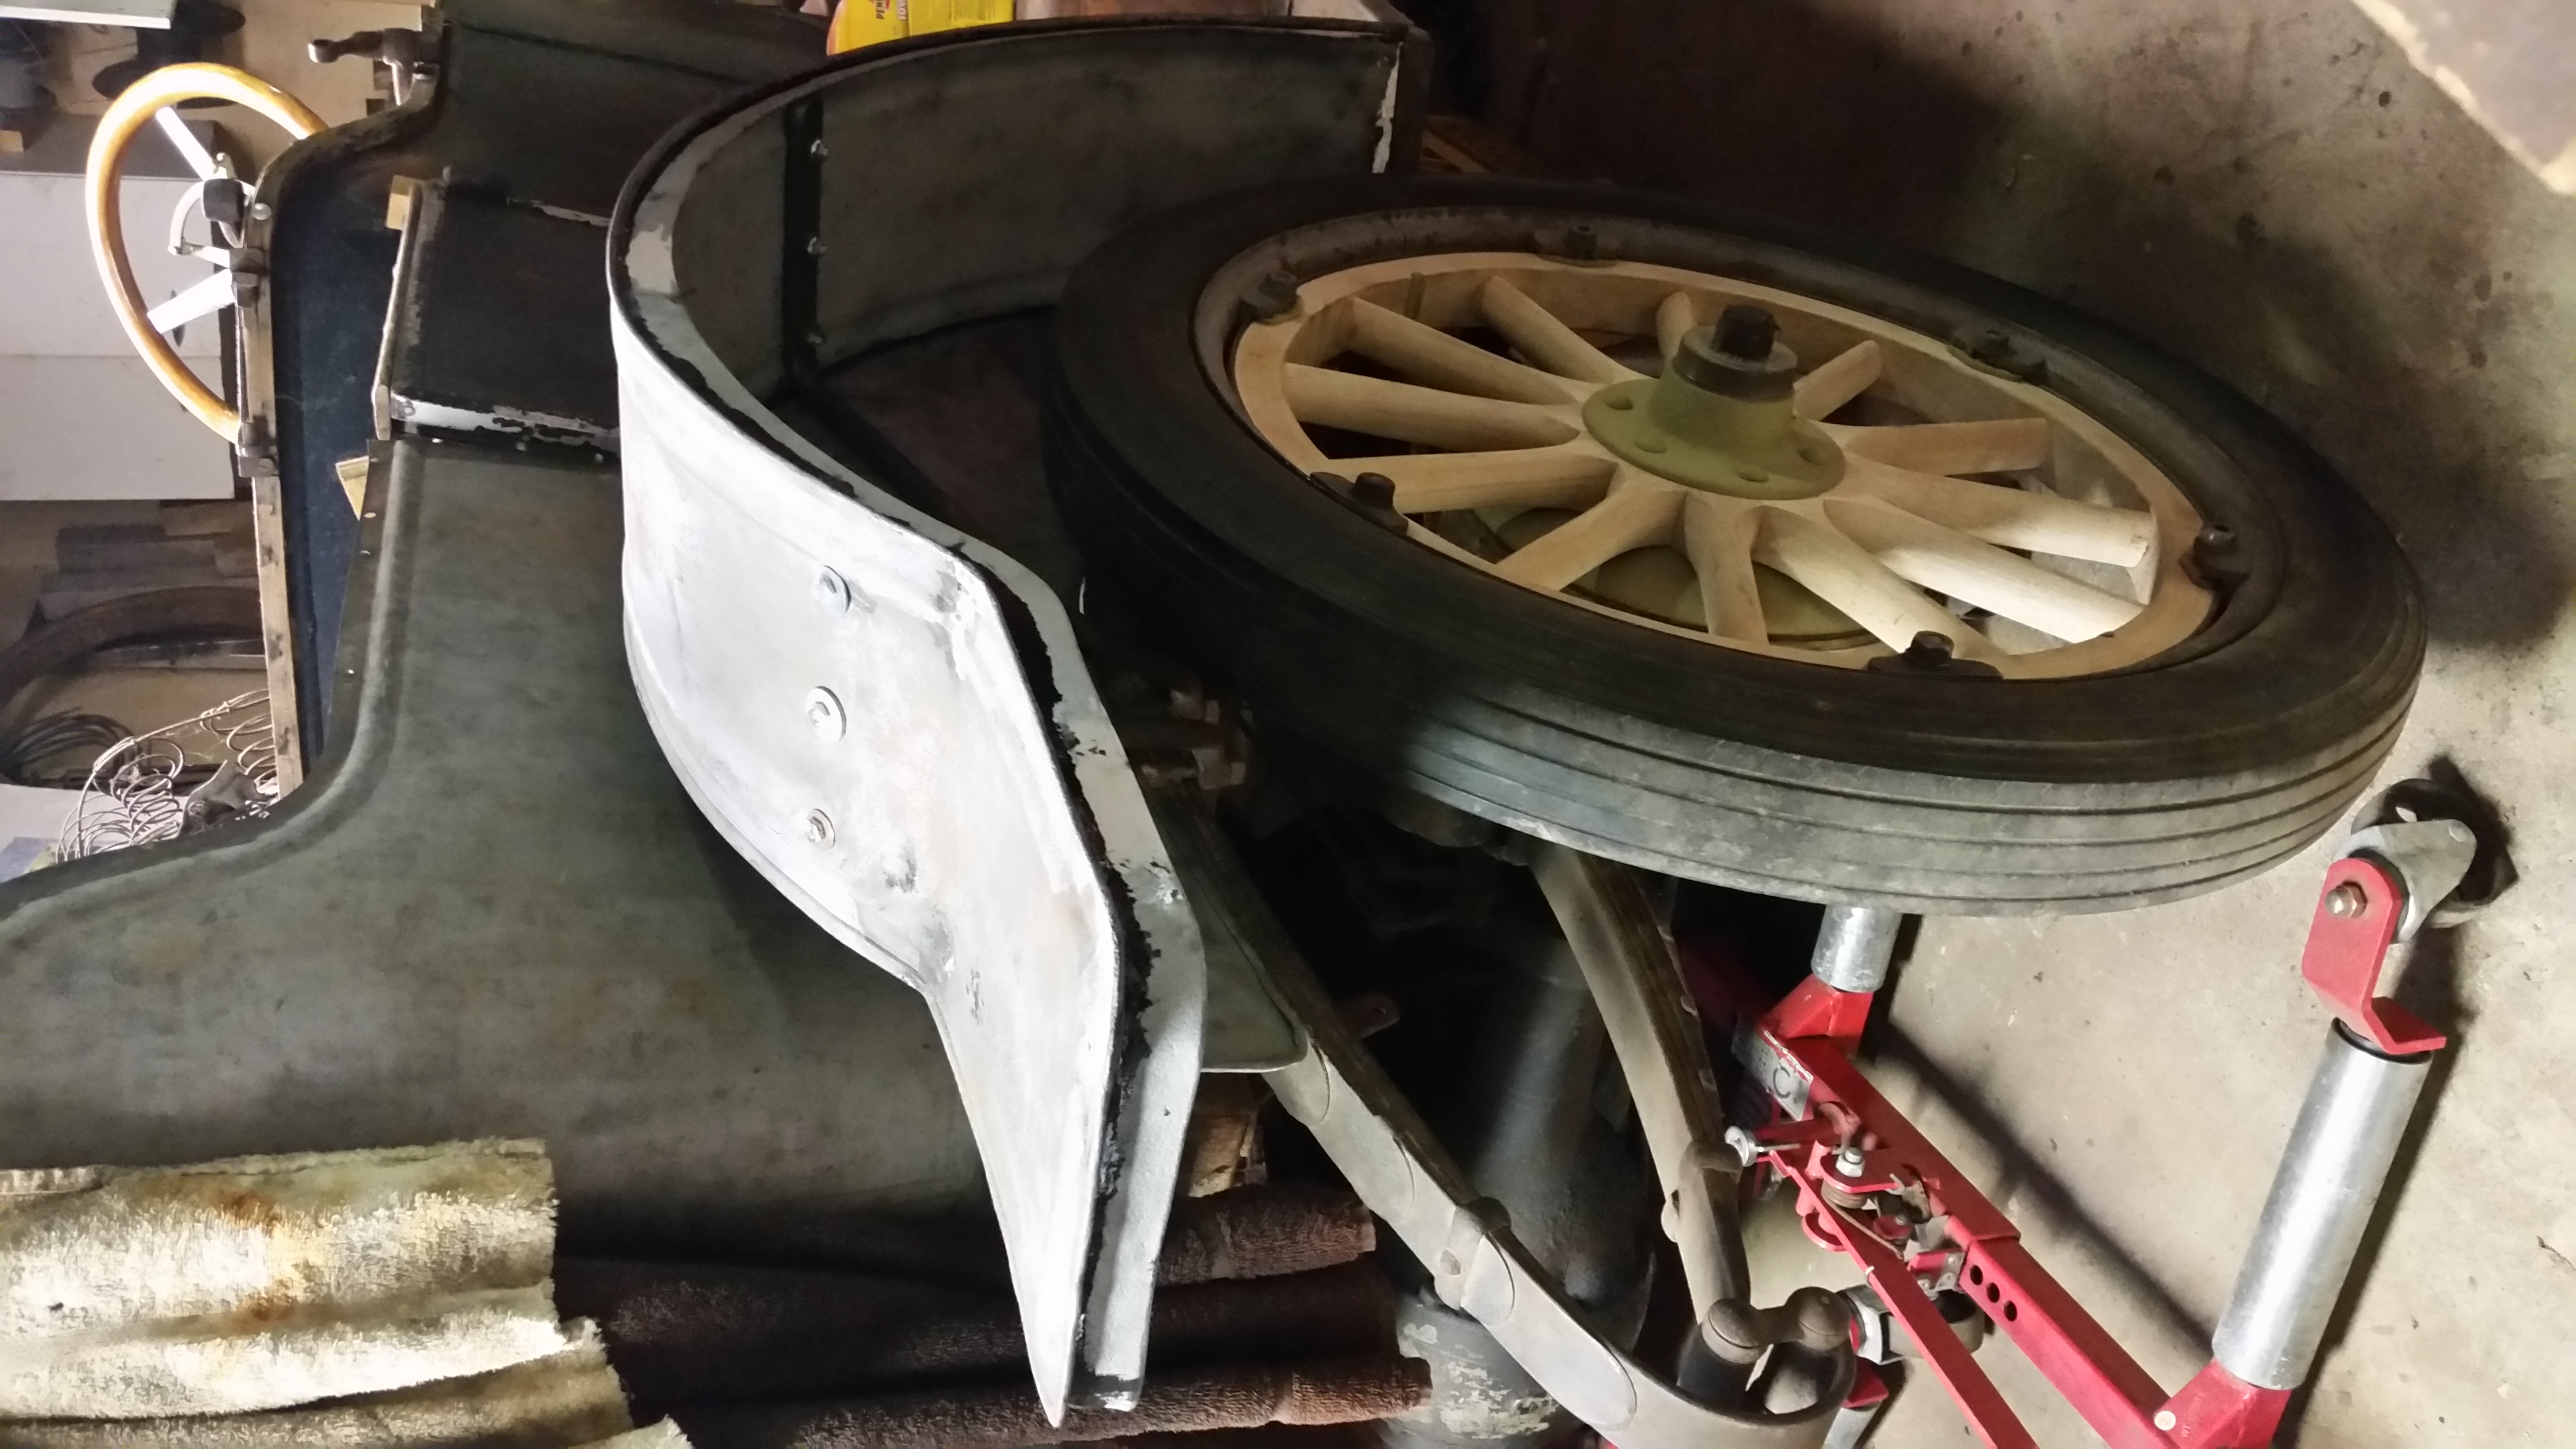
| Rear panel back in for good and outer rim dry fit after fabrication. Click on the picture to see the full size. | full fender mounted on car with outer rim dry fit looking for shape. looks good to me. Click on the picture to see the full size. |
Once we had it back into its slot, I went around with a pair of Vise-Grip pliers and folded the crimp back down. I worked around the fender slowly crimping it a little at a time. The finished product looked better than I ever imagined. I decided to let the paint dry good with the finder mounted in the position it would be on the car.
The next day I decided to start work on fabricating "the edge". If you remember, I was missing a piece about 8 inches long right where the fender had been folded down. I had hoped to just use an edge from my donor fender, but the arc of that 5-Passenger Touring fender was not the same as the on on my Demi Tonneau.
So I decided to take a piece out of the edge from the donor fender and weld it between the two pieces of my fenders edge. To do this, first I cut a piece out of the donor edge which was longer than I needed and fit that into the fender. This piece contained the curve for the flat back part of the fender, so it was important.
I then fit the other two original pieced to that. I pulled the fender into the correct shape and then tacked the three pieces together. Then I was able to put it on the car and see how it looked, made a couple of adjustments, and then did final welding of the three pieces into one. When done, I put it back on the car and it looks pretty good. The Right picture about shows it on the car.
Next up is to finish up "the edge". This will involve more welding and body work. I think I will put some filler on this as well while it is apart and easy to work with. Might be easier than doing it when it is all assembled. Making progress slowly.
Sunday, January 21, 2018 6:46 PM
|

|
| Three pieces of the right rear fender joined back together for good. Click on the picture to see the full size. | Running Board end of the Right Rear Fender with patch panel ready to go in. This is the next step. Click on the picture to see the full size. |
Once "the edge" piece was ready, I prepared to assemble it to the "main part". To do this, I wanted to mount the fender to the fender irons in a more solid manner than I had been doing. So I found some bolts, washer and nuts the appropriate size.
Then, like when I attached the "rear panel", I painted all sides of the joint with POR-15, then assembled it in the same way I did the back panel. I was able to do this one by myself. Once I had the folded edge re-crimped, I put the fender on the car and pulled it down with the bolts. I then checked alignment and made a couple of adjustments. I figure when the POR-15 is dry, it will not be able to move again.
I have to tell you I am extremely happy with the way it is looking. The lines are just the way they should be. I am so happy I decided to disassemble the fender into its three parts. I do not think I would have ever gotten this fender to look like this any other way.
The last thing I want to do to this fender is fix the other end which attaches to the running board. I already have a patch made up for this end, but wanted to wait till I had the rest of the fender in shape before I did this.
First thing I had to do though was remove the running board. The running board on the right side is not original to the car. In fact, it looks like it may be a plank rough sawn on the farm where this car spent its entire life prior to joining our family.
I was able to get the three bolts undone which held the running board to the brackets (should have been six bolts). I am not ready to start fitting this patch panel into the fender. Next time in the garage, I will start cutting metal and getting it to fit. A little progress is a good thing.
Tuesday, January 23, 2018 7:32 PM
|
|
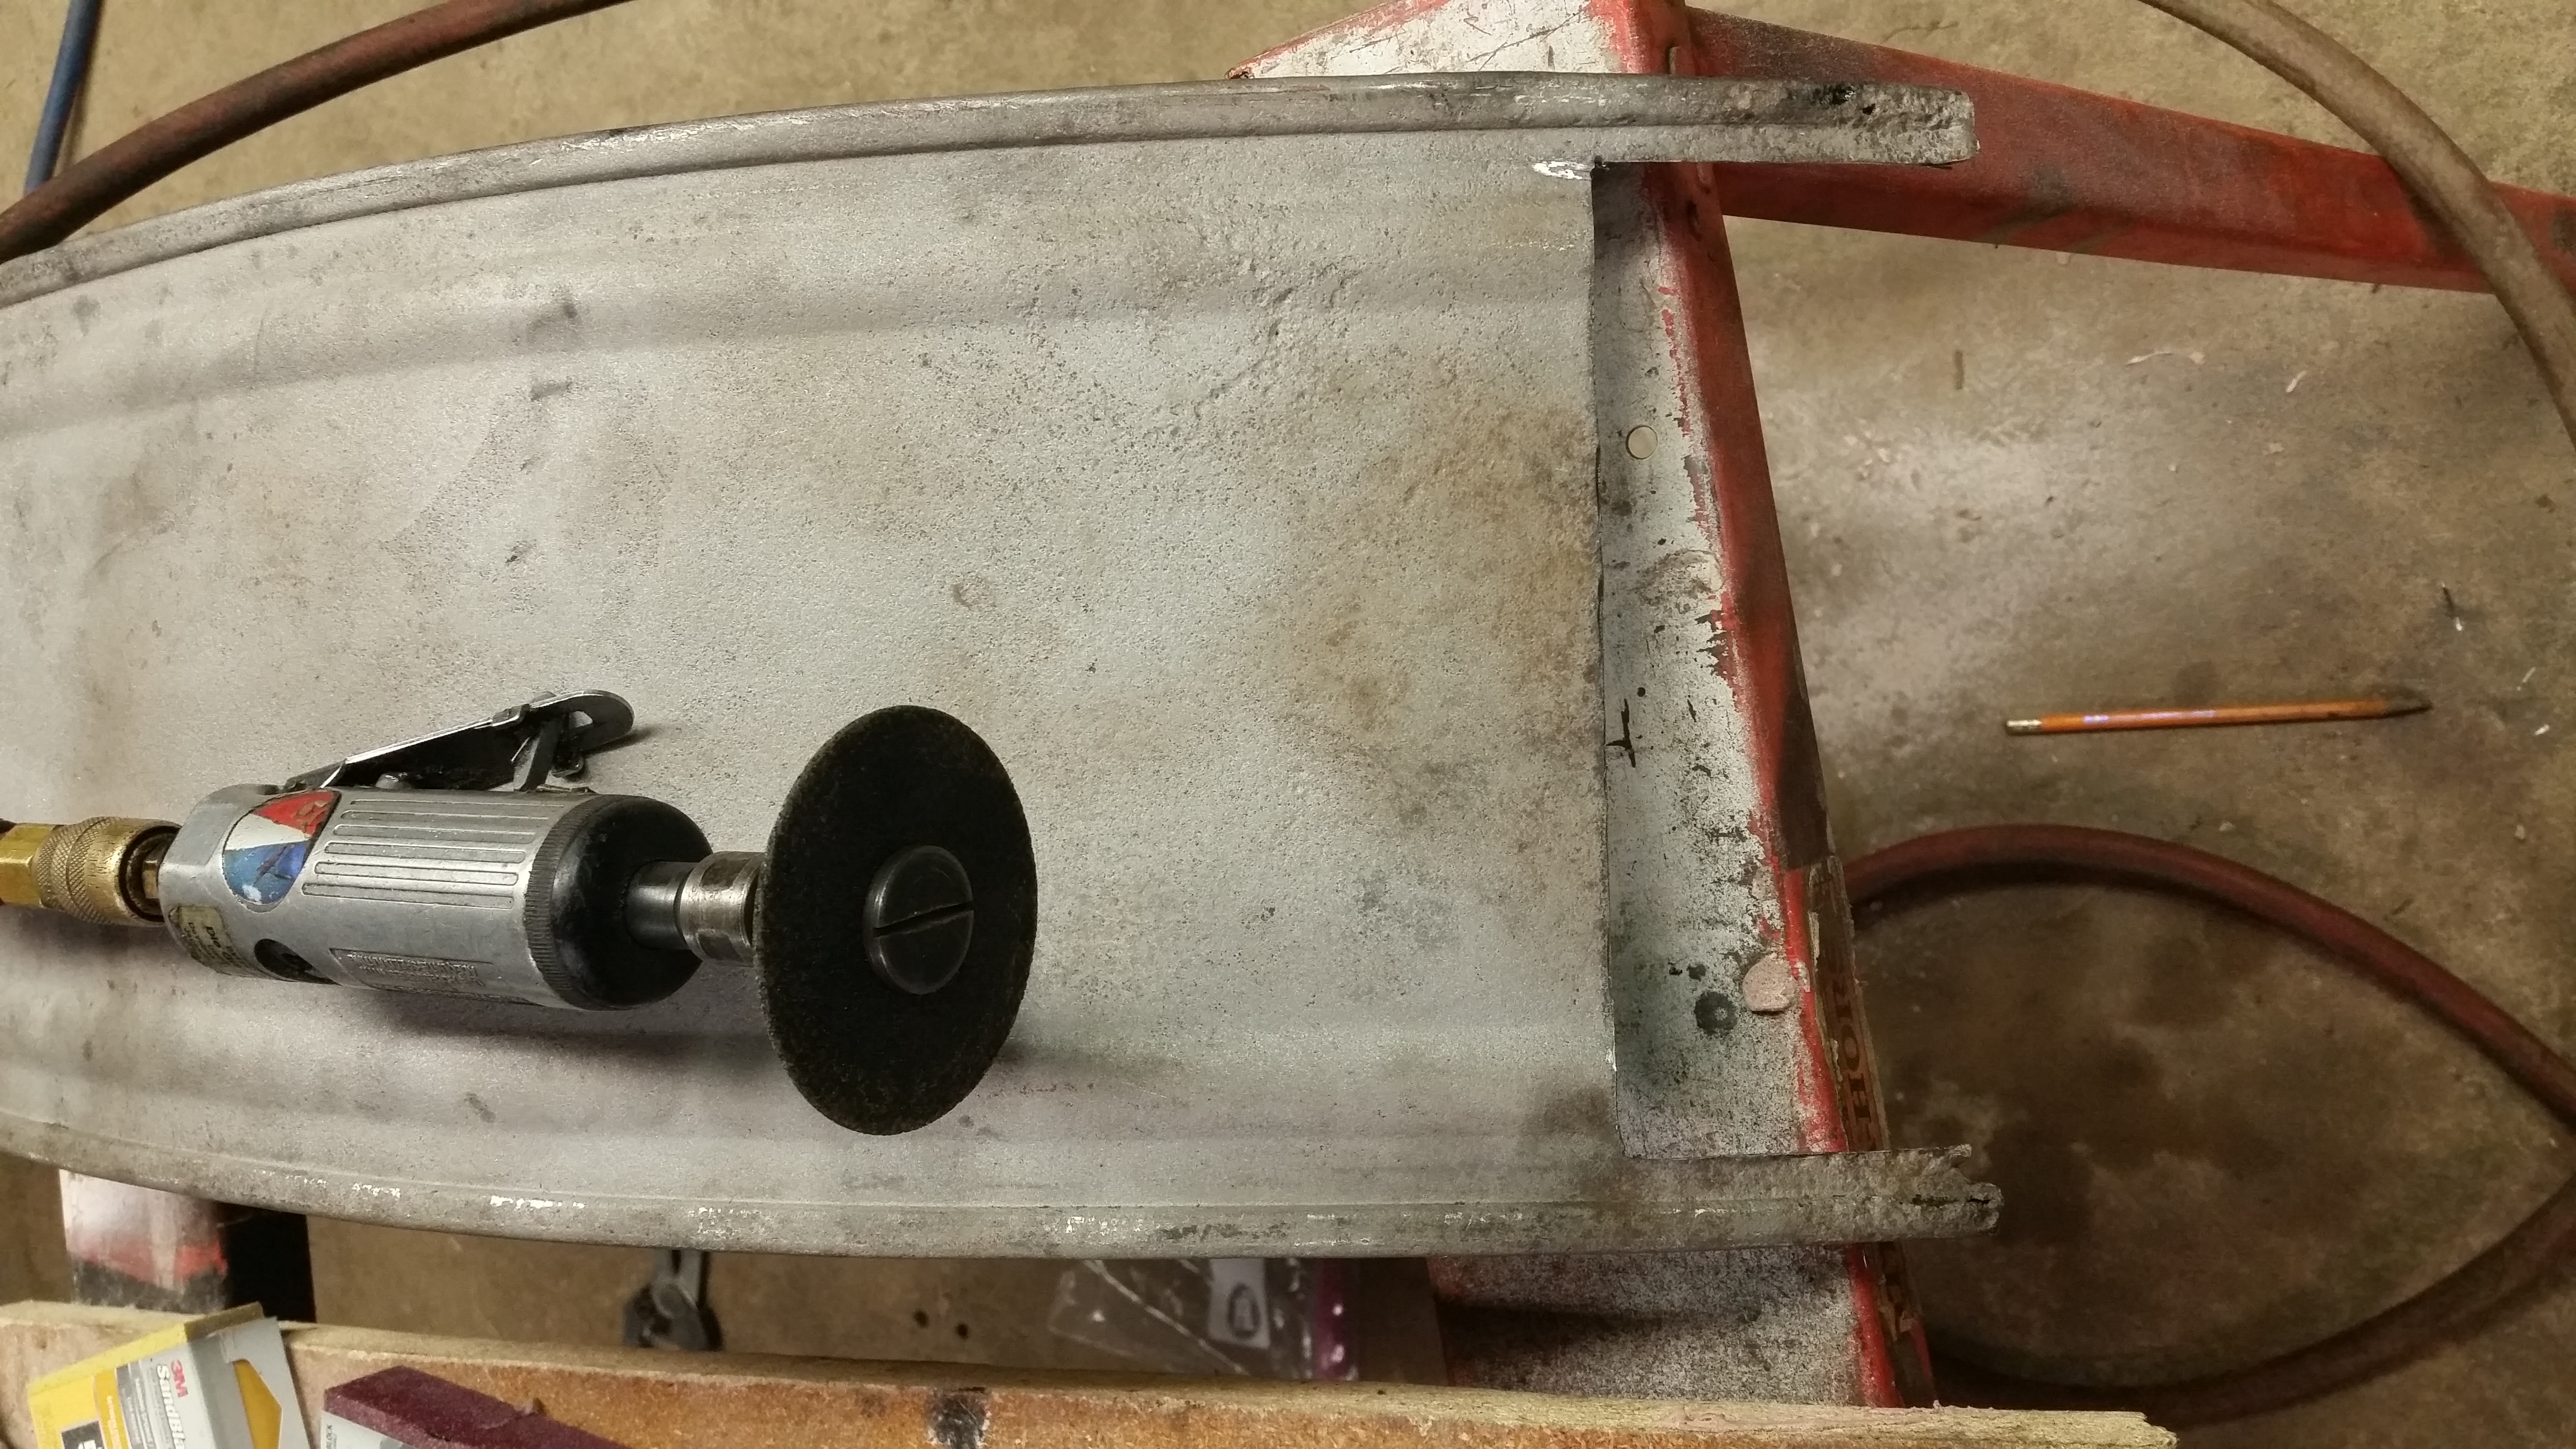
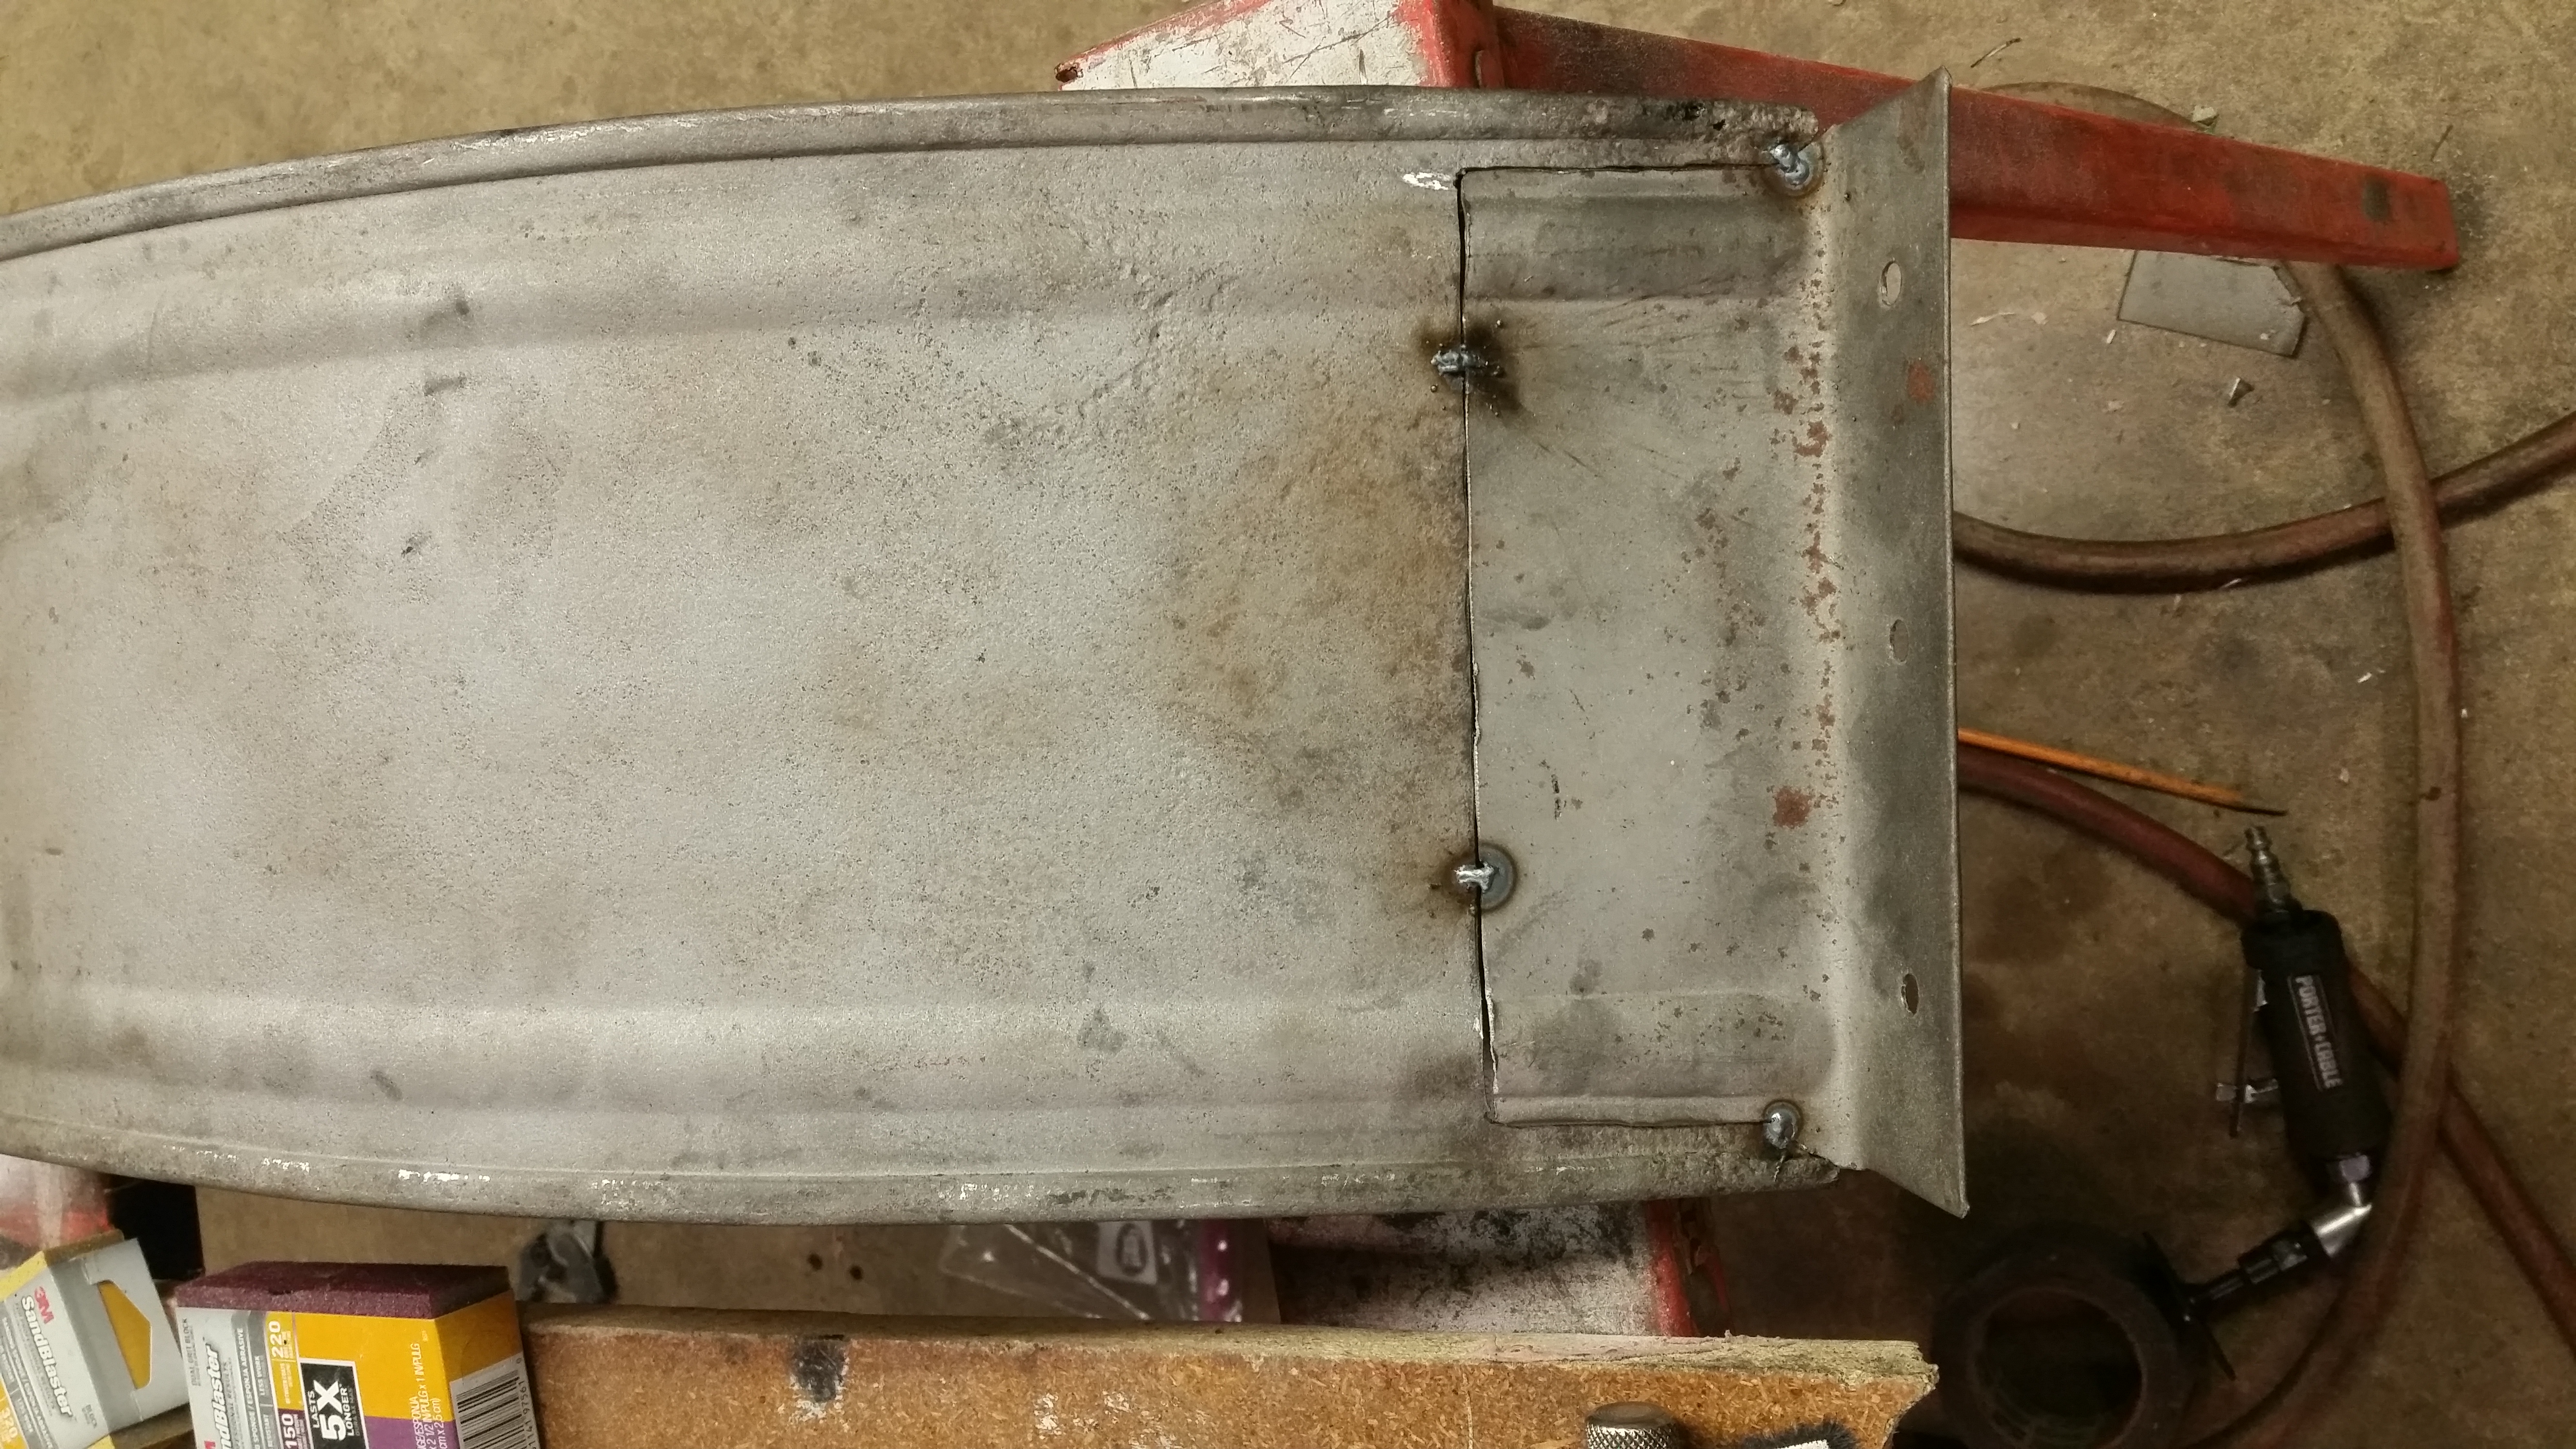
| Used a die grinder and cut off wheel to cut out the bad metal from the end of the fender. Click on the picture to see the full size. | New patch panel cut to size and tacked into place. Click on the picture to see the full size. |
I was going to continue welding in the patch but it has been times like this in the past that I have wished I had just waited till another night and not rushed. So what is what I did tonight. I want to make sure everything looks good before I put it in for good. It appears to be lining up well. I will have to stitch this in slowly so as not to warp the metal.
I may go out again tomorrow night. We will see how I feel when I get home from work.
Sunday, February 4, 2018 8:10 PM
|
|
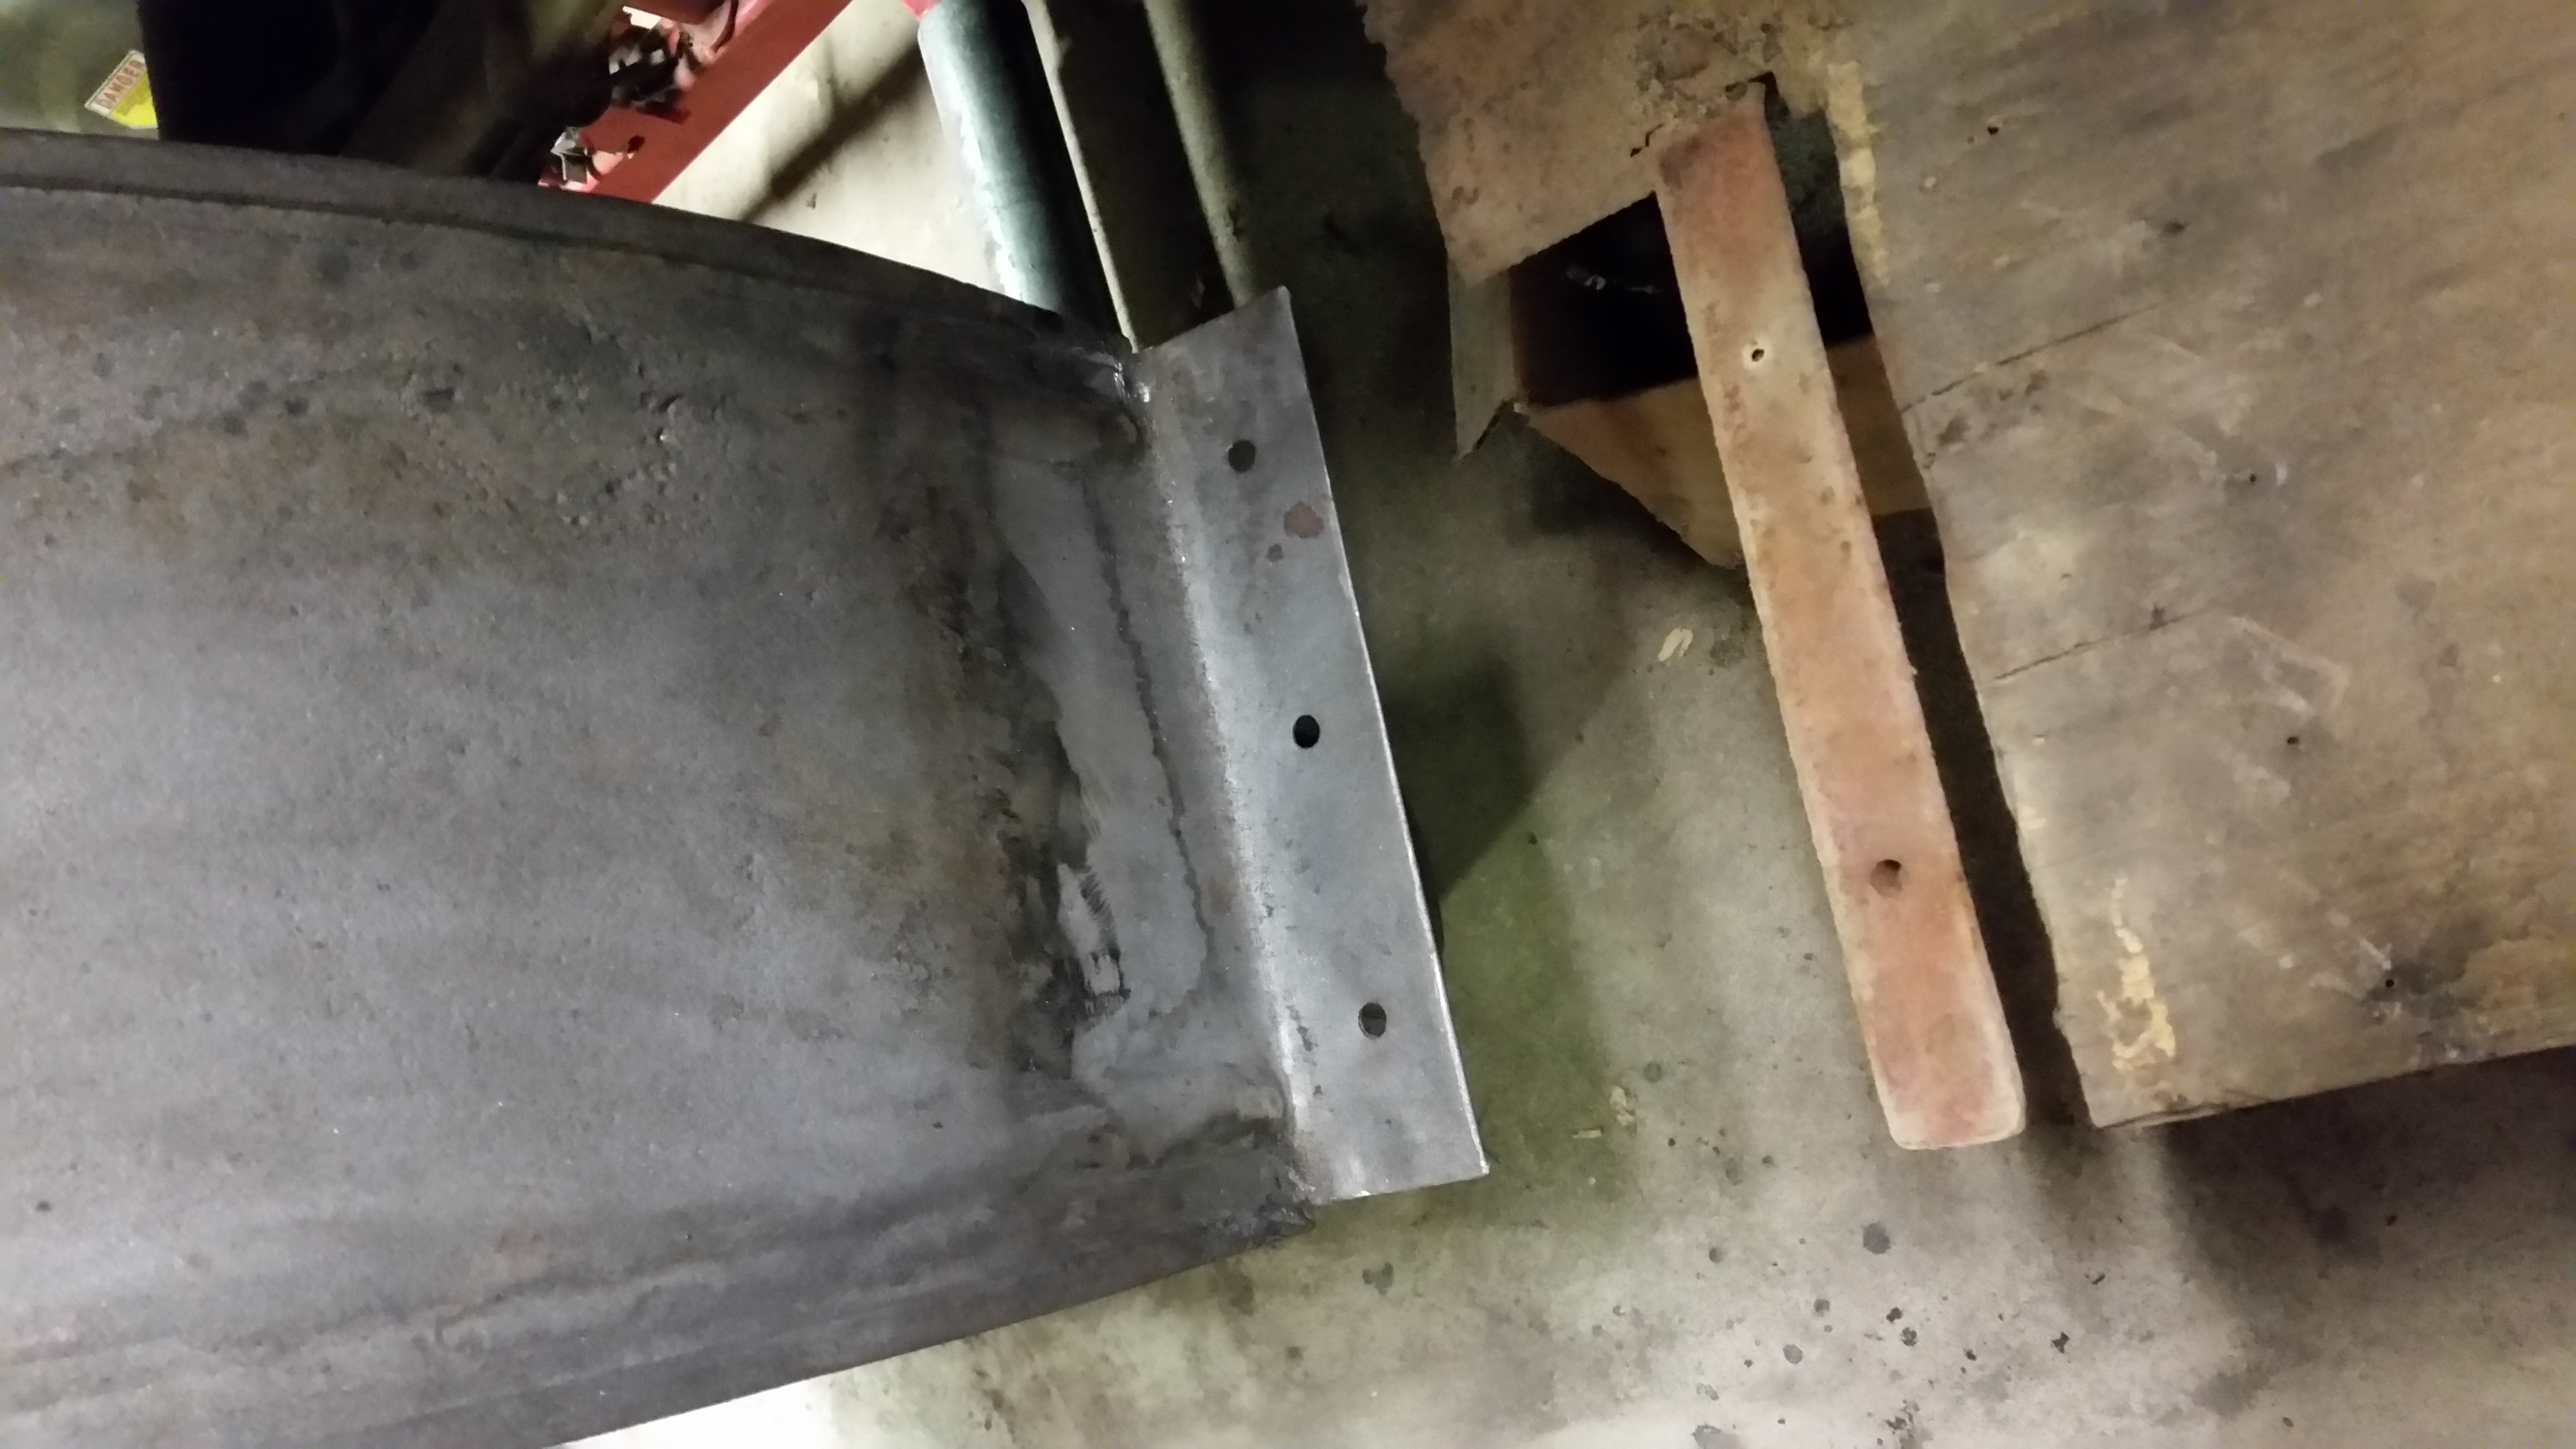
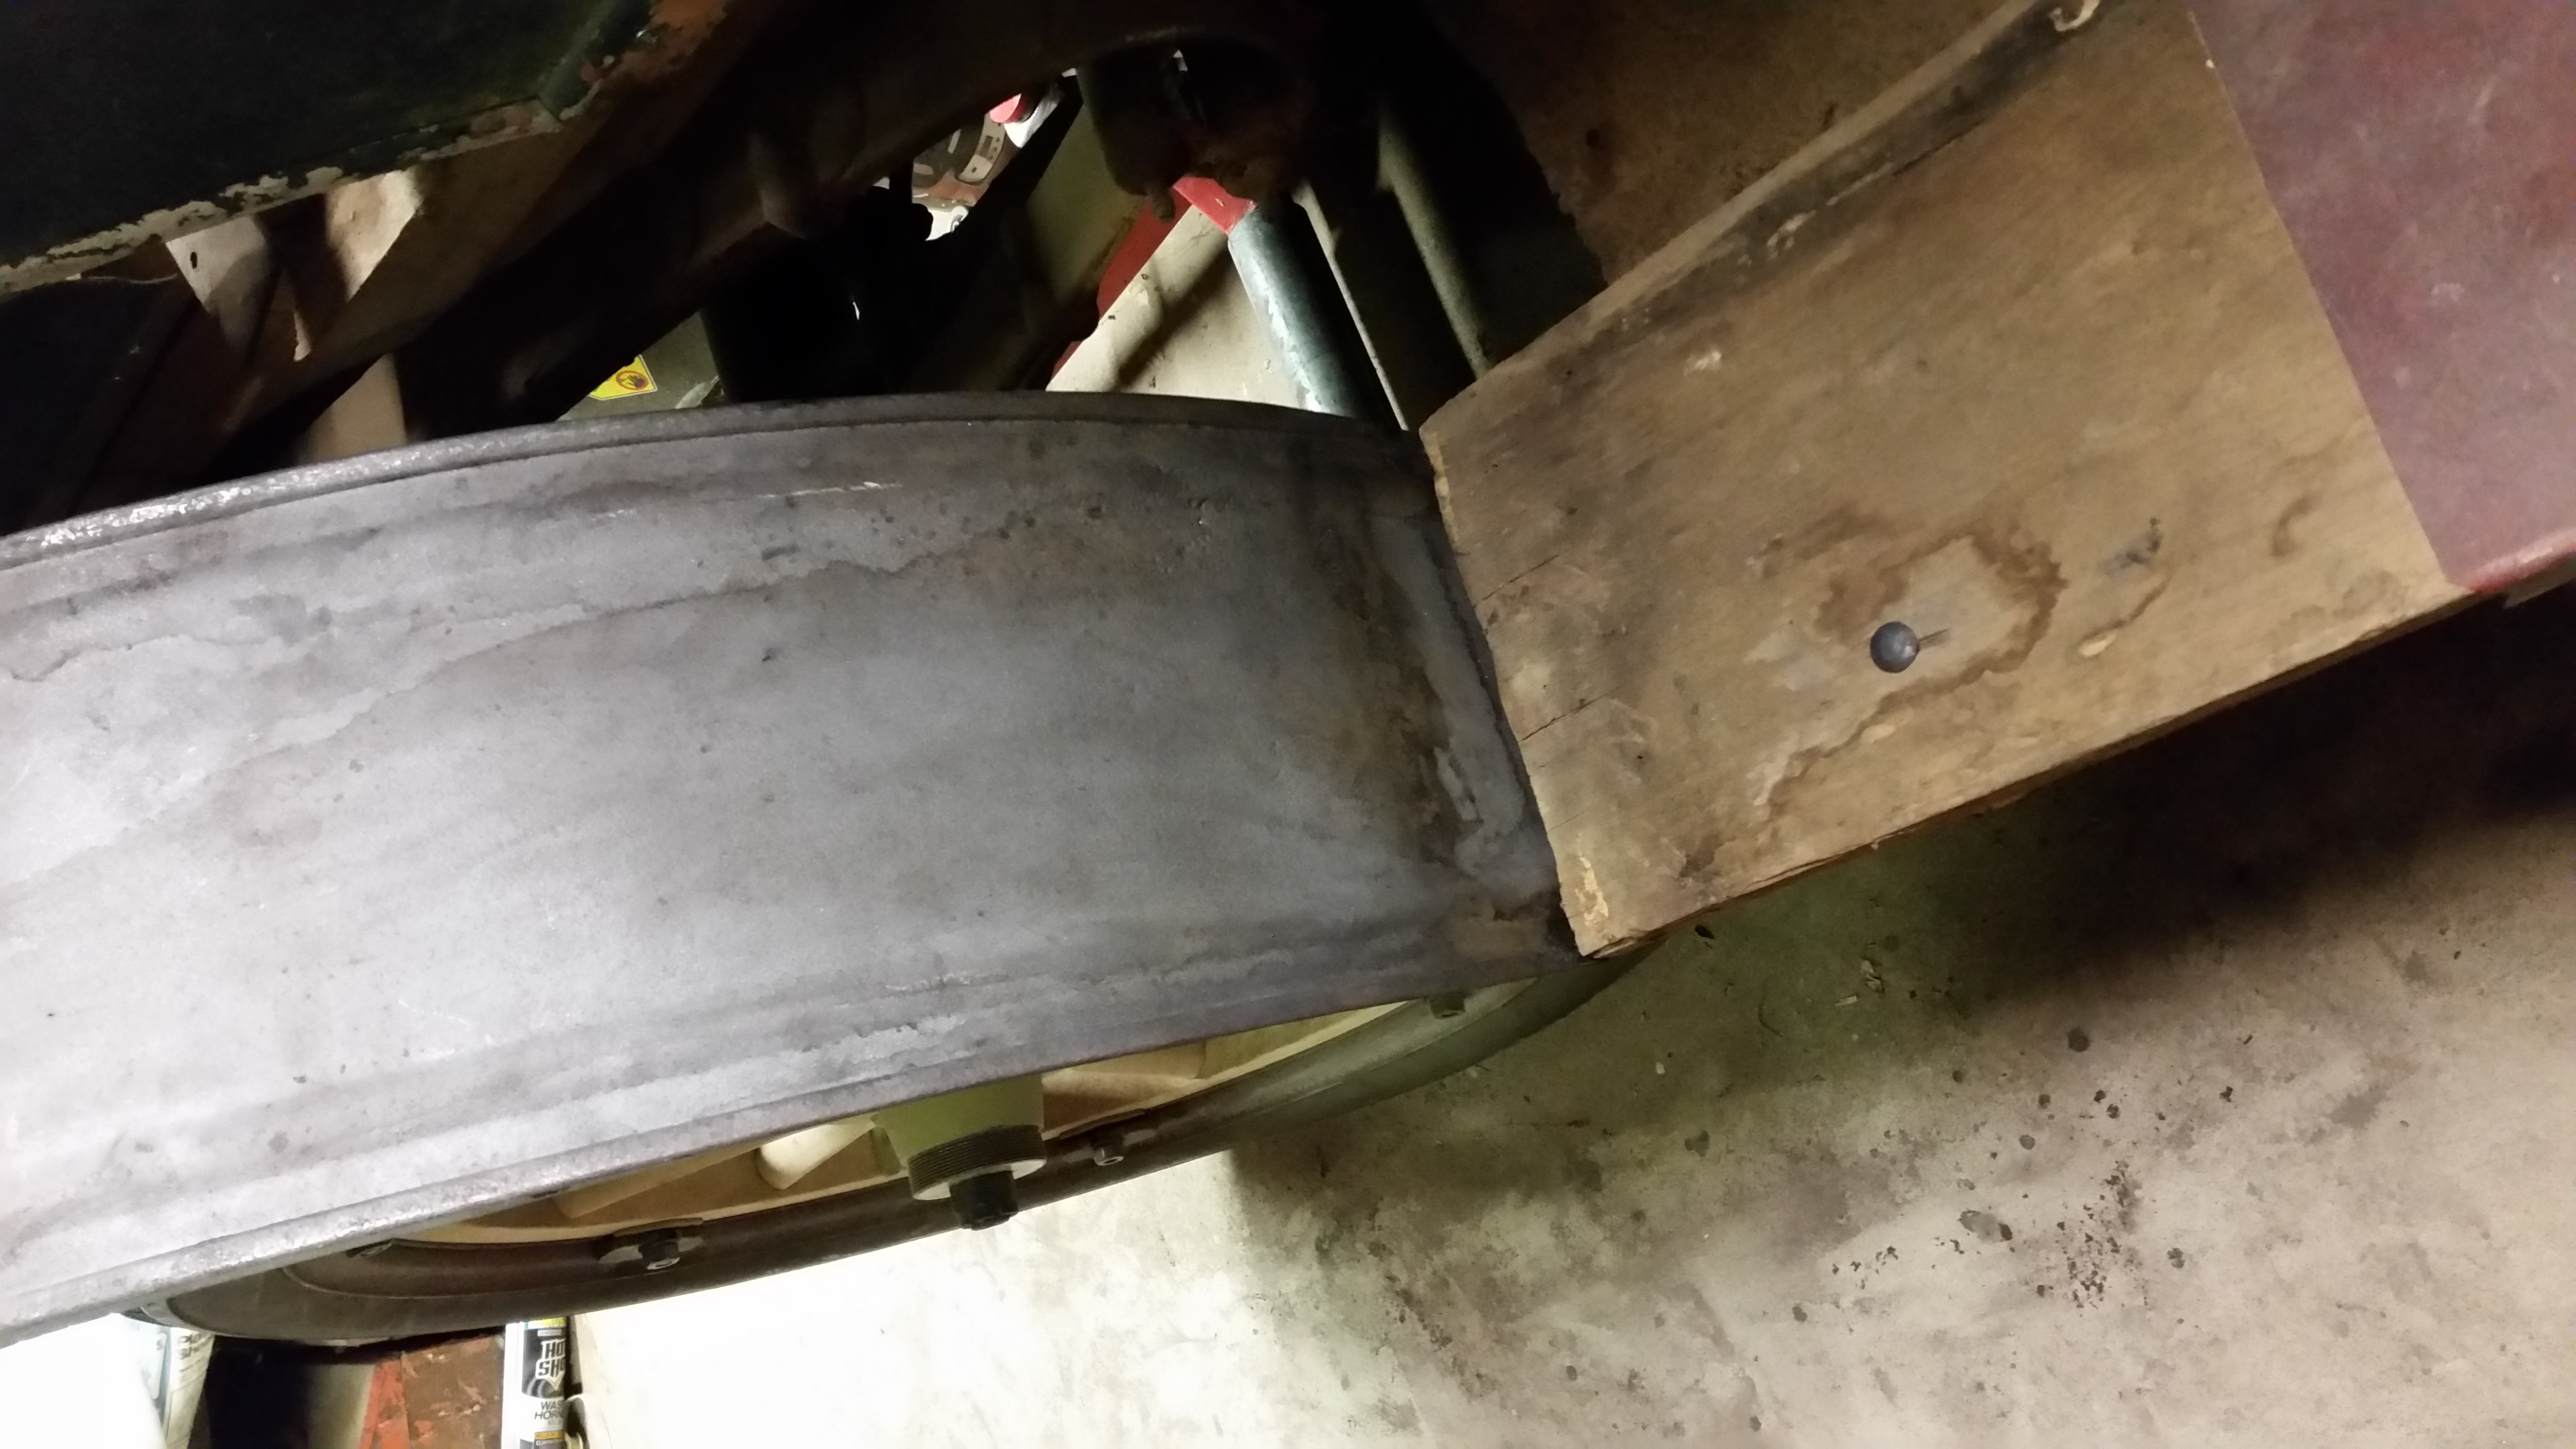
| The Running Board end of the Right Rear fender is welded in. Click on the picture to see the full size. | With the running Board in place to ensure the metal work is sufficient. Click on the picture to see the full size. |
Next up I will start looking at the left rear fender, which is the worst one. I am sure it will take me longer to put back together.
Wednesday, February 7, 2018 6:12 PM
|
|
| The Left Rear Fender showing the missing back end. Click on the picture to see the full size. | A look at the inside of the Left Rear Fender on the garage floor. Click on the picture to see the full size. |
You can see from the pictures that the back end of the fender, the part that should should come straight back parallel to the ground, it completely missing from the fender. Someone obviously backed this car into the barn at some point in its history.
Further inspection leads me to believe that the fender irons themselves may also be bent. I will have to start by getting them back into alignment. The end that bolt to the running board will also need to be replaced on this fender in a similar way to what I did on the other fender. The difference with this side is that the very edge which I saved on the other fender, I will have to replace on this one. That will require some additional fabrication on the patch I create.
For the patch for the very back of the fender, I will cut the back off of one of my spare 5-Passenger touring fenders and weld it onto this one. I will pick the one where the beads line up closest. initial measurements show that they are not all the same, but at least one is close enough.
Next steps will be straightening the fender irons and then disassembling the fender into its separate parts. Stay tuned.
|

|
| The back side of the left rear fender. Click on the picture to see the full size. | Looking at the Left Rear Fender from the front of the car, you can see how it is bent up a bit. Something hit it good. Click on the picture to see the full size. |
Saturday, February 10, 2018 9:15 PM
|
|
| The left rear fender disassembled into the individual parts. Click on the picture to see the full size. | The fender brackets are definately not in alignment. Click on the picture to see the full size. |
If you look at the photo on the right above, you will see that the rear fender brackets do not appear to be in alignment. I believe this E-M-F was backed into something bending the bill on both of the rear fenders. That bill was completely gone from this left rear fender.
The left picture at the end of this listing shows the running board end of the main part of the fender. The patch started above will hopefully be welded onto this end.
The rear end of the main part of the fender is a real problem. The damage is exstensive even up to the mounting rivets. I believe I will need tocut out the left most mounting hole as well and fabricate a patch to compensate.
My next session in the garage, I will work on straightening the fender brackets and fabricating the needed patches.
|
|
| The runnign board end of the main part of the left reaar fender. Notice that the end is gone that mounts to the running board. Click on the picture to see the full size. | The backend of the left rear fender. Note that the very end of the fender is completely gone. Click on the picture to see the full size. |
Monday, January 17, 2022 9:57 PM
|

|
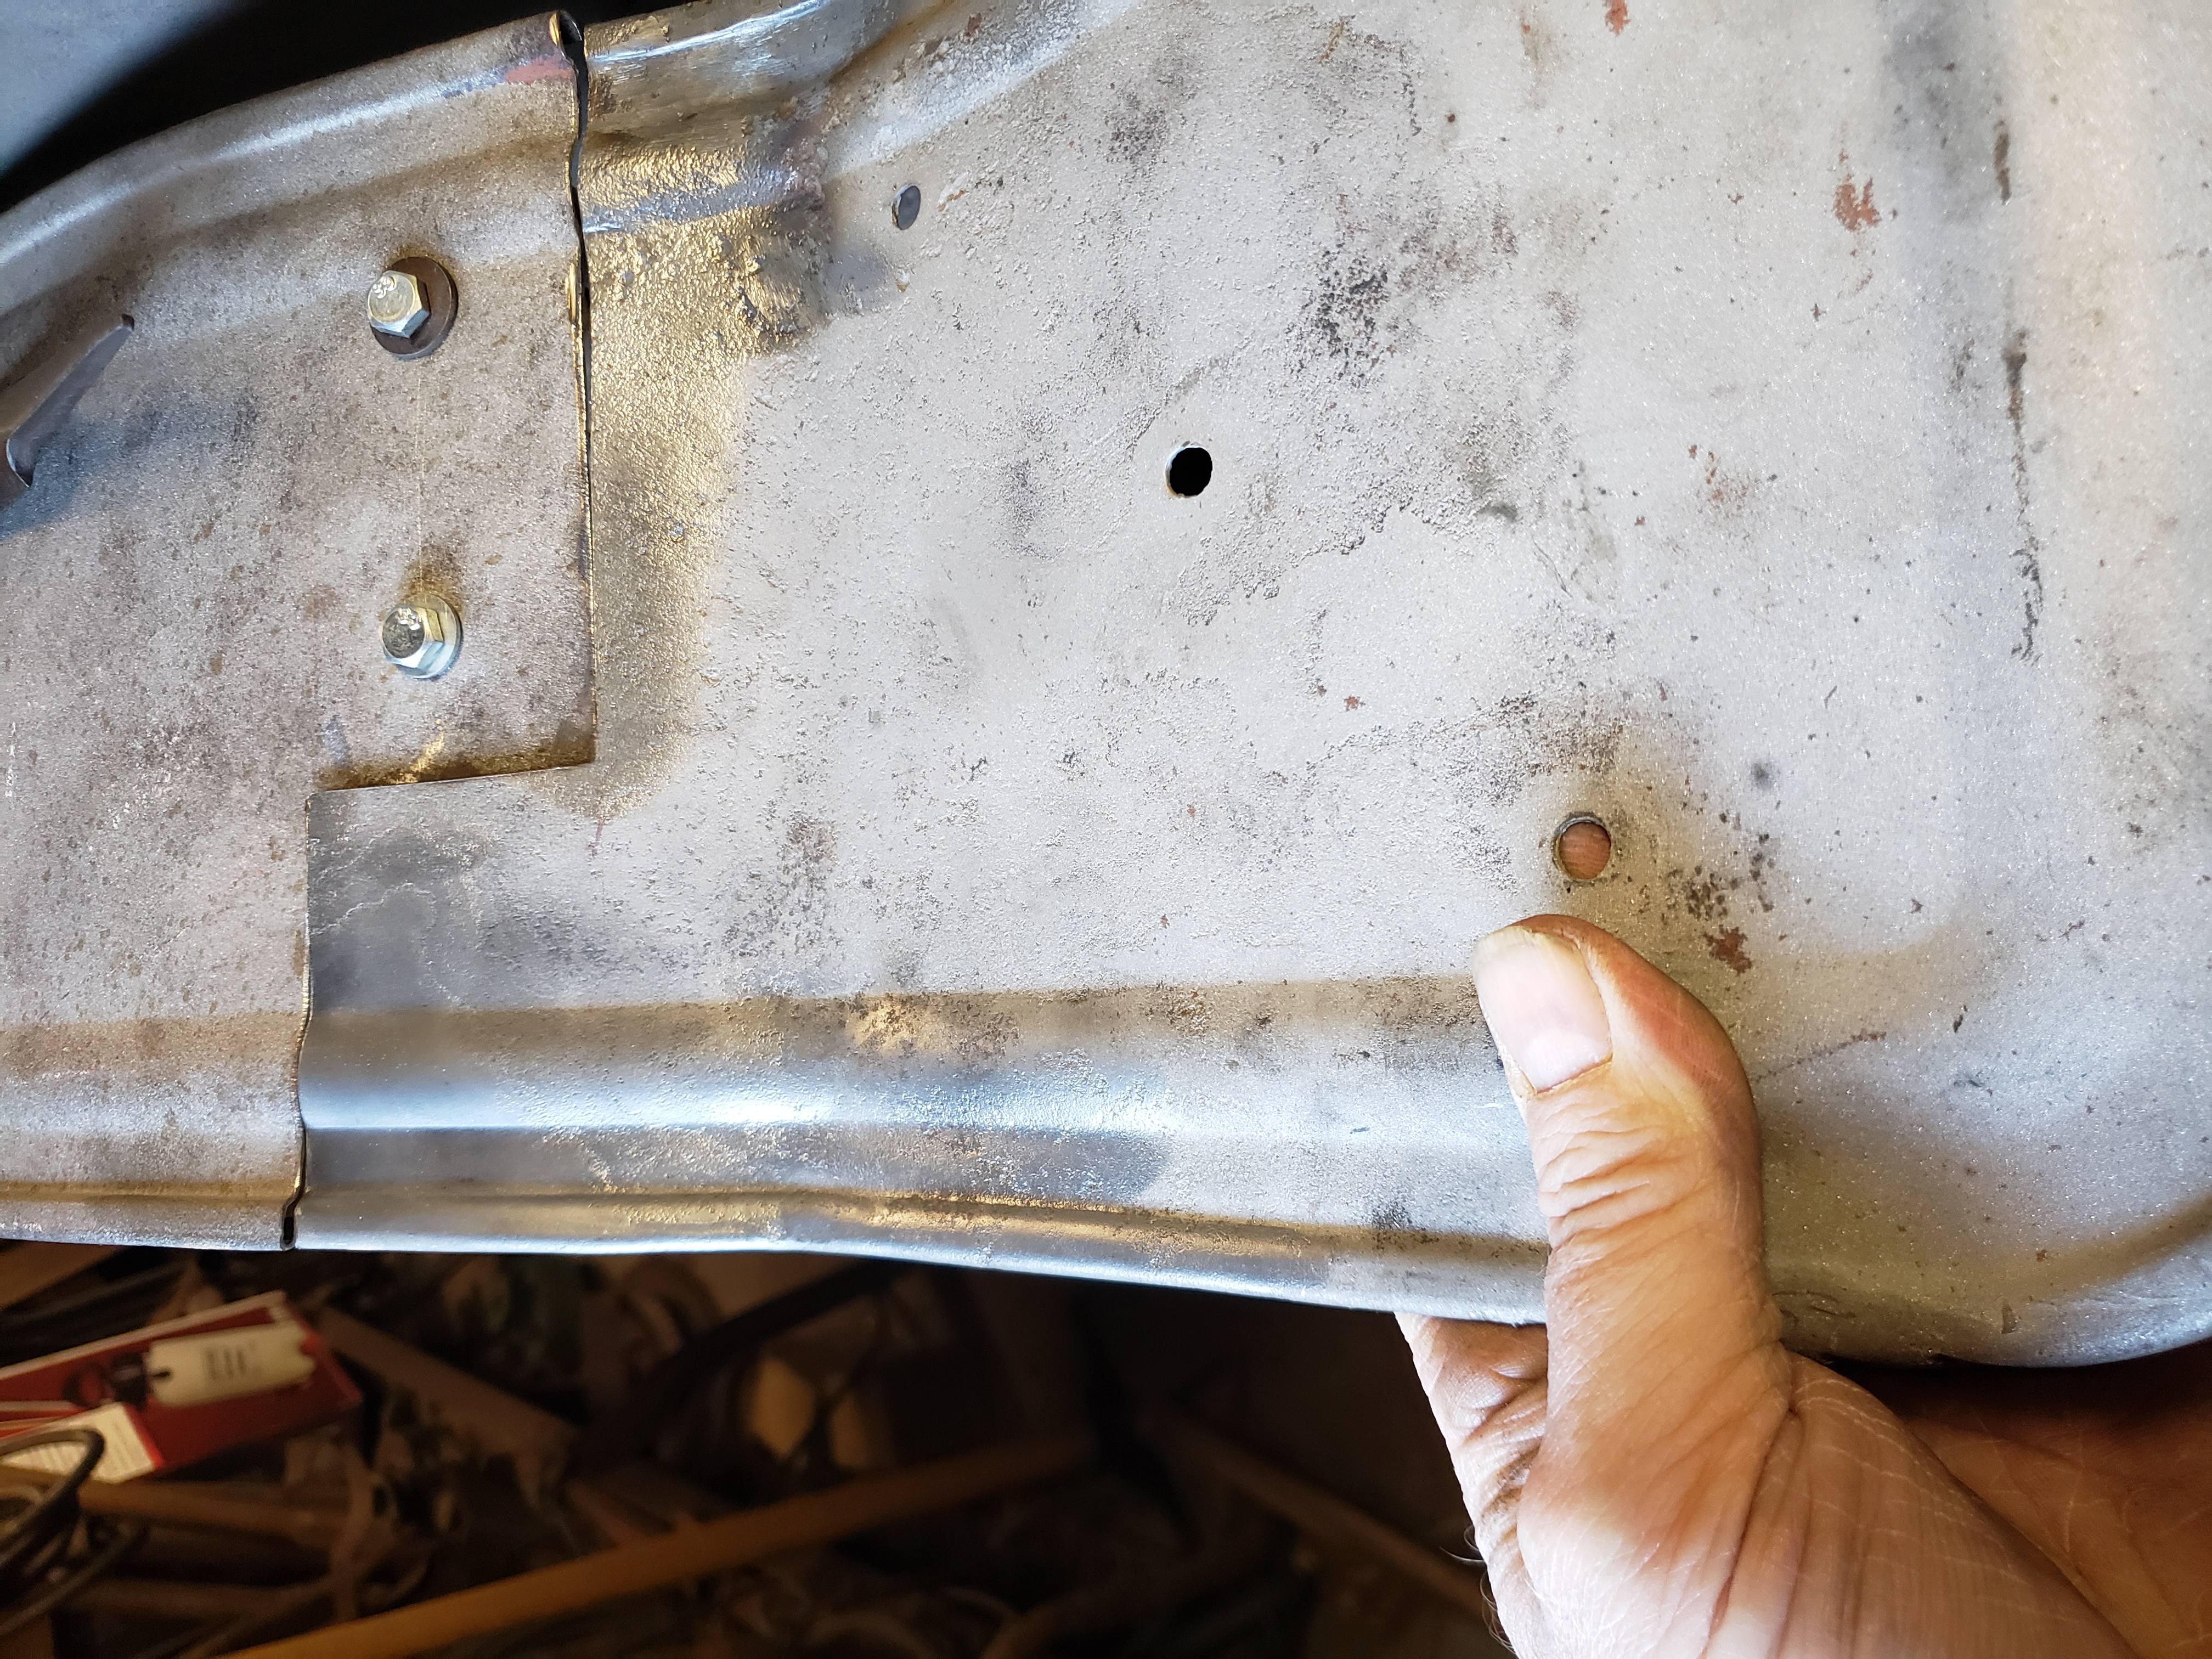
| Holding the patch in place as I finish fitting it into the fender. Note how I had to replace one of the holes. Click on the picture to see the full size. | The patch is now tacked in place in this photo. The beads line up well. Click on the picture to see the full size. |
With his passing, I also acquired three of his cars: a 1909 Sears Motorbuggy, a 1917 Ford Model T Touring and a 1930 Ford Model A Tudor Sedan. I have been spending time working on these cars and finding places to store them (including the walk out basement in my house for the Sears).
With other projects caught up, I started back into the E-M-F restoration. I started by straightening the fender brackets until I was happy with how the finder was sitting on the car.
I also cut the back off of a spare rear fender for a 5-Passenger touring to act as the patch for the missing piece from my car. I had four fenders to choose from and only one of them did the beads line up well enough to use. Thank you lord!
You can see from the picture on the left above the patch held in place as I am checking fit. Note that I had to take out one of the mounting holes in the original fender because the metal was in such bad shape, I did not think I could weld onto it. But I did not want to lose all of the holes because I needed them to align the fender.
Once I was happy with the way it fit, I tacked it into place. You can see this in the photo on the right above.

|
|
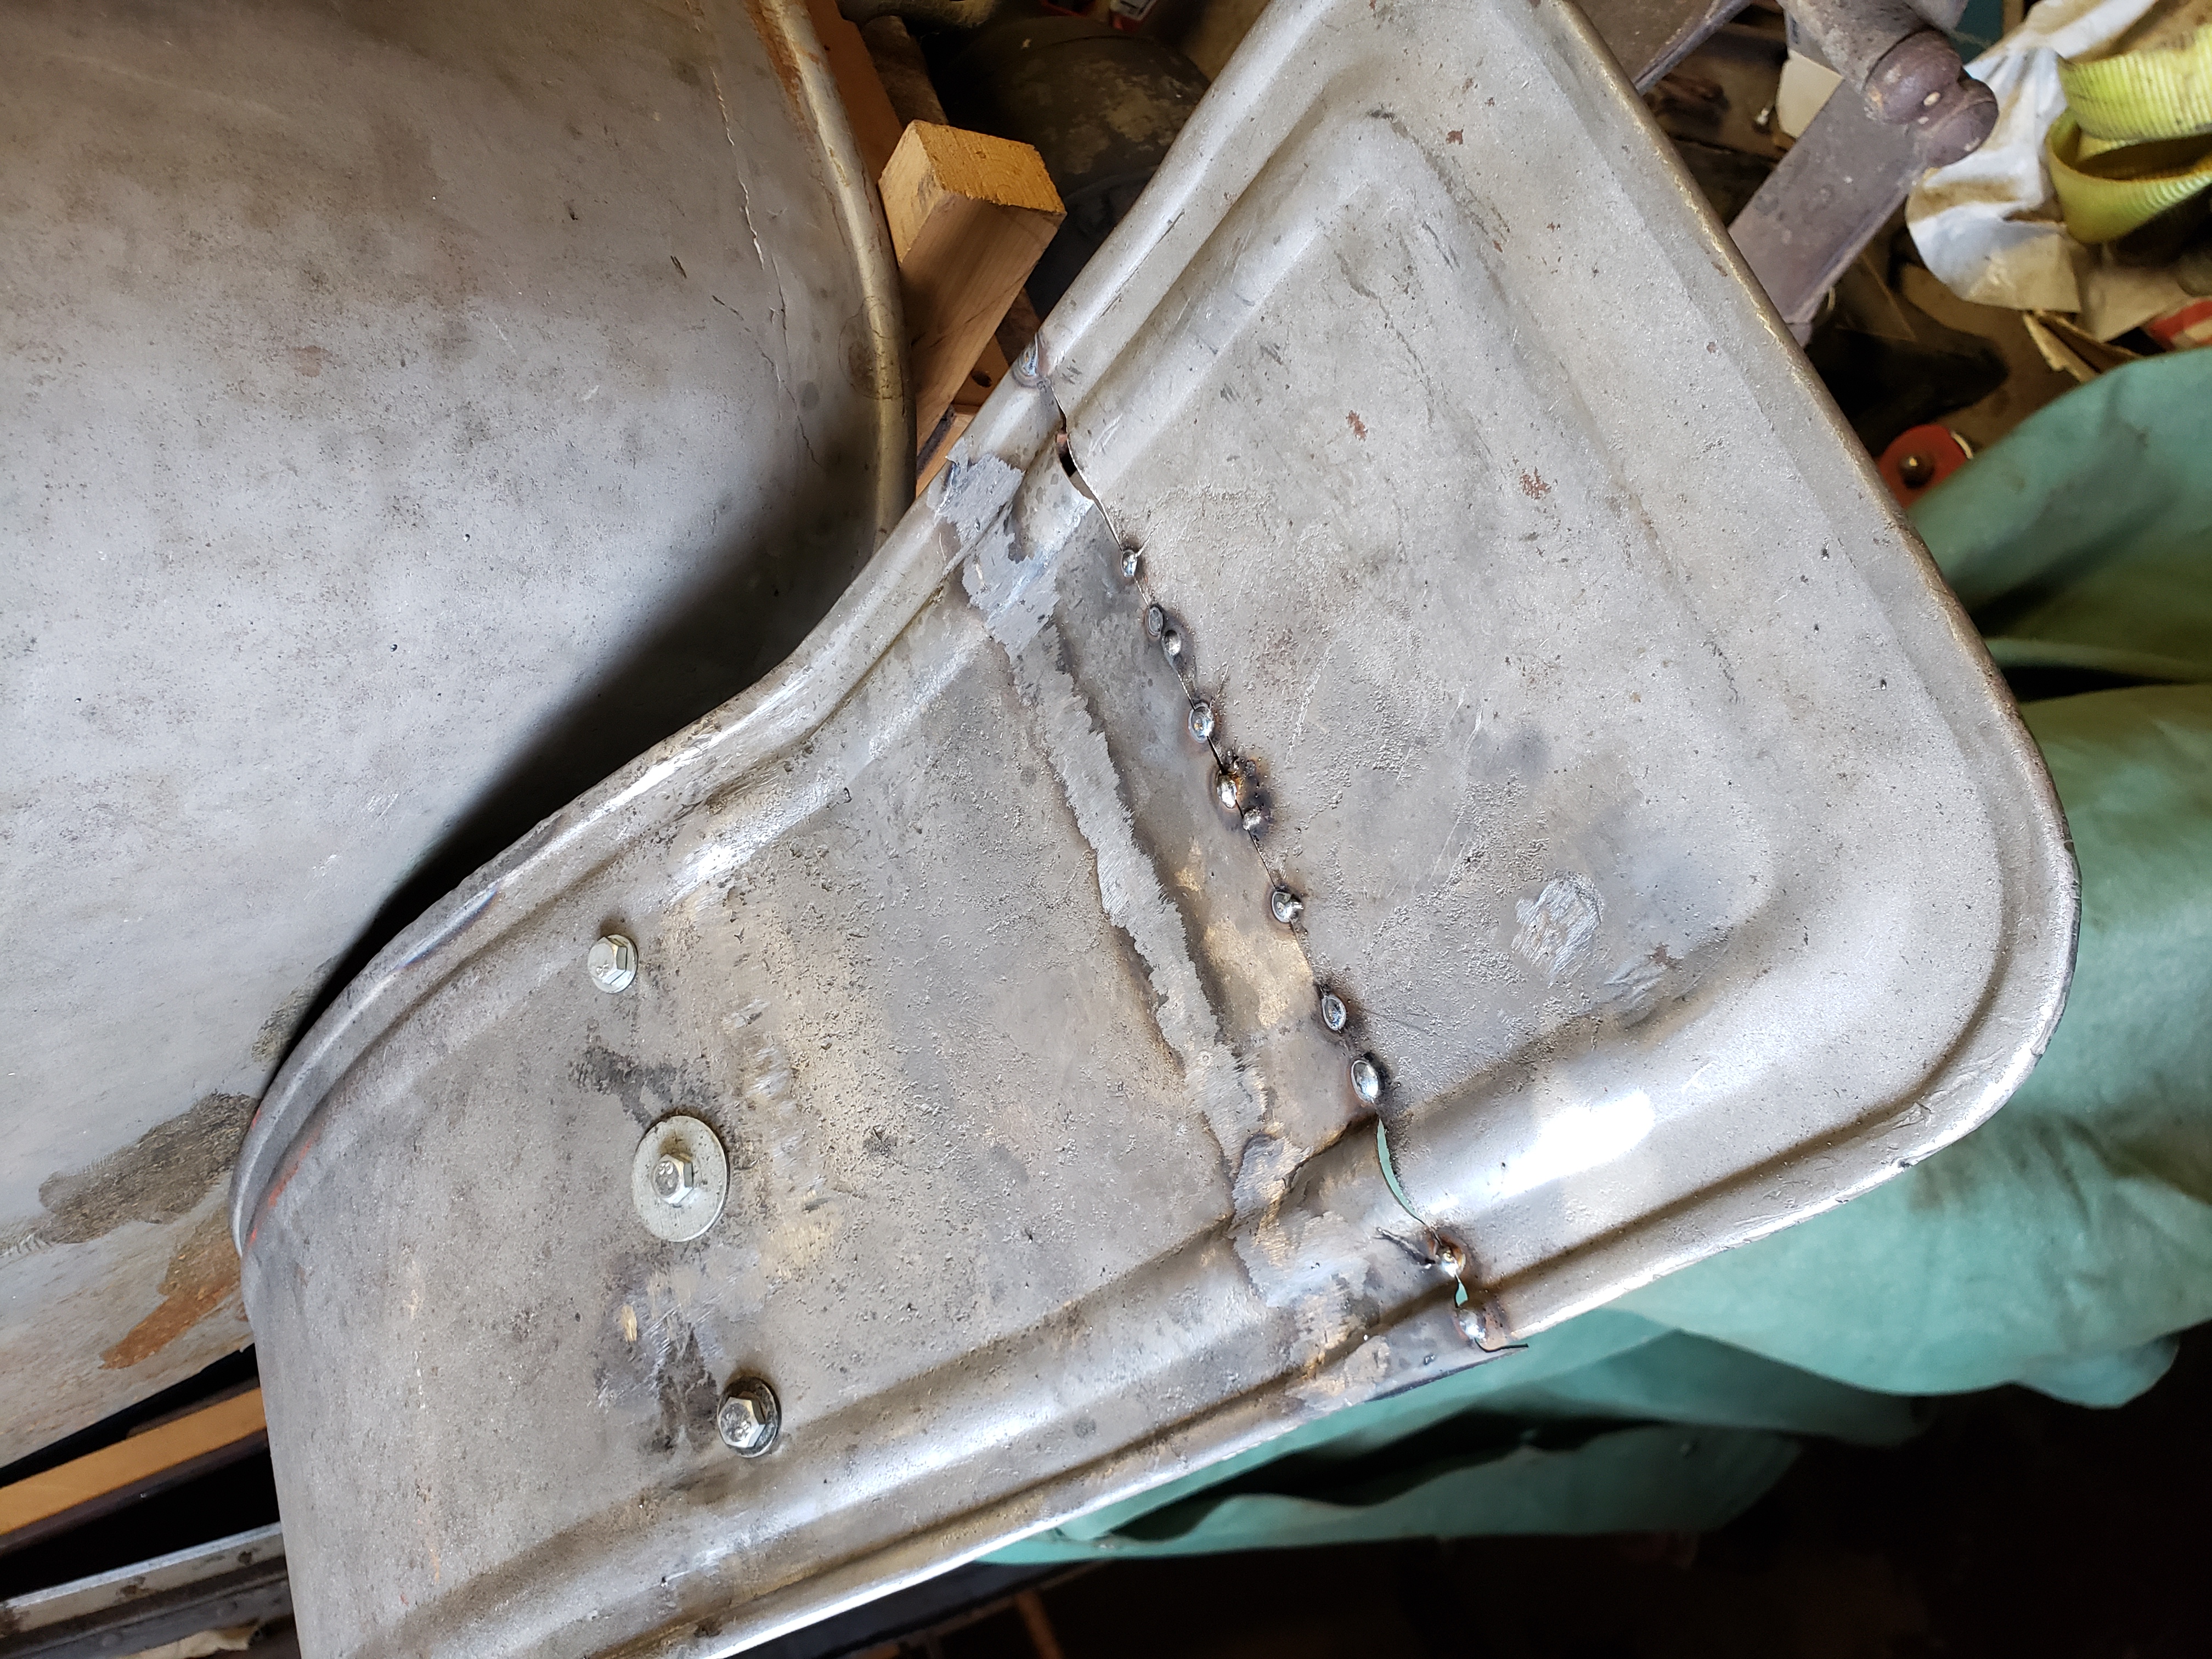
| The rear patch all welded in and fitting the inside fender panel. Click on the picture to see the full size. | View of the outside of the welded in patch. Click on the picture to see the full size. |
I included a picture of the outside of the fender so you can see the rear bill of the fender.
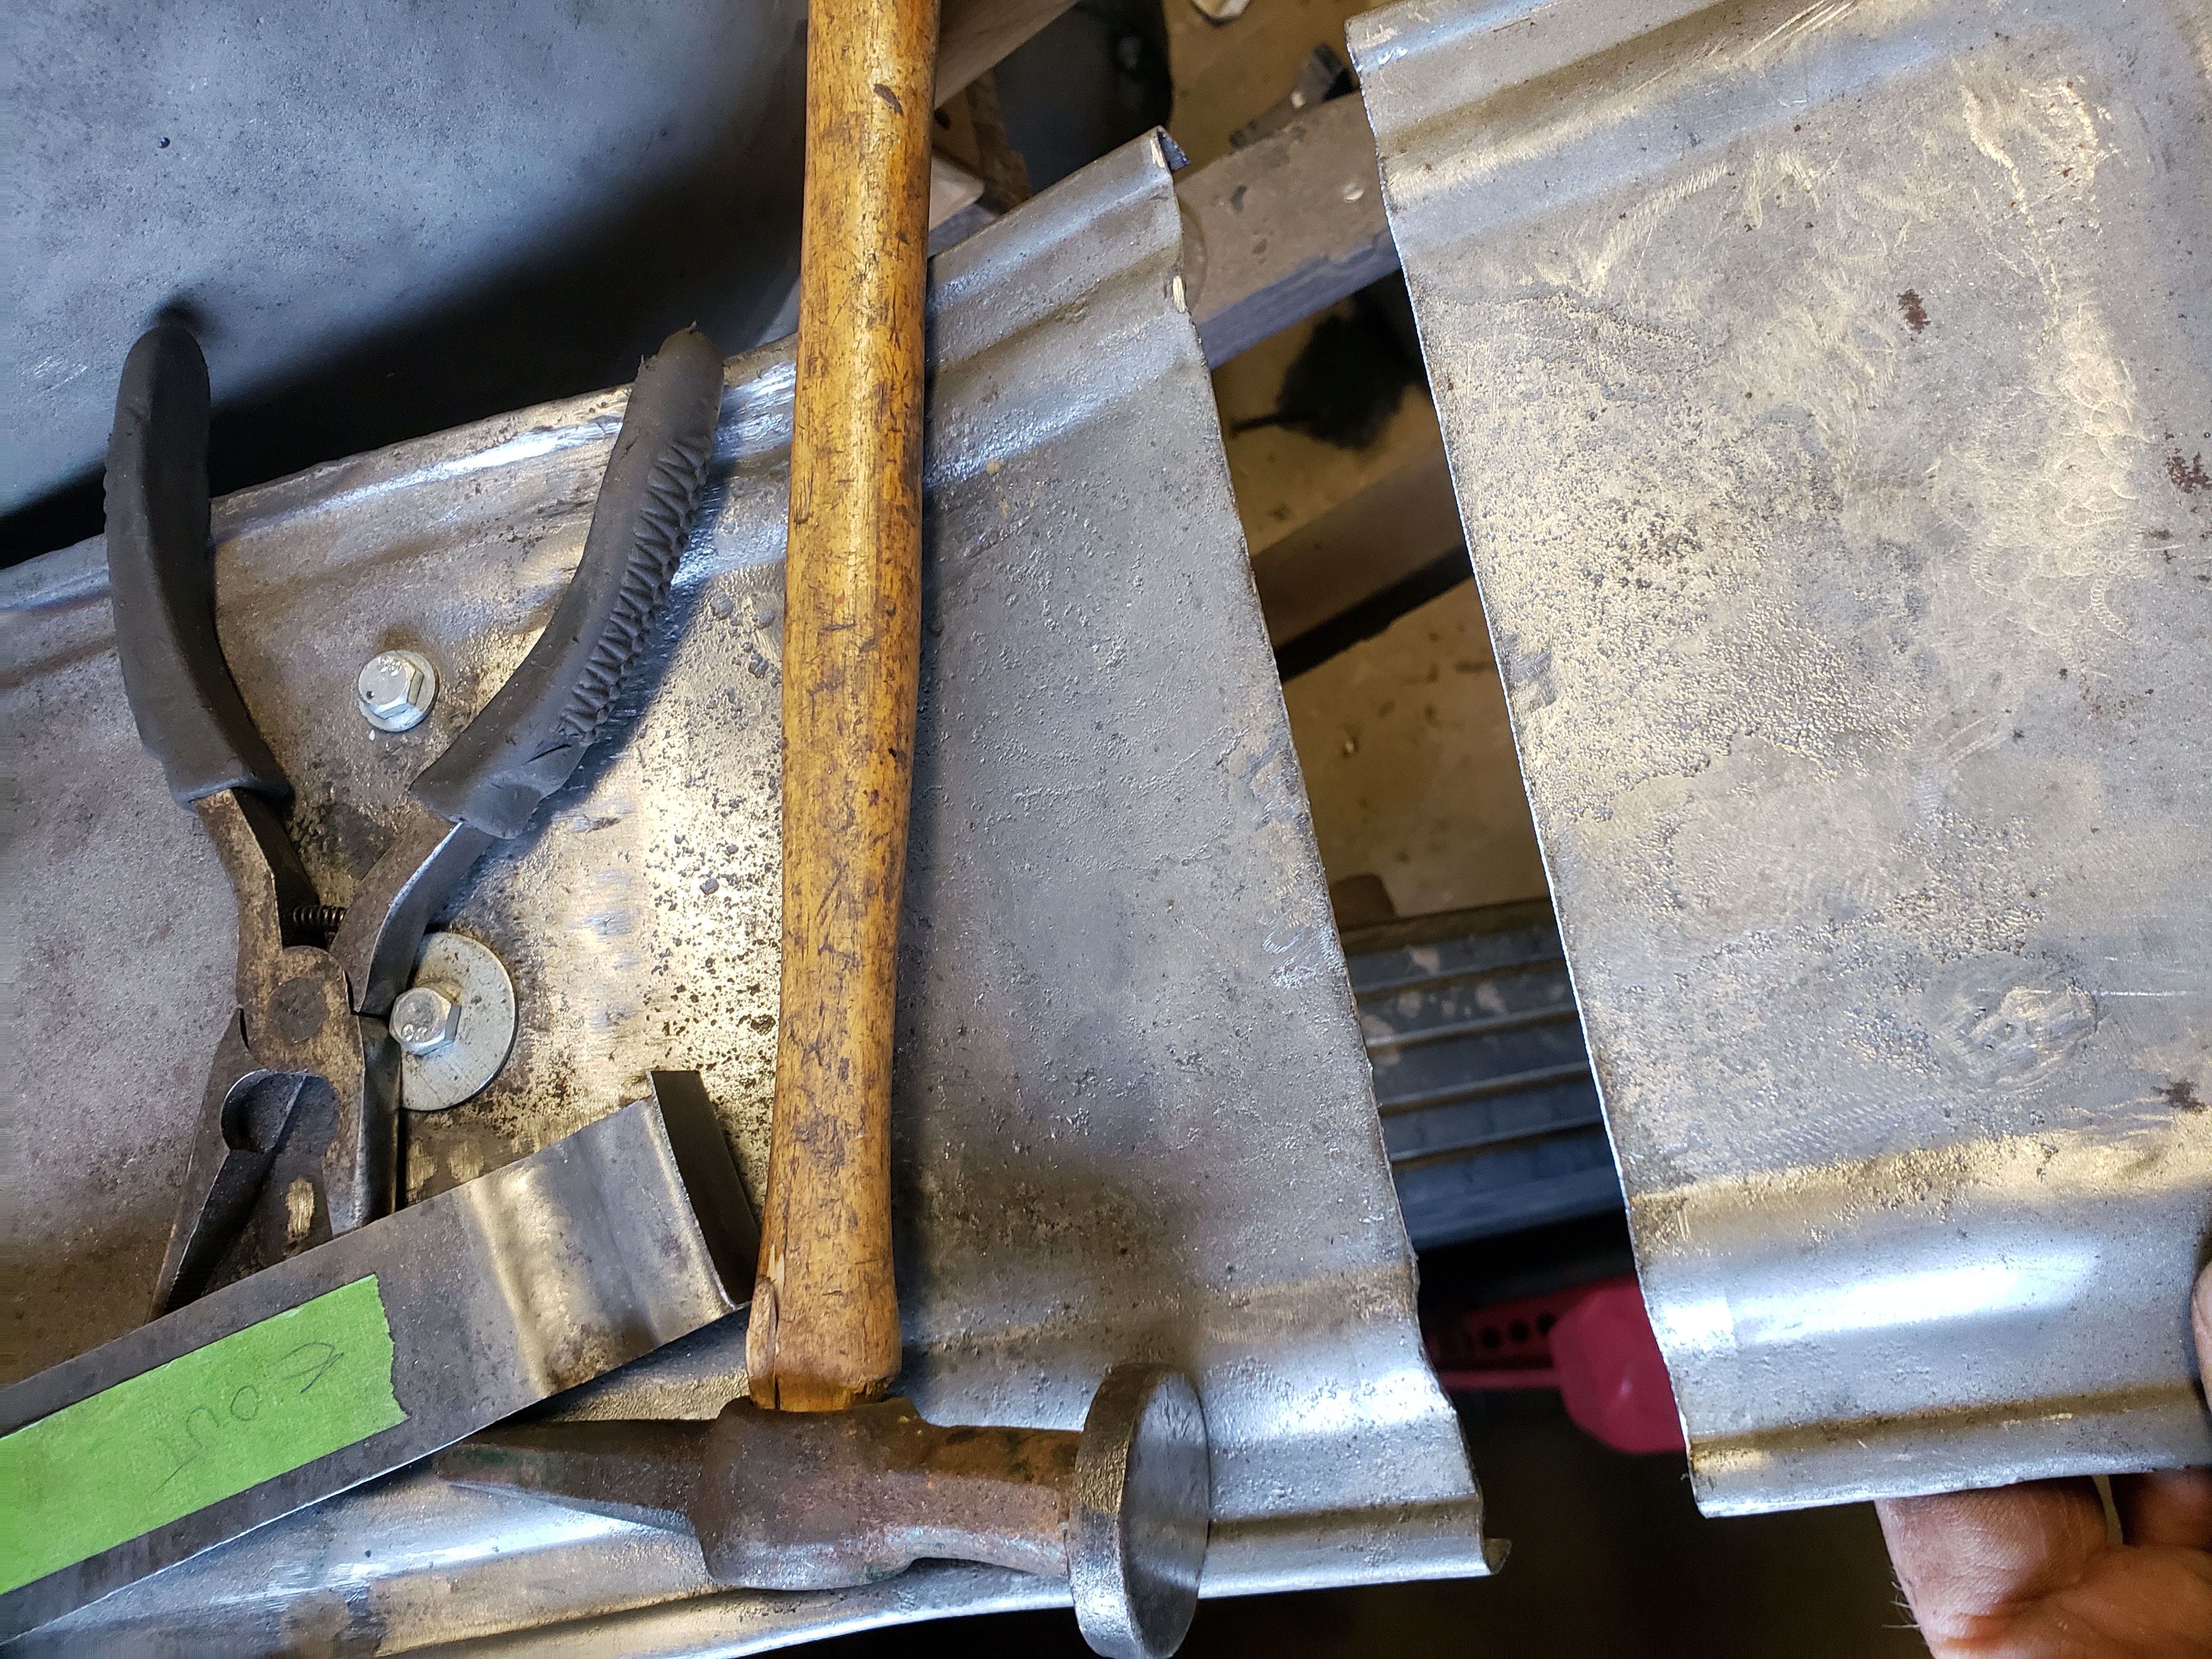
The pictures below show the alignment of the beads on the fender and the patch at the running board end of the fender.
Making the bead on the running board end on the very outside edges of the fender was a bit of a challenge, but I think they ended up looking nice.
Next up I need to fabricate the entire outside edge of the fender. I will be starting with parts from the fender I sacrificed along with the few pieces that were left of the original parts of this fender.
|
|
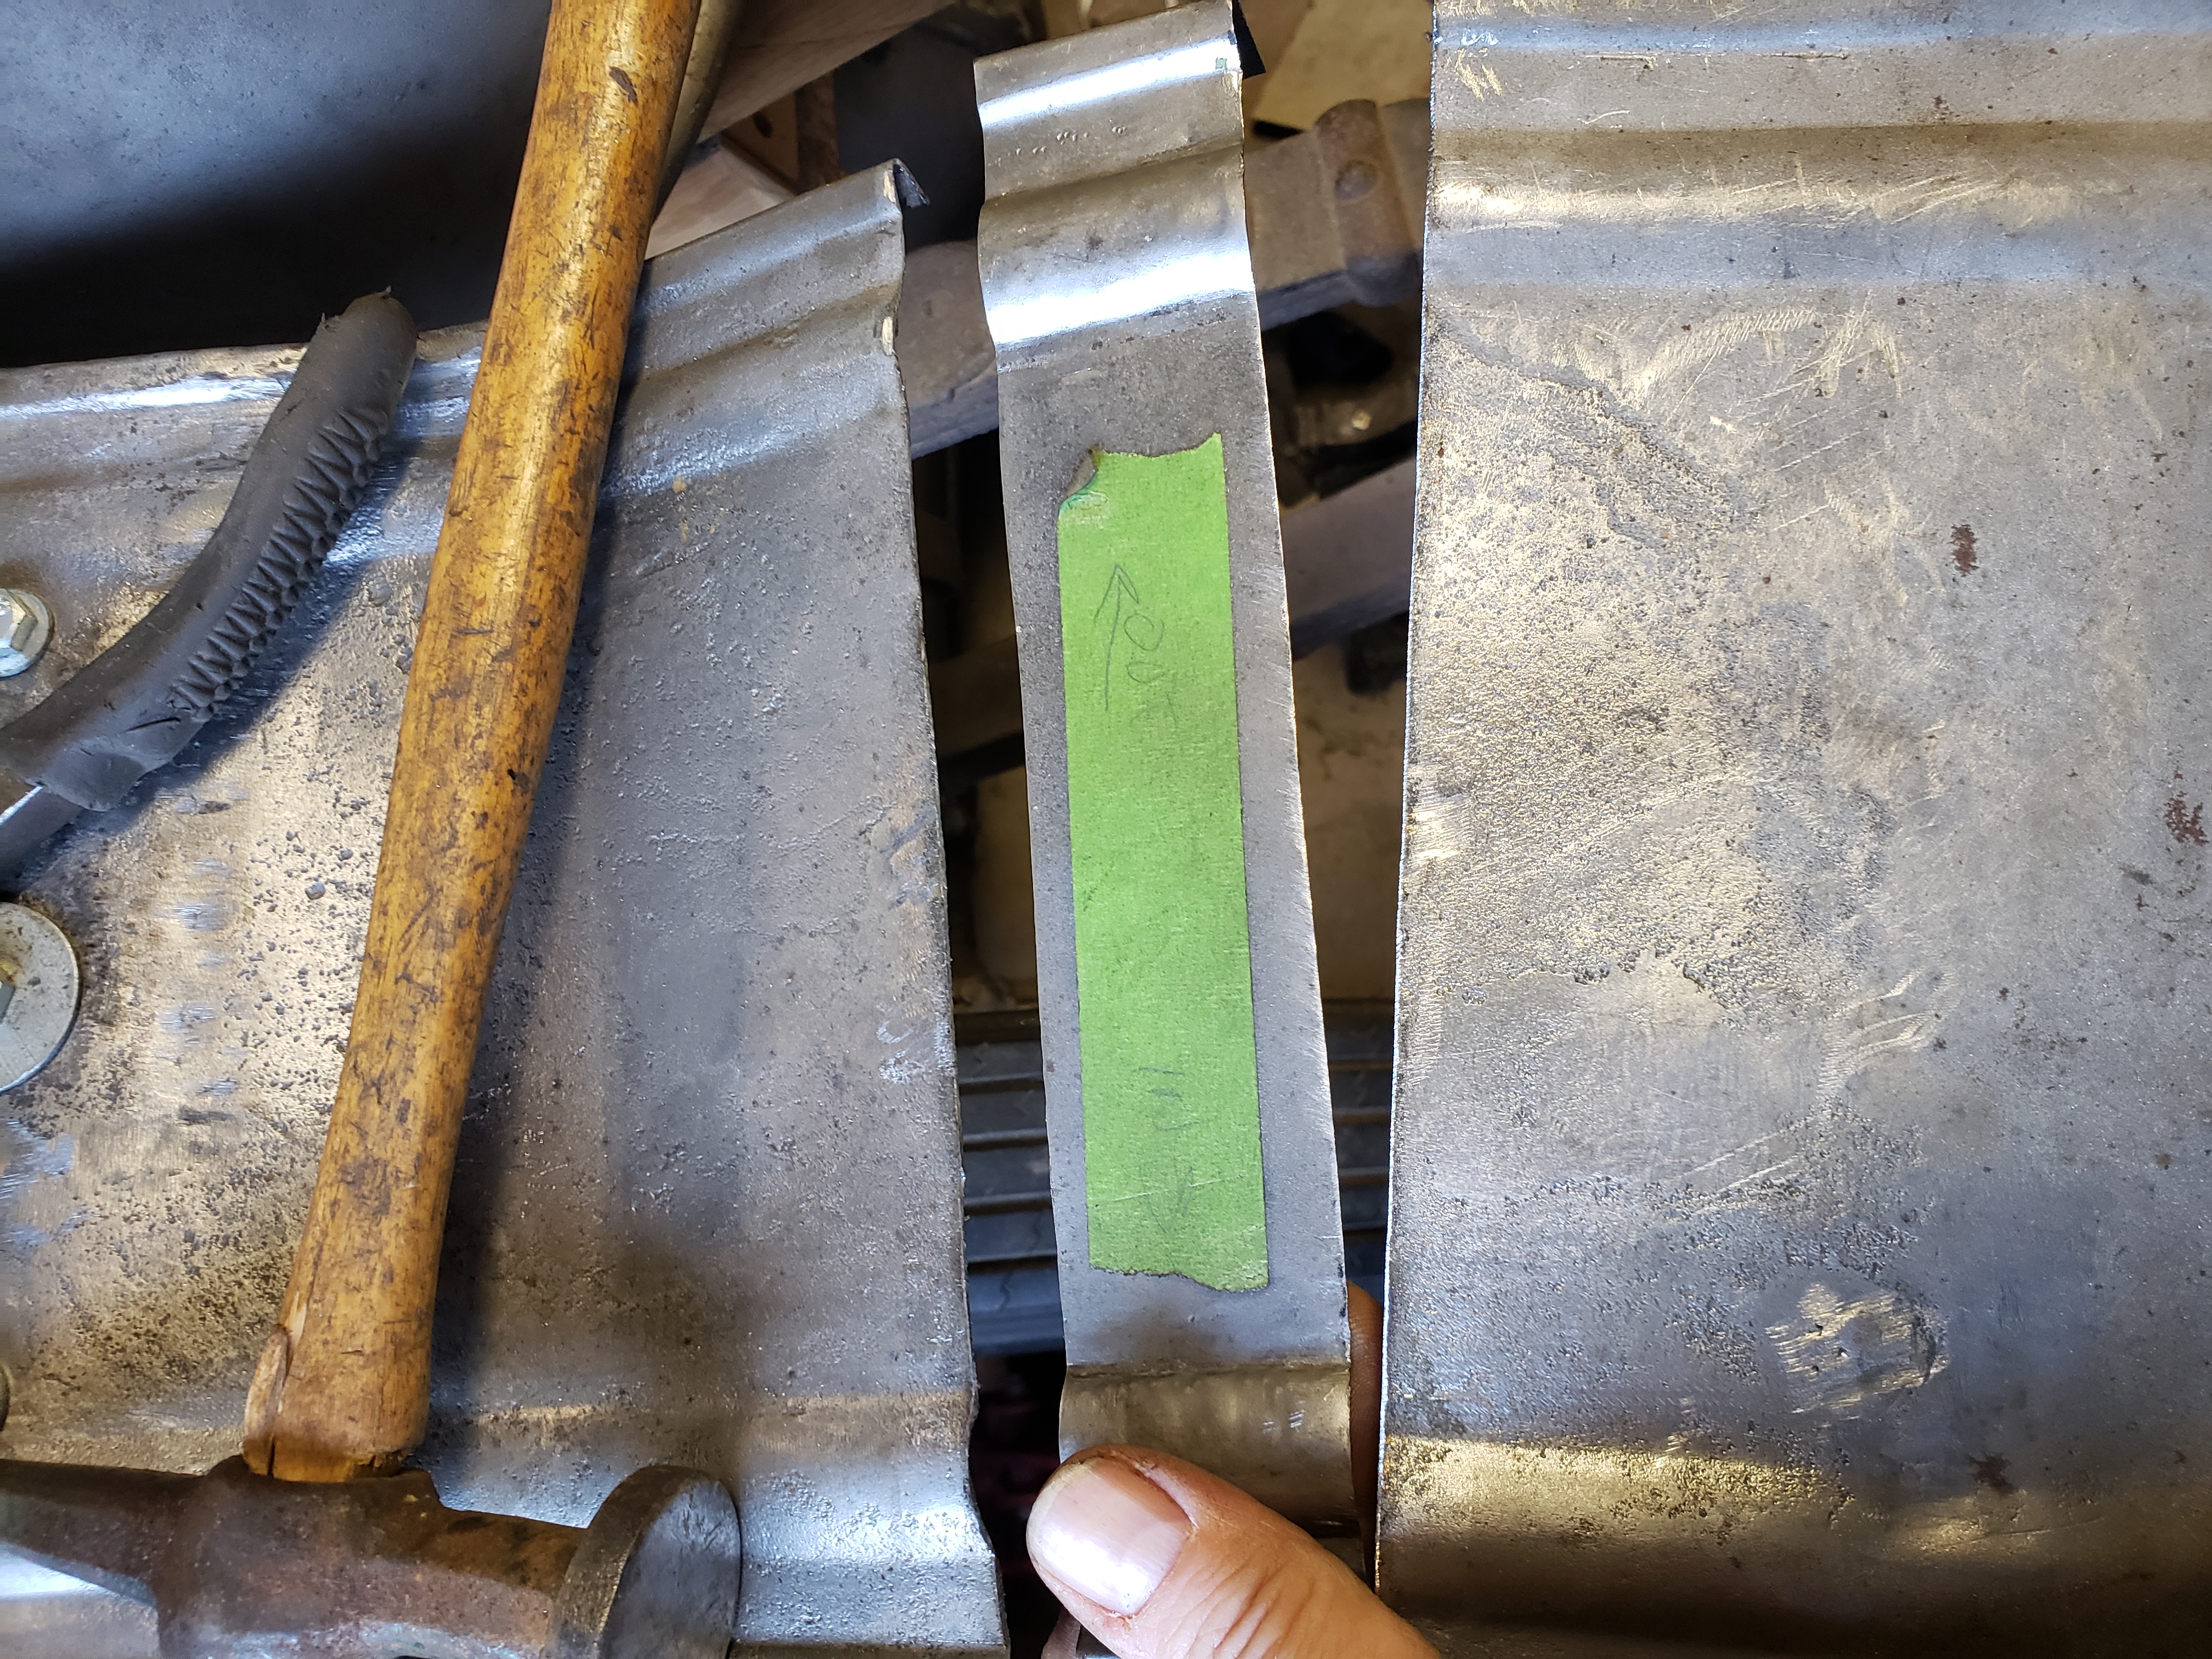
| Look how nice the beads line up on the patch! Click on the picture to see the full size. | The running board end patch lines up pretty good as well! Click on the picture to see the full size. |
Sunday, January 23, 2022 9:59 PM
|
|
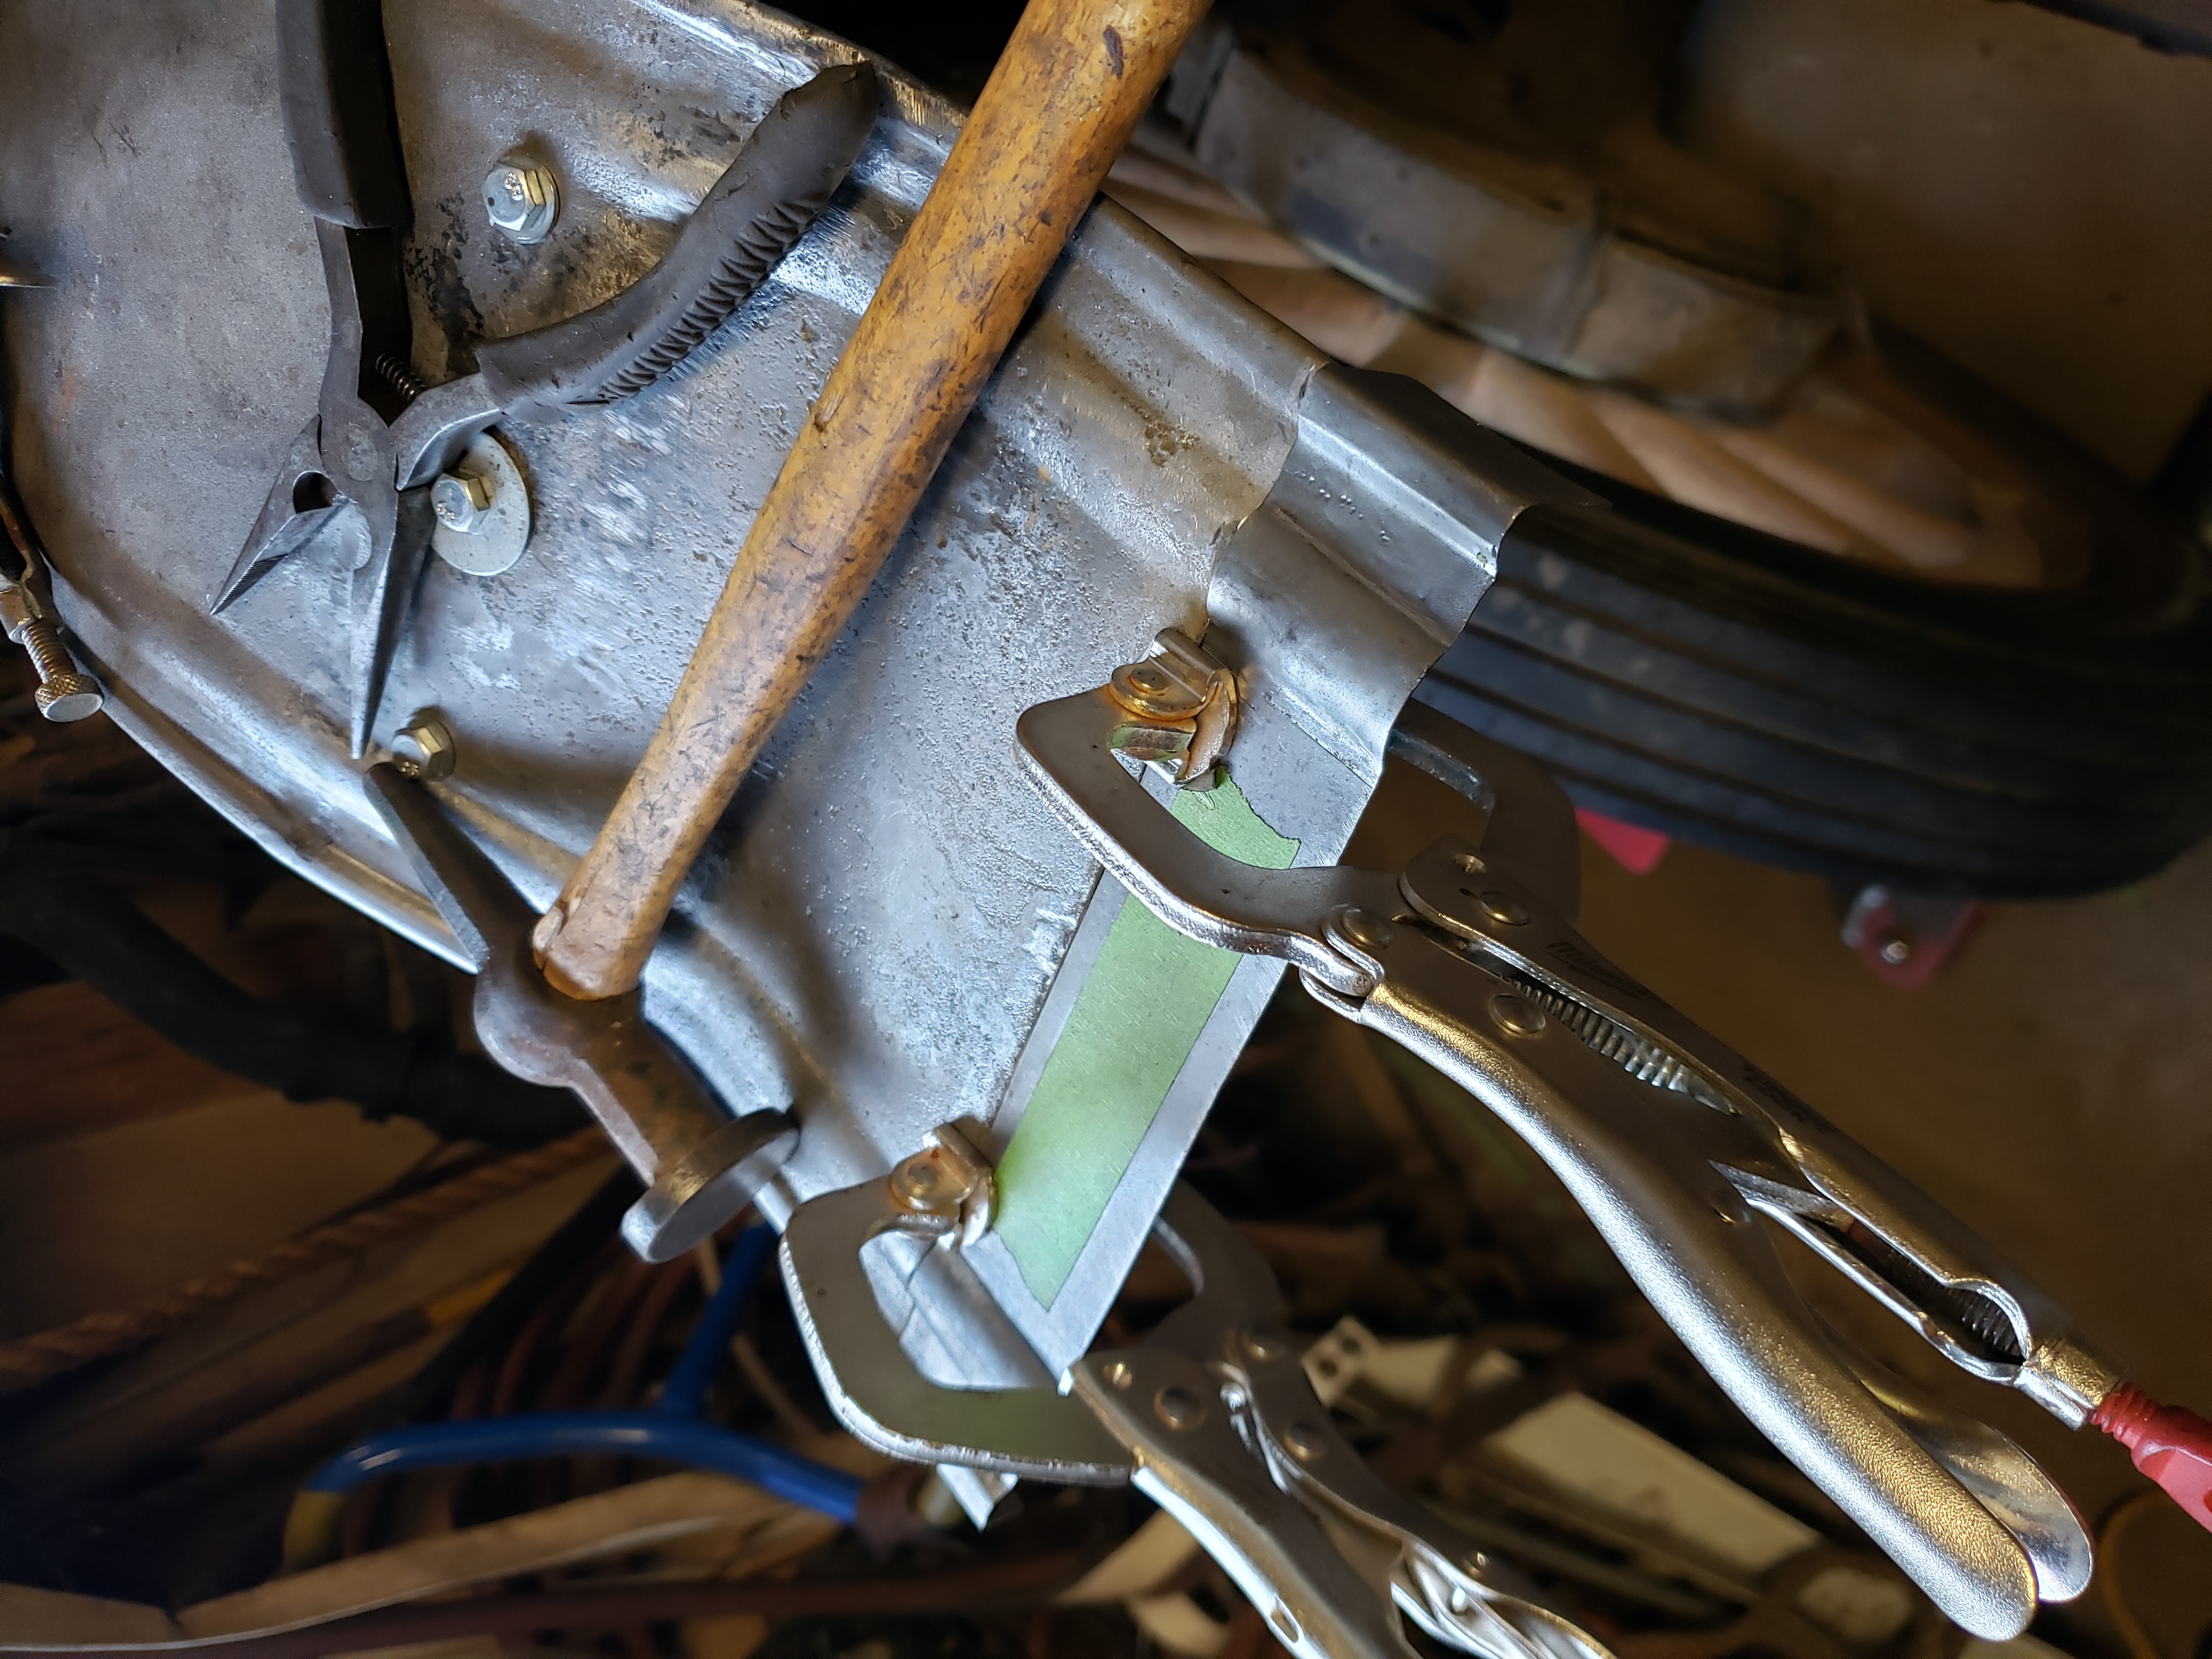
| The outside edge of the fender showing the edge held in place by the clamps mentioned. Also note the shiney part of the fender bracket showing where I lengthened it.Click on the picture to see the full size. | The back of the inside edge of the fender. Lines up nice with the inside panel. Click on the picture to see the full size. |
I was planning to start the fabrication of this edge this last weekend. But the more I looked at the way the fender was lining up, the more I did not like it. It just was not as straight as I wanted. I mean. I am not looking for perfection, but even I have a certain standard.
So I started to look at why it was not lining up. So, I disconnected it from the running board. Wonder of wonders, the lines looked better. I found that the fender was naturally hanging about ¼ to ½ inch below the running board, so when I pulled it up, it was distorting the shape. If you remember, when I started, the running board end of this fender was completely rusted off. When I fabricated a new end, I had to guess a bit to the length. So, I must not have gotten it right. My options were to leave it as it is or cut off the end I welded on, remove some material, and weld it back on. But was there another choice?
I decided to bolt the end back up to the running board and unbolt it from the first fender bracket up from the running board. Well, when I did this the lines looked good again, but the fender sat about ¼ inch from the bracket. The bracket lined up perfectly except for this gap. It appears I was presented with a third option of lengthening the fender iron by ¼ inch.
After much thought, I decided that this third option was the easiest solution. So that is what I did. I cut the bracket in the middle of a straight part, bolted it to the fender and the chassis, clamped the cut ends into a V-block and then filled in the gap carefully. I actually tacked it together on the car, then removed it and finished it up on the bench.
Once it was welded back together and cleaned up, I put it back on the car and it lined up the way I wanted.
Now I was back to fabricating the edge. I had the edge from the donor fender which fit around the back of the fender perfectly (since I took the patch from that same donor fender). I also had a pare the fit the running board end and curved about 1/3 of the way around the arc perfectly. So, I just needed to fill the gap. I kept fitting pieced I had until I found part of a piece that would fit the gap and the arc. I have all the parts fit in place now. On my next garage session I will weld the pieces together.
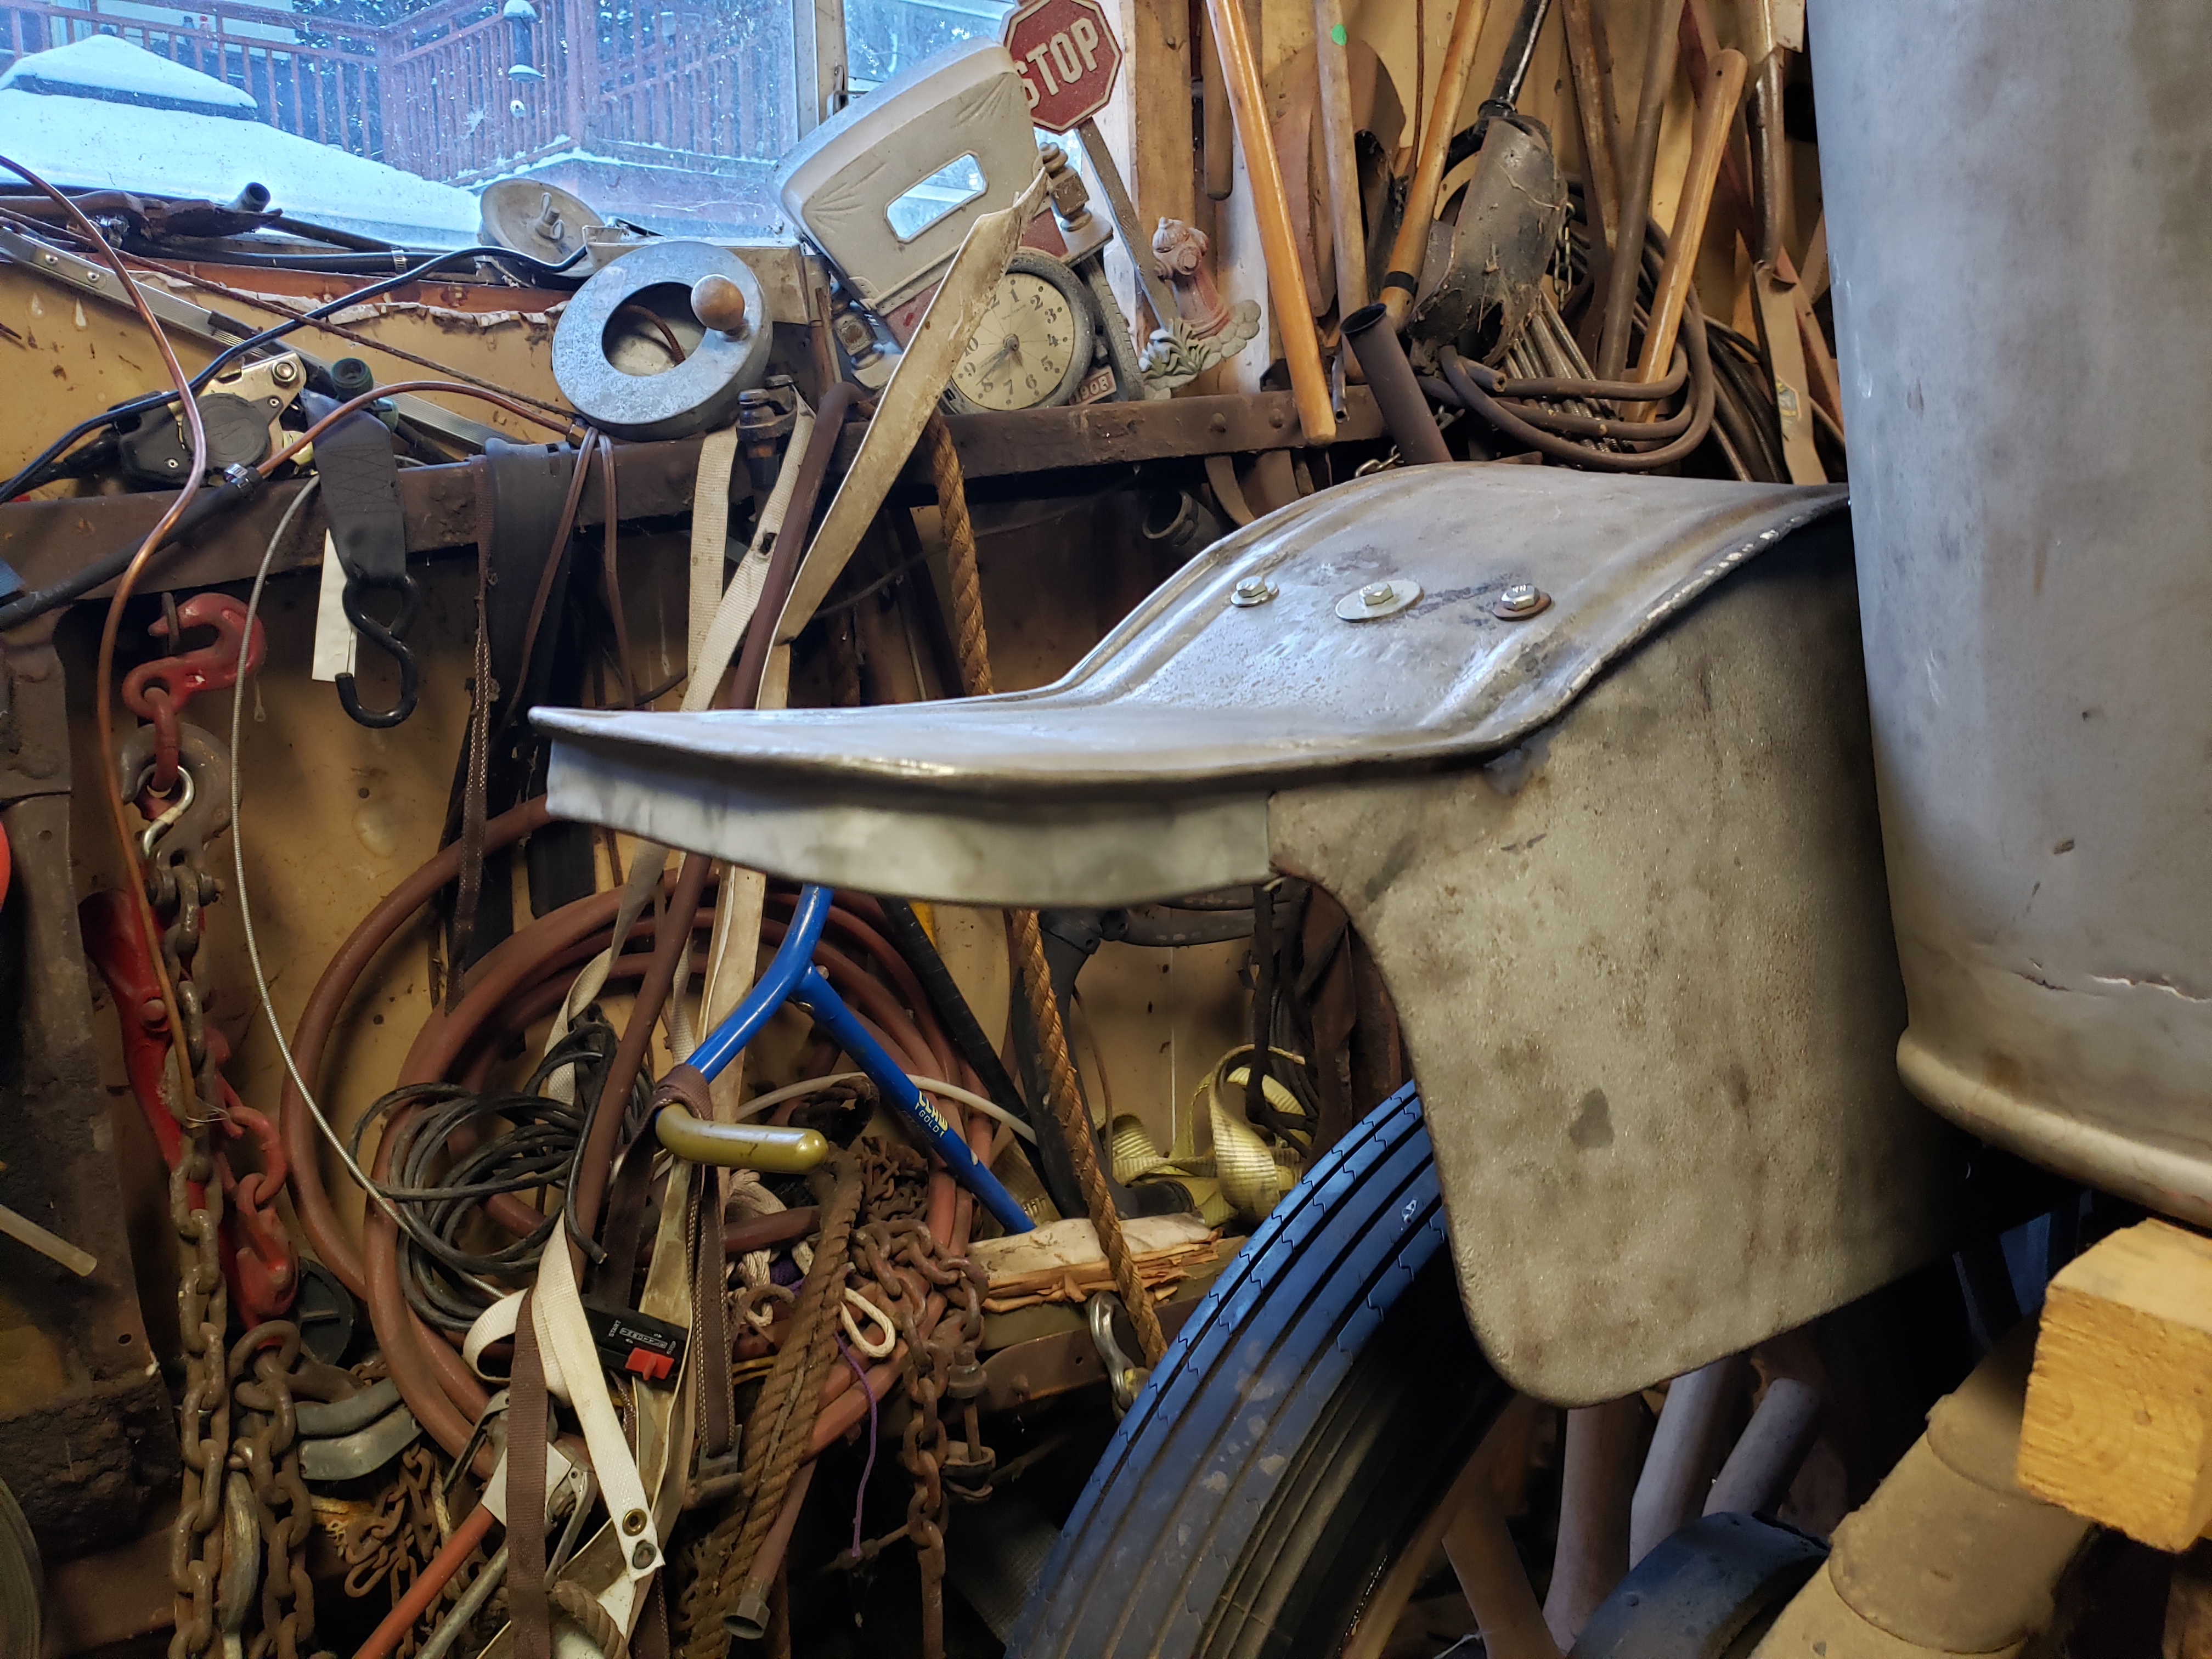
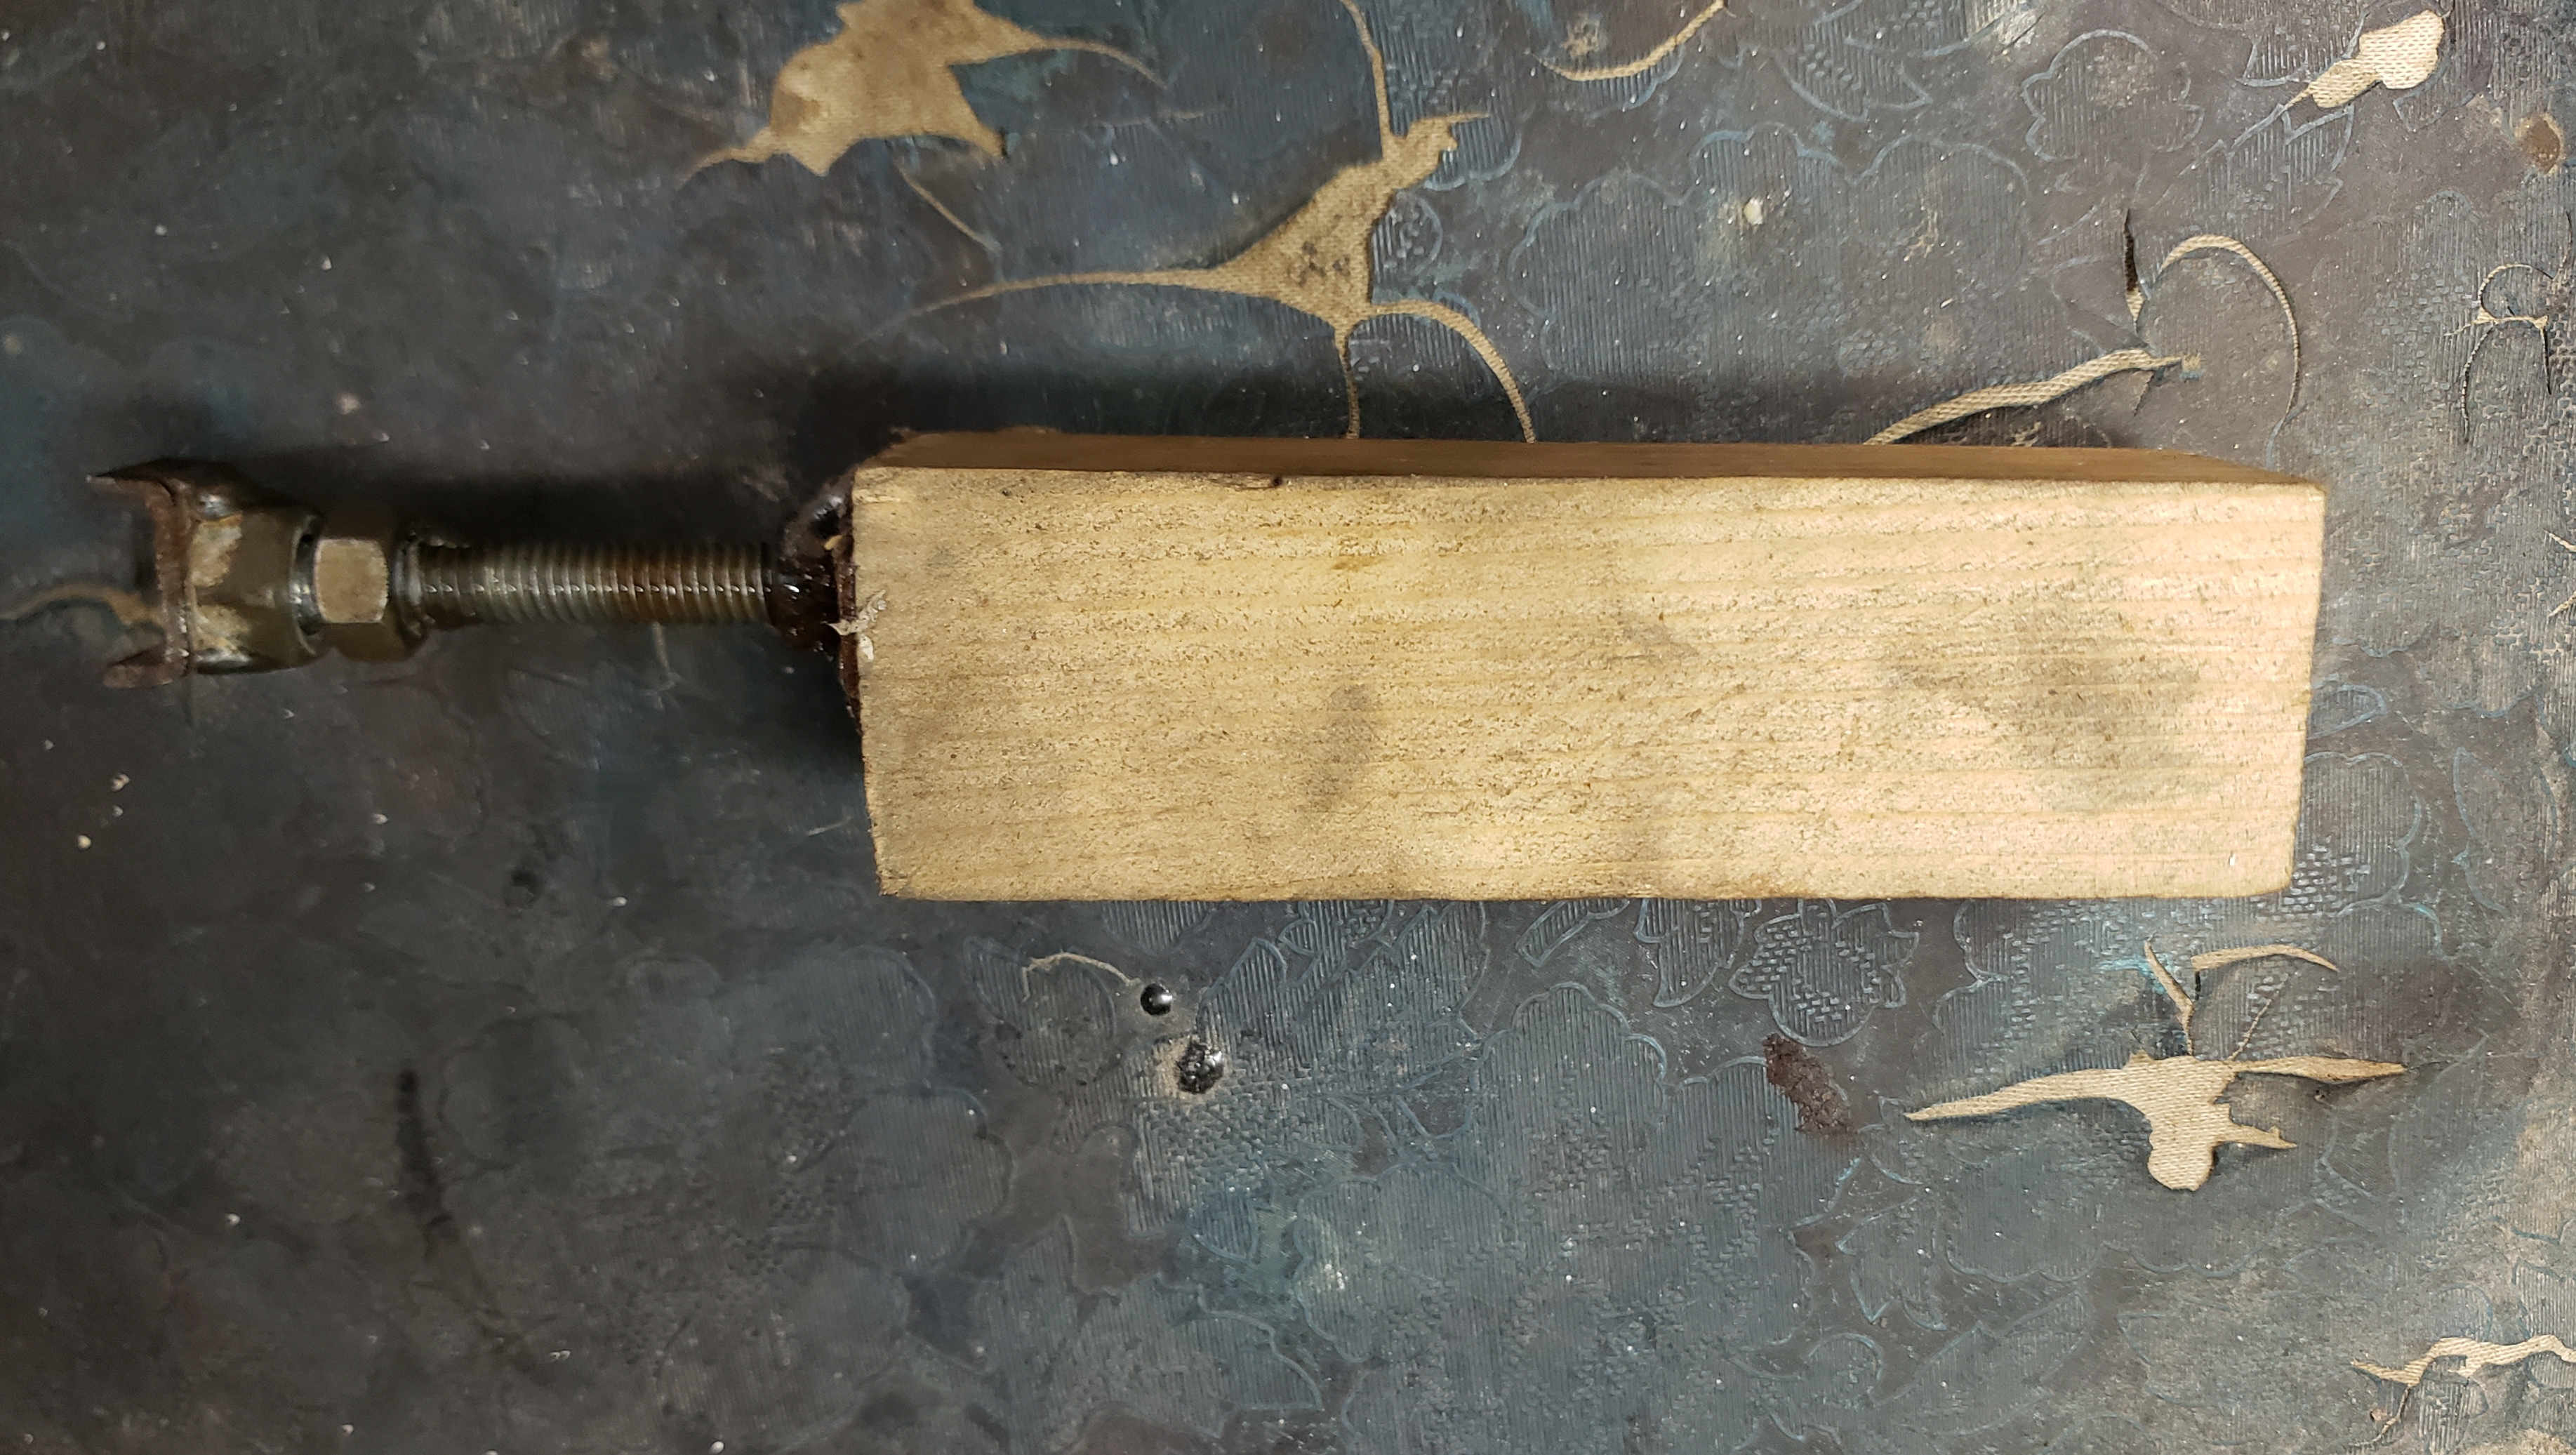
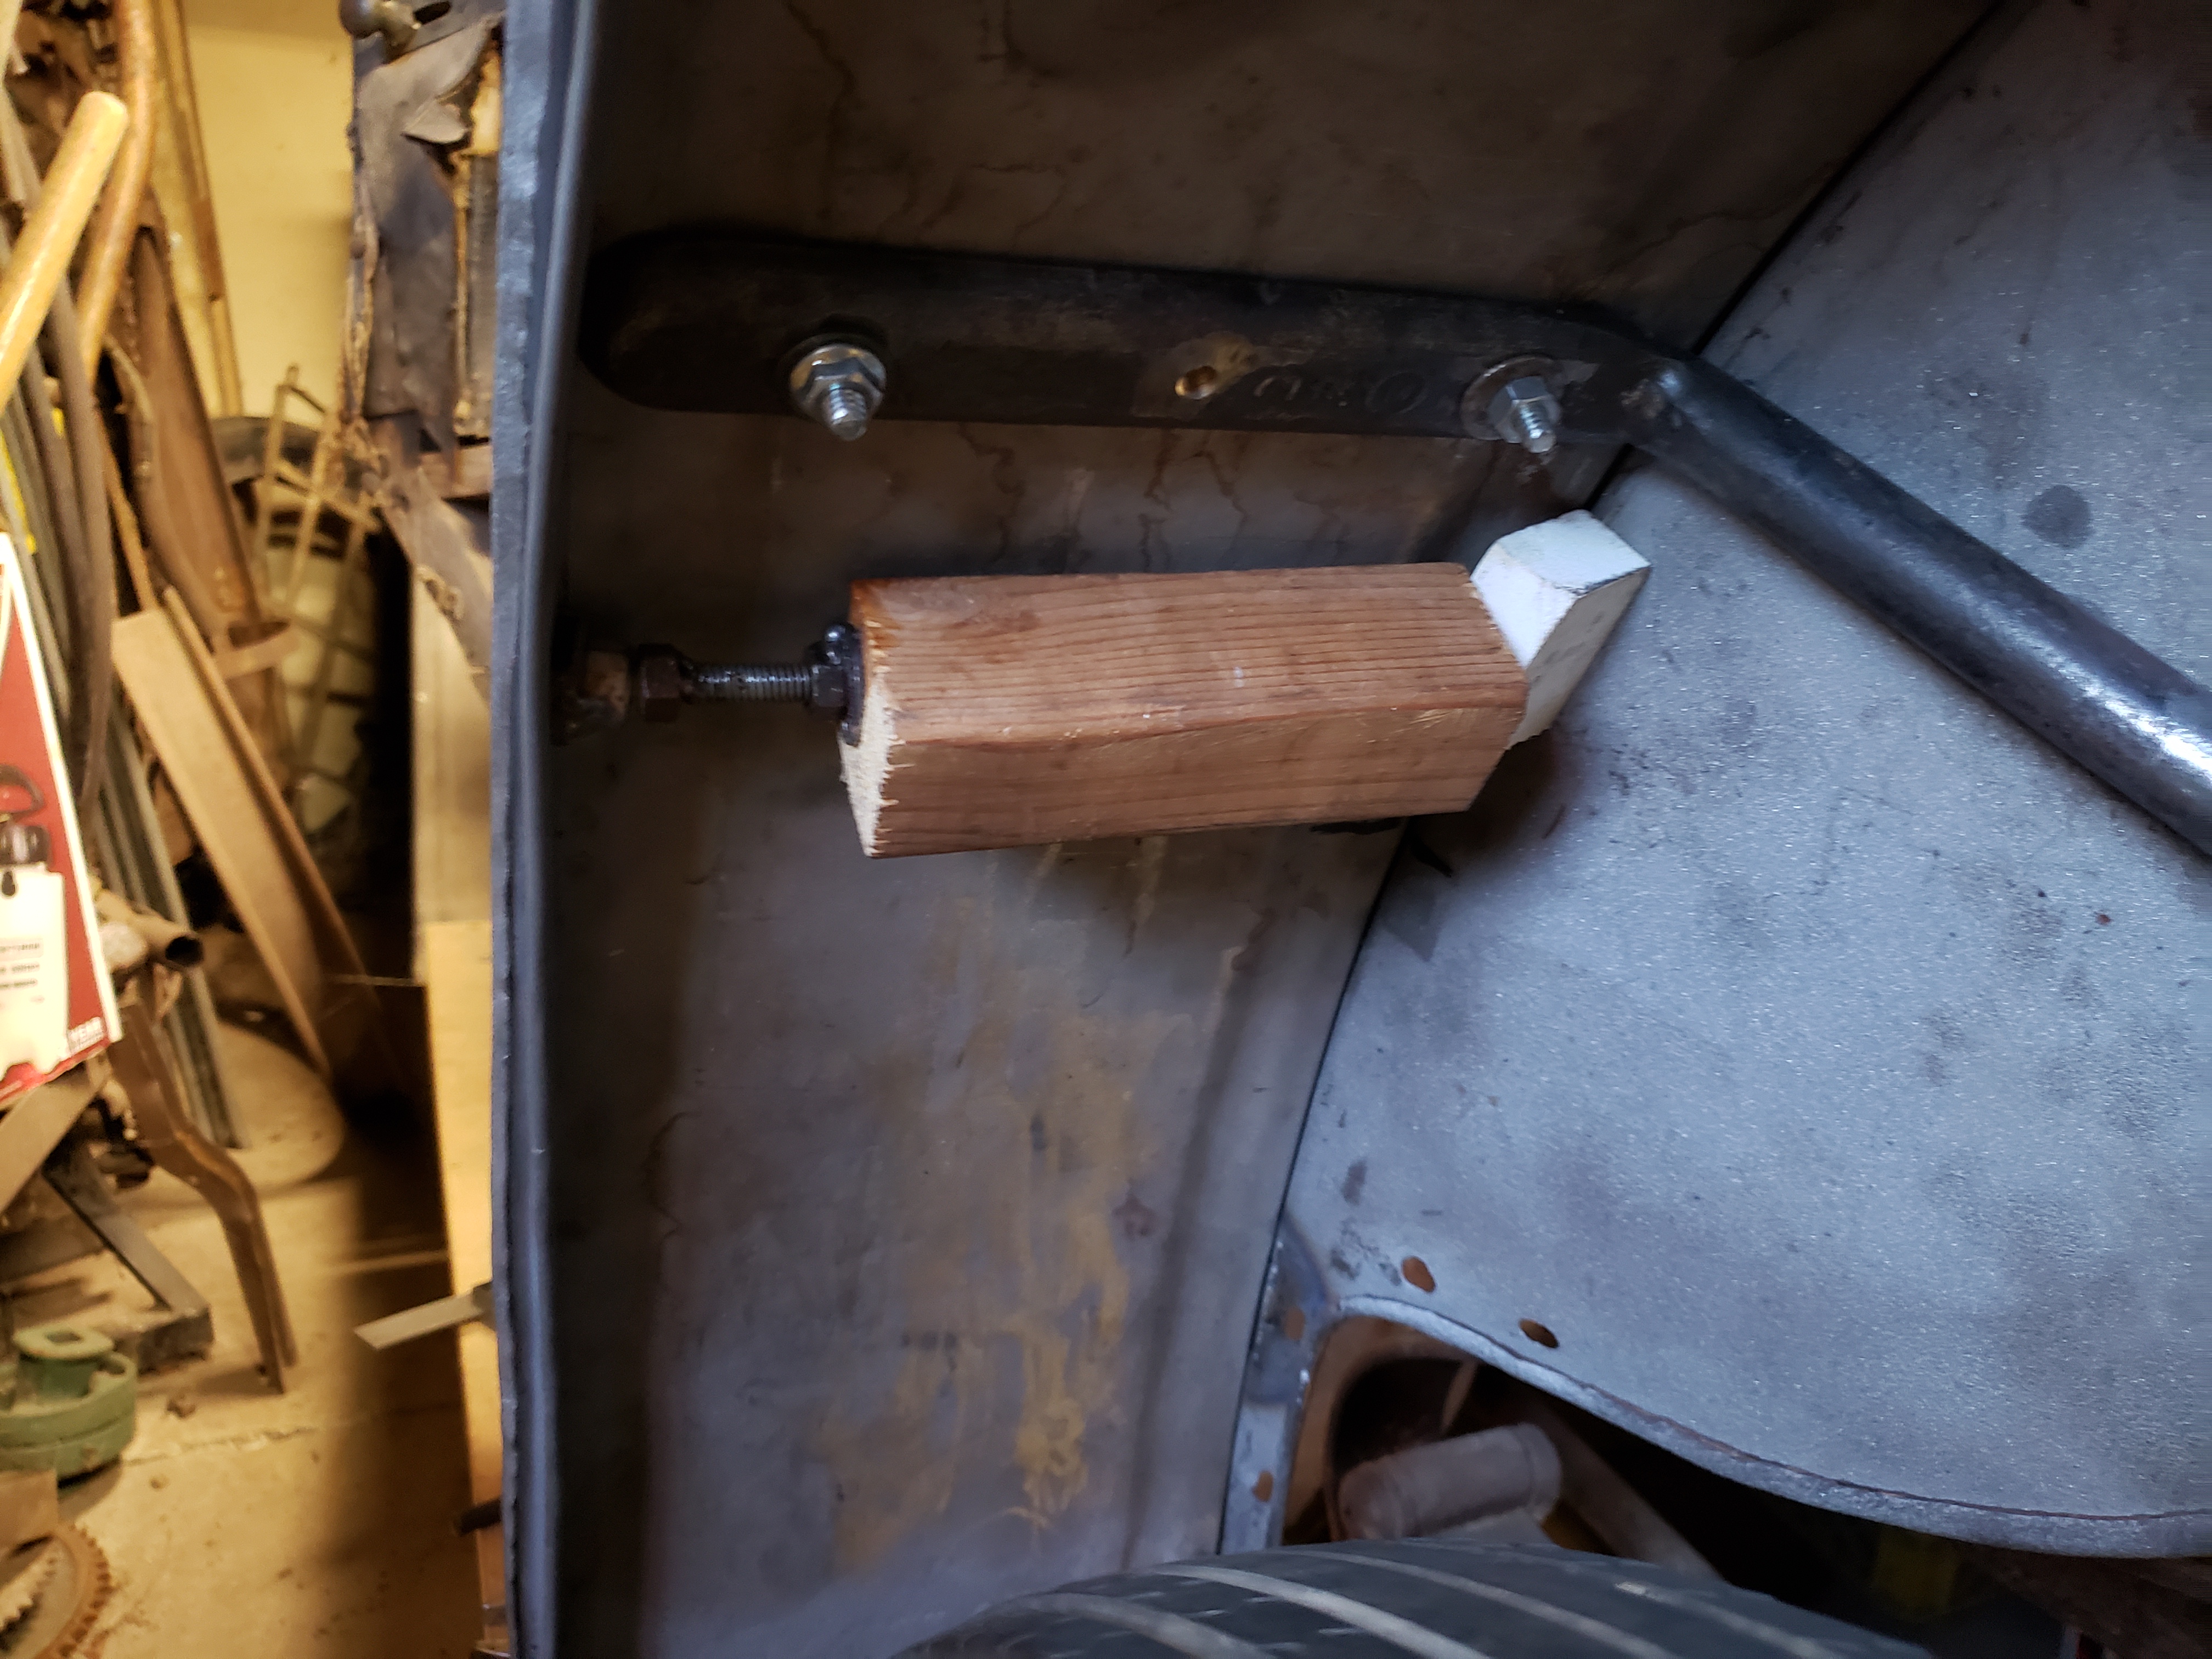
Before I wrap up this entry, let me tell you about the clamps I made to push both the back panel and the outer edge into their respective slots. You can see one of these clamps in the picture below and also one of the clamps in place on the fender holding the parts in place. I actually made these when doing the rear fender on the other side. All they do is screw out to press the parts outwards into the slots. I did not mention them in the log entries for the other fender, but I thought I would mention them here for completeness. They are working really well.
|
|
| Tool I made to spread the edge and panel out into their slots. Click on the picture to see the full size. | Spreader tool in place doing it's job. Click on the picture to see the full size. |
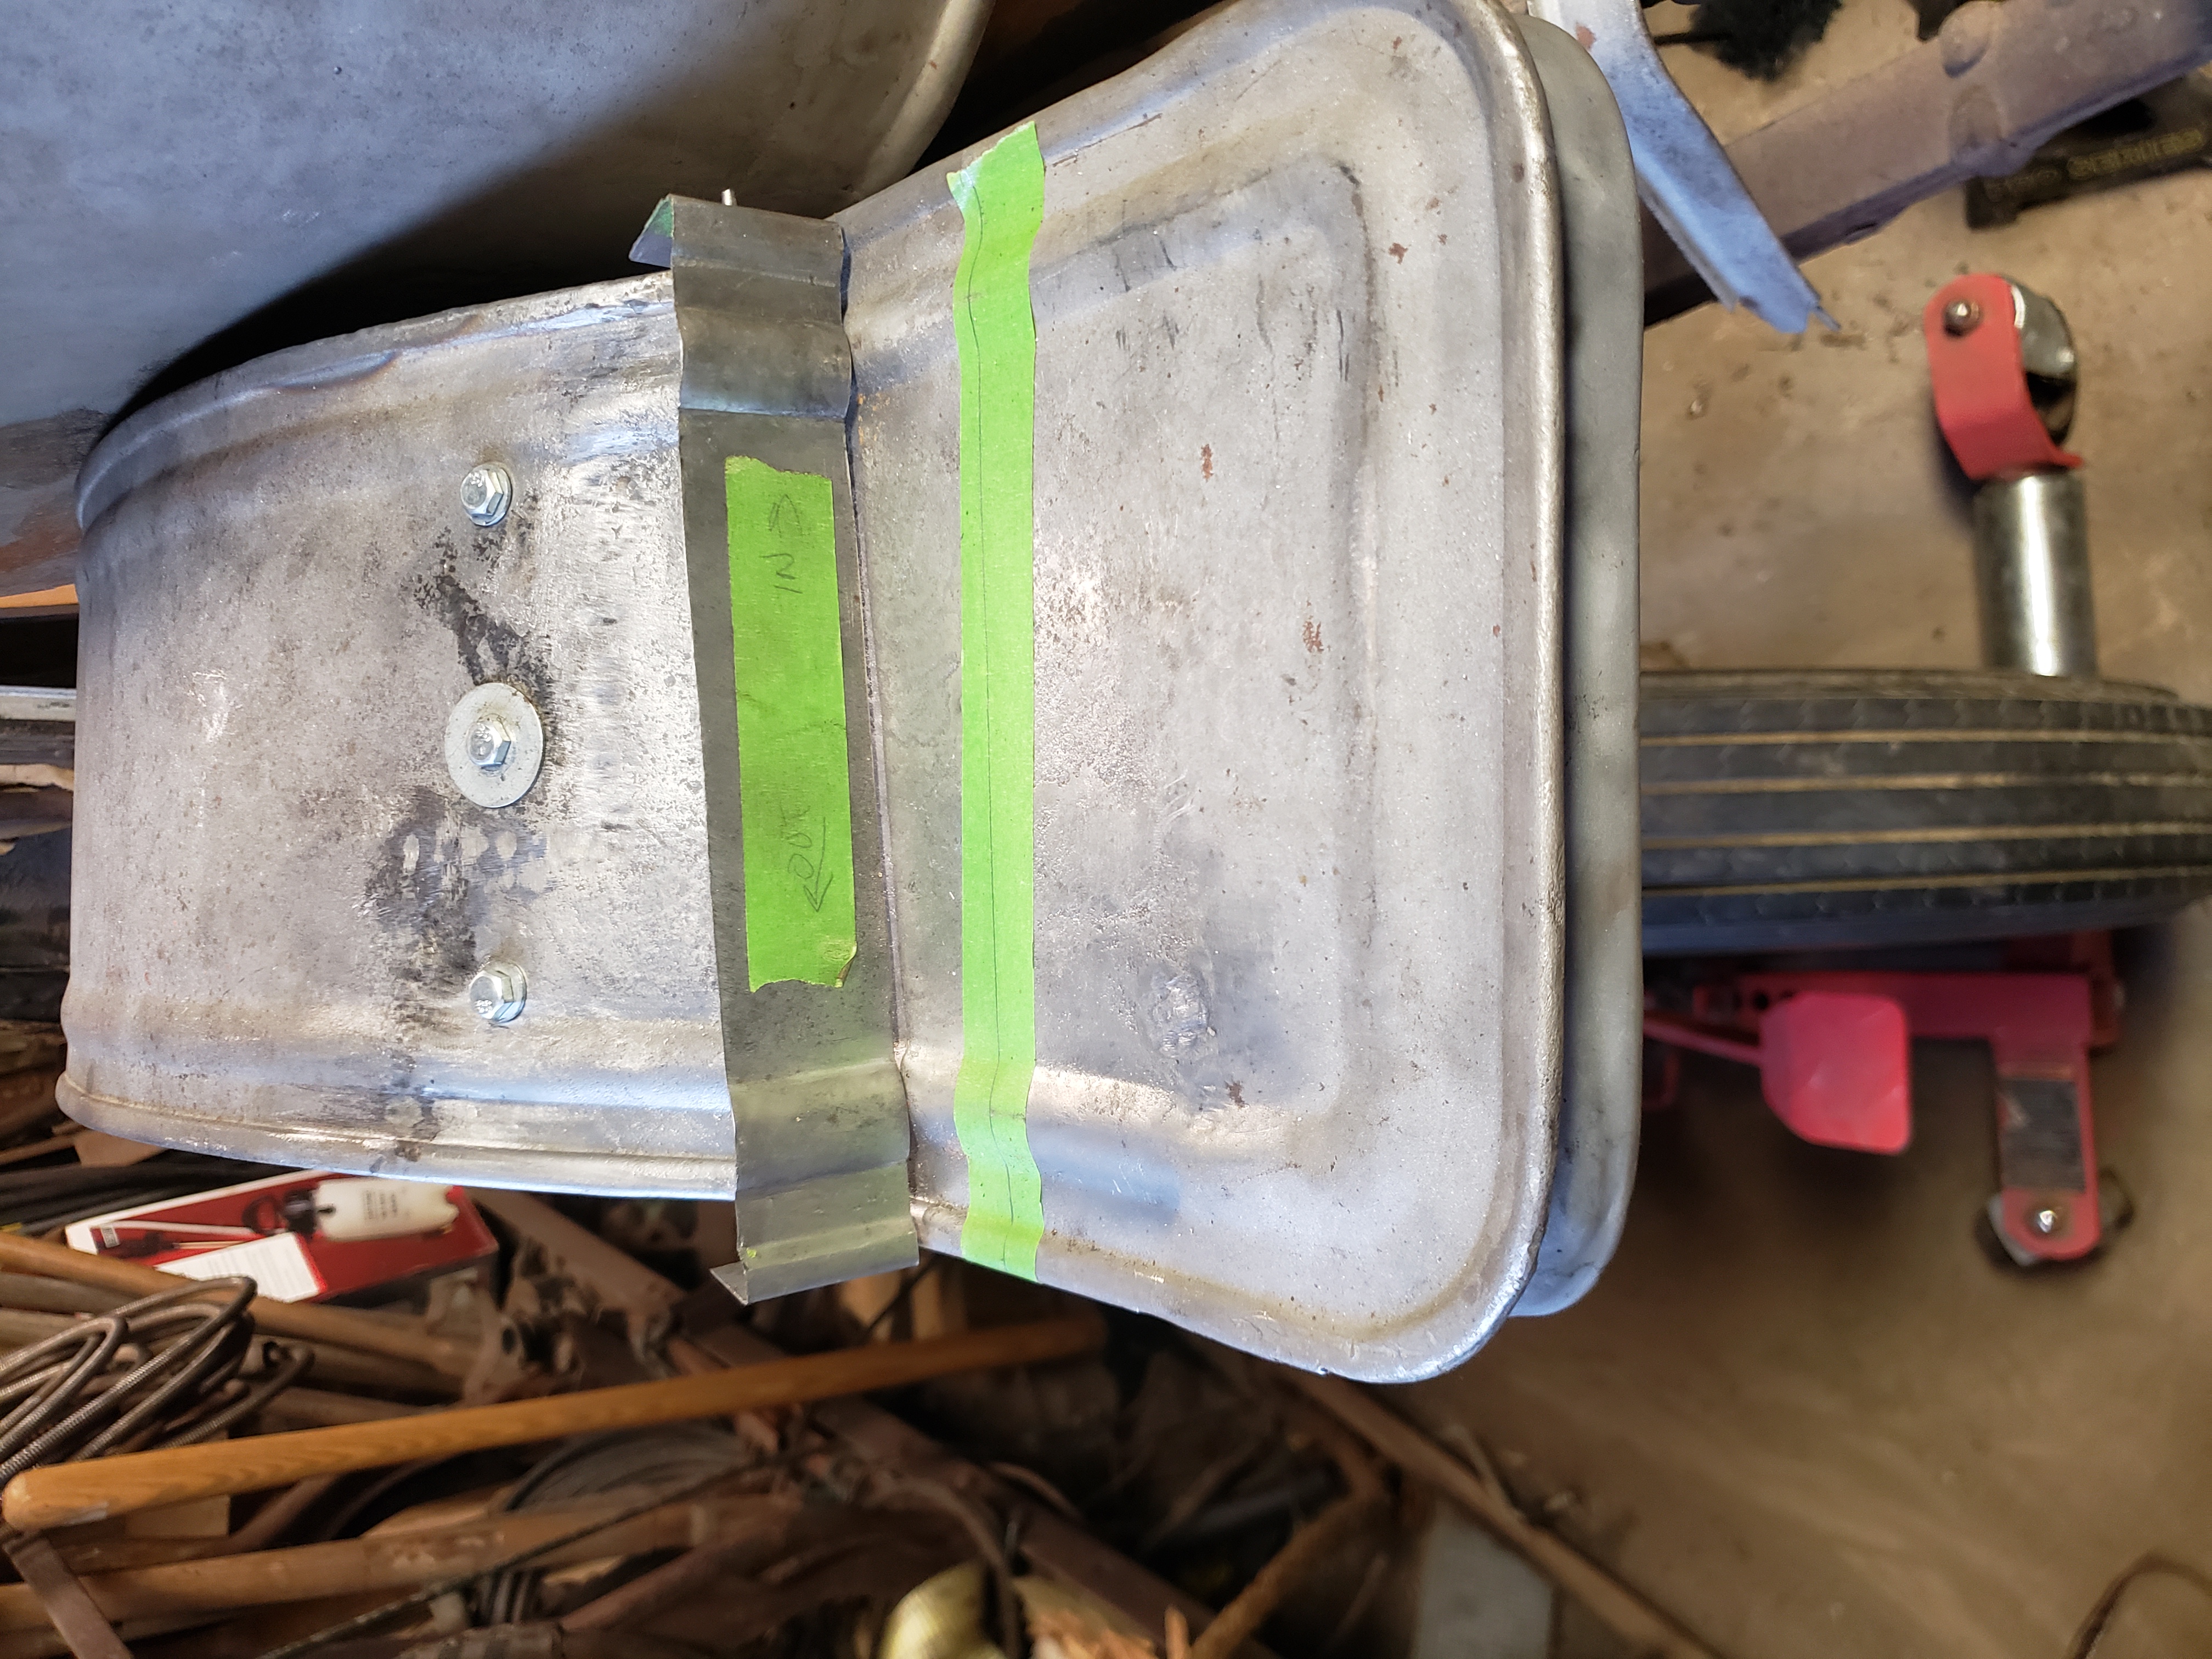
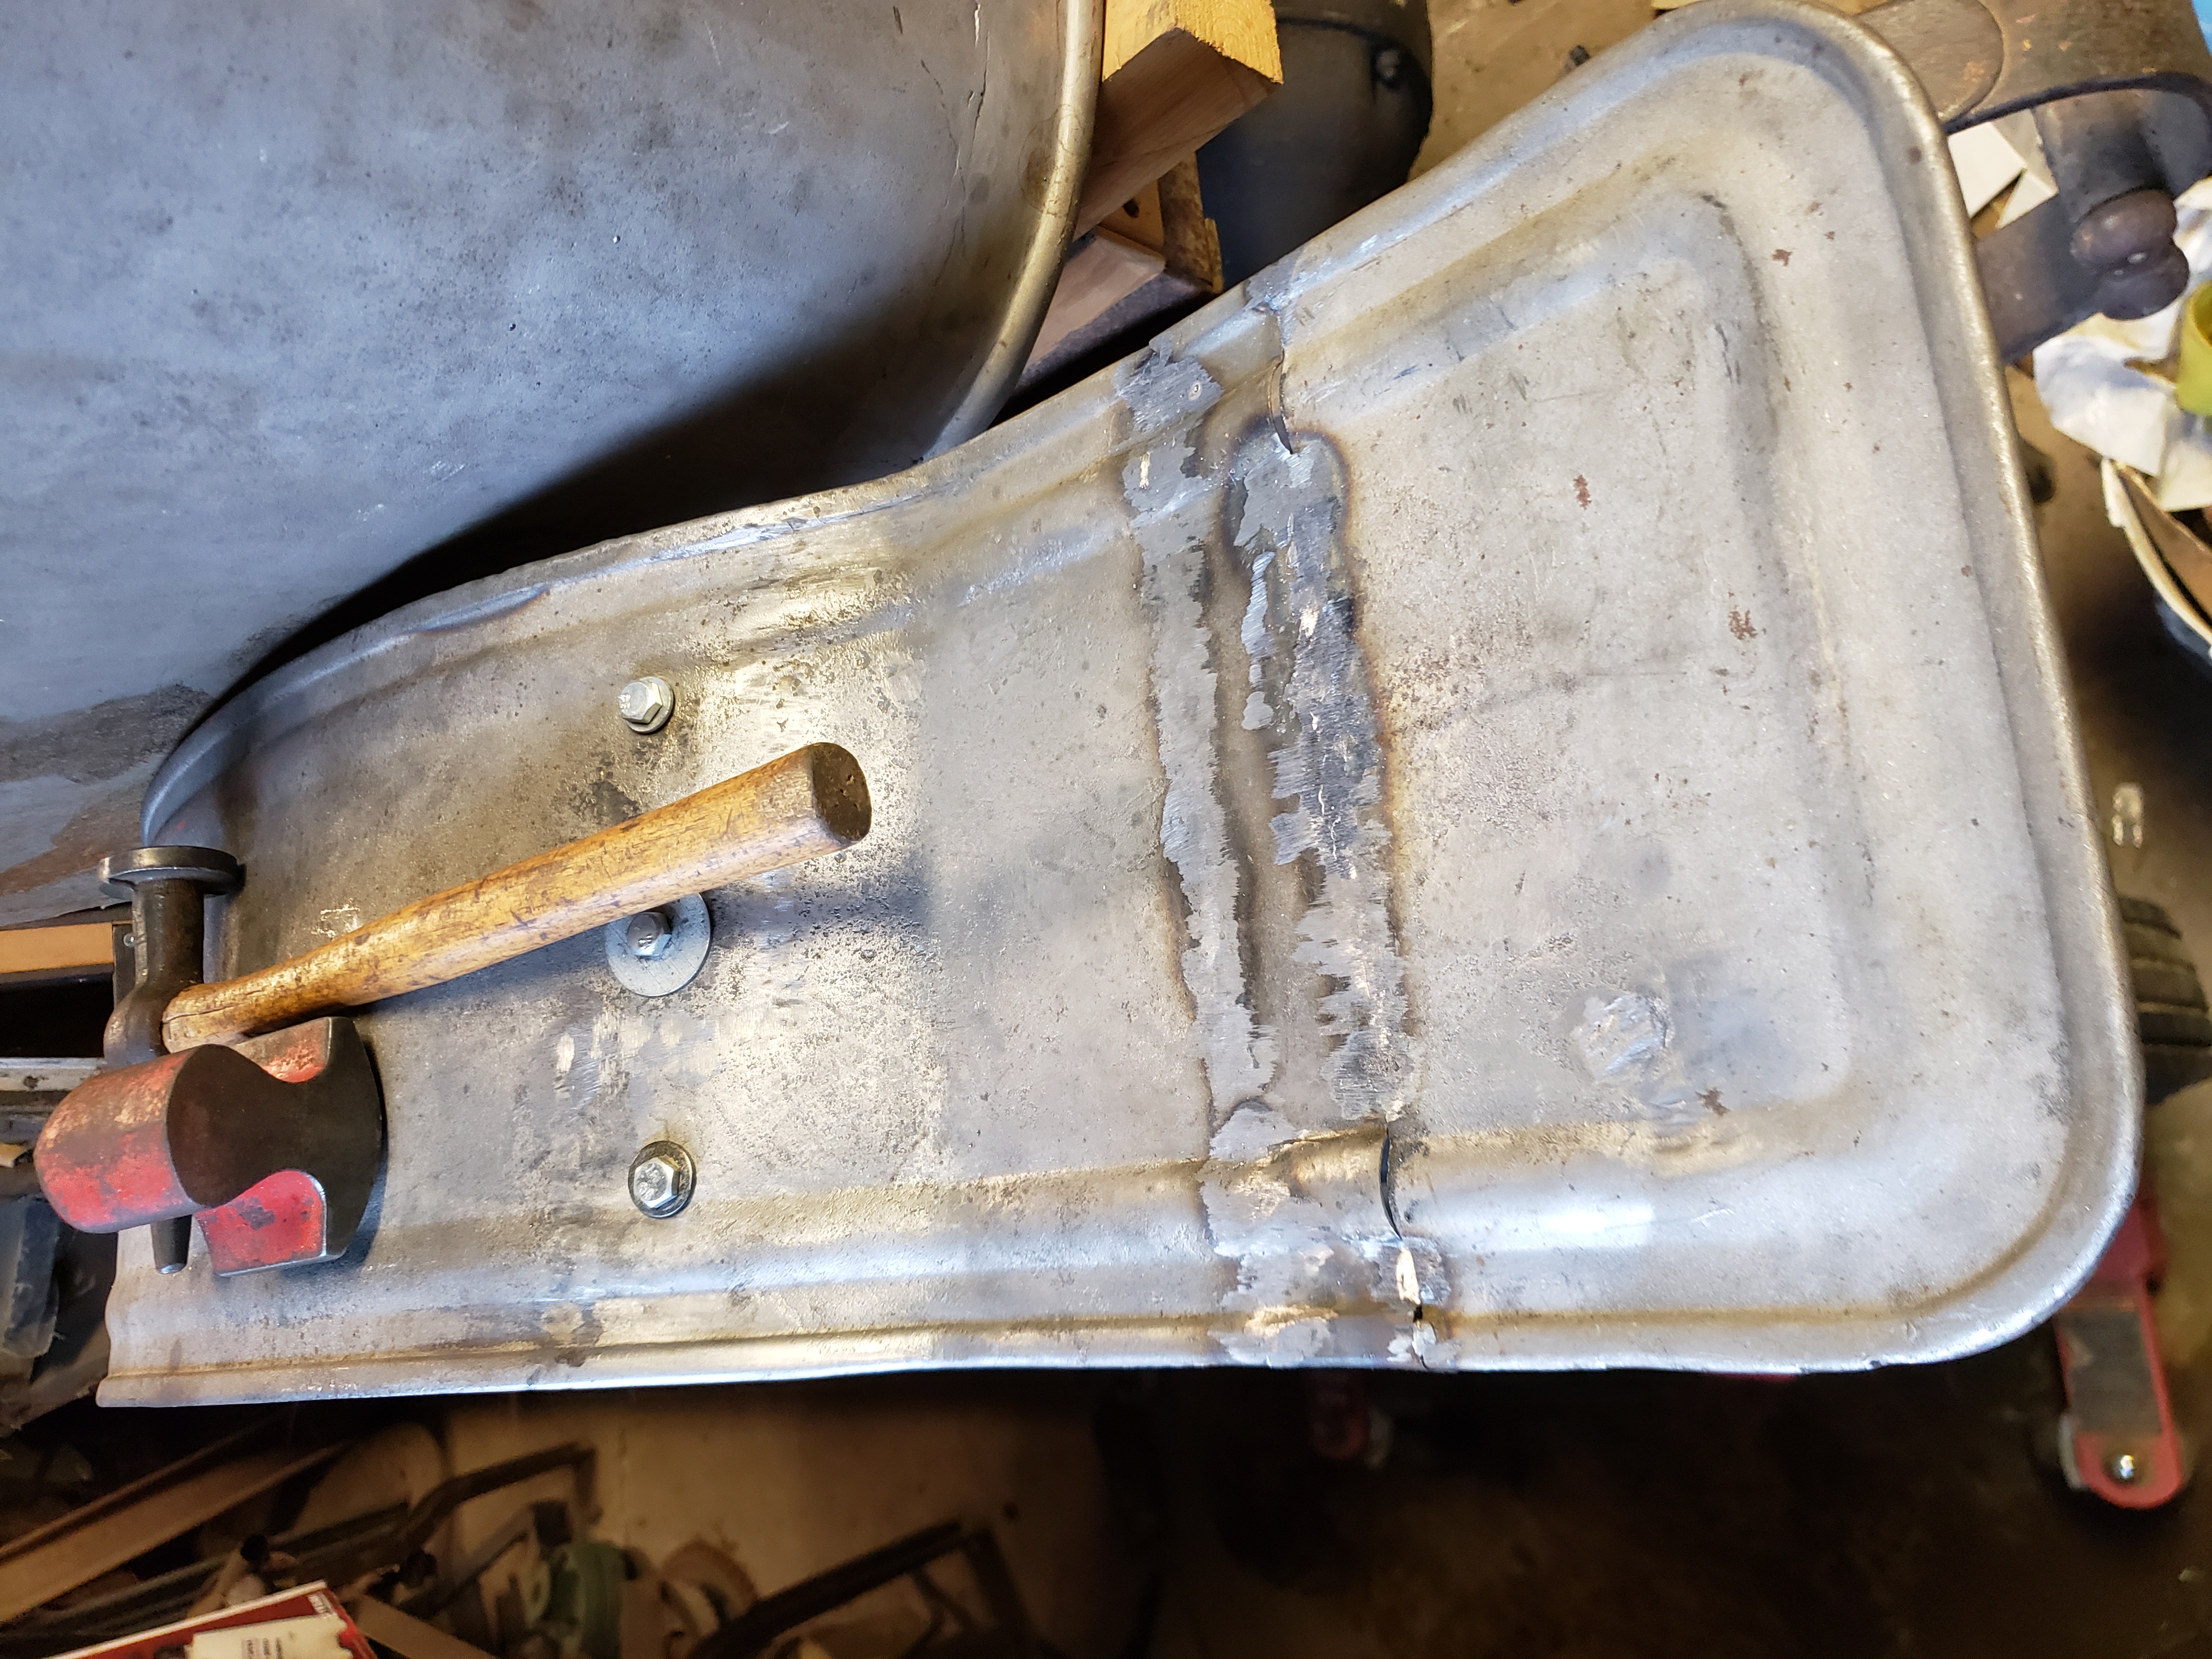
Sunday, February 6, 2022 6:45 PM
|
|
| The new 1.5 inch patch sitting on the fender. Click on the picture to see the full size. | The bill is cut off. No turning back now. Click on the picture to see the full size. |
Instead of this difference, she noticed that the bill of the fender was longer on the original on the right fender than the bill I welded onto the left fender (which came from a donor fender from a 1912 E-M-F 5-Passenger touring).
Some additional measuring indicated that the bill I welded on was indeed approx. 1.5 inches shorter. So apparently the 5-Passenger touring have a shorter bill than the Demi Tonneau’s. I am glad she noticed this now and not after I had the fender all done.
So not I had a decision to make: do I ignore it and let it be shorter, or do I make up a patch, cut off the fender and weld in the patch to lengthen it?
As much as it pained me to do so, I made up a patch and cut the fender. The first picture shows the patch sitting on the fender and the fender marked where I need to cut it. The second one is of the fender with the bill cut off in the right place. It was a hard cut to make.
|
|
| Holding the patch and bill in place. Click on the picture to see the full size. | The patch is clamped and ready to tack weld. Click on the picture to see the full size. |
I then fit up the patch and clamped it in place and then tacked the patch onto the main part of the fender. Once tacked, I took the main part of the fender to the bench and finished welding it together and did some basic body work to straighten it.
I then bolted the main part of the fender back onto the car and tacked on the bill to the main part of the fender. You can see this in the third picture. Once tacked, I again removed the main part of the fender from the car and took it back to the bench and did some basic welding. I did not get it all welded as you can see in the last picture. I still have the outer edges and the beads to align a bit better and then finish up the welding. I will have to get to that the next time.
|
|
| The Bill is tacked on. Click on the picture to see the full size. | I rouch welded most of the bill and then put back on the car to look at alignment. Click on the picture to see the full size. |
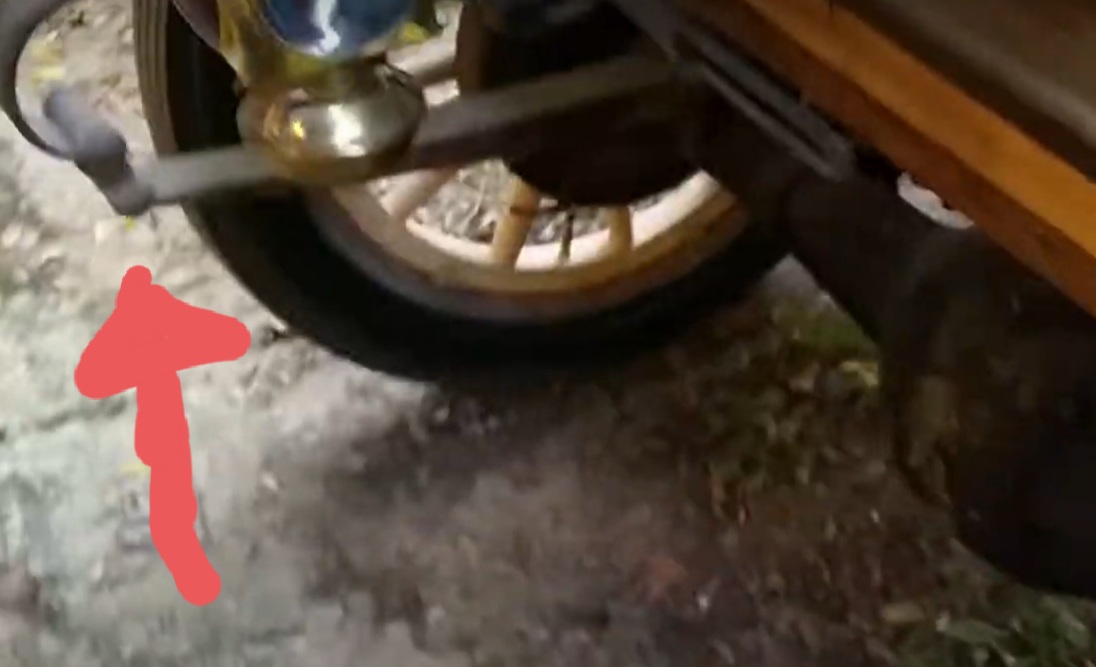
Sunday, February 13, 2022 8:54 PM
|
|
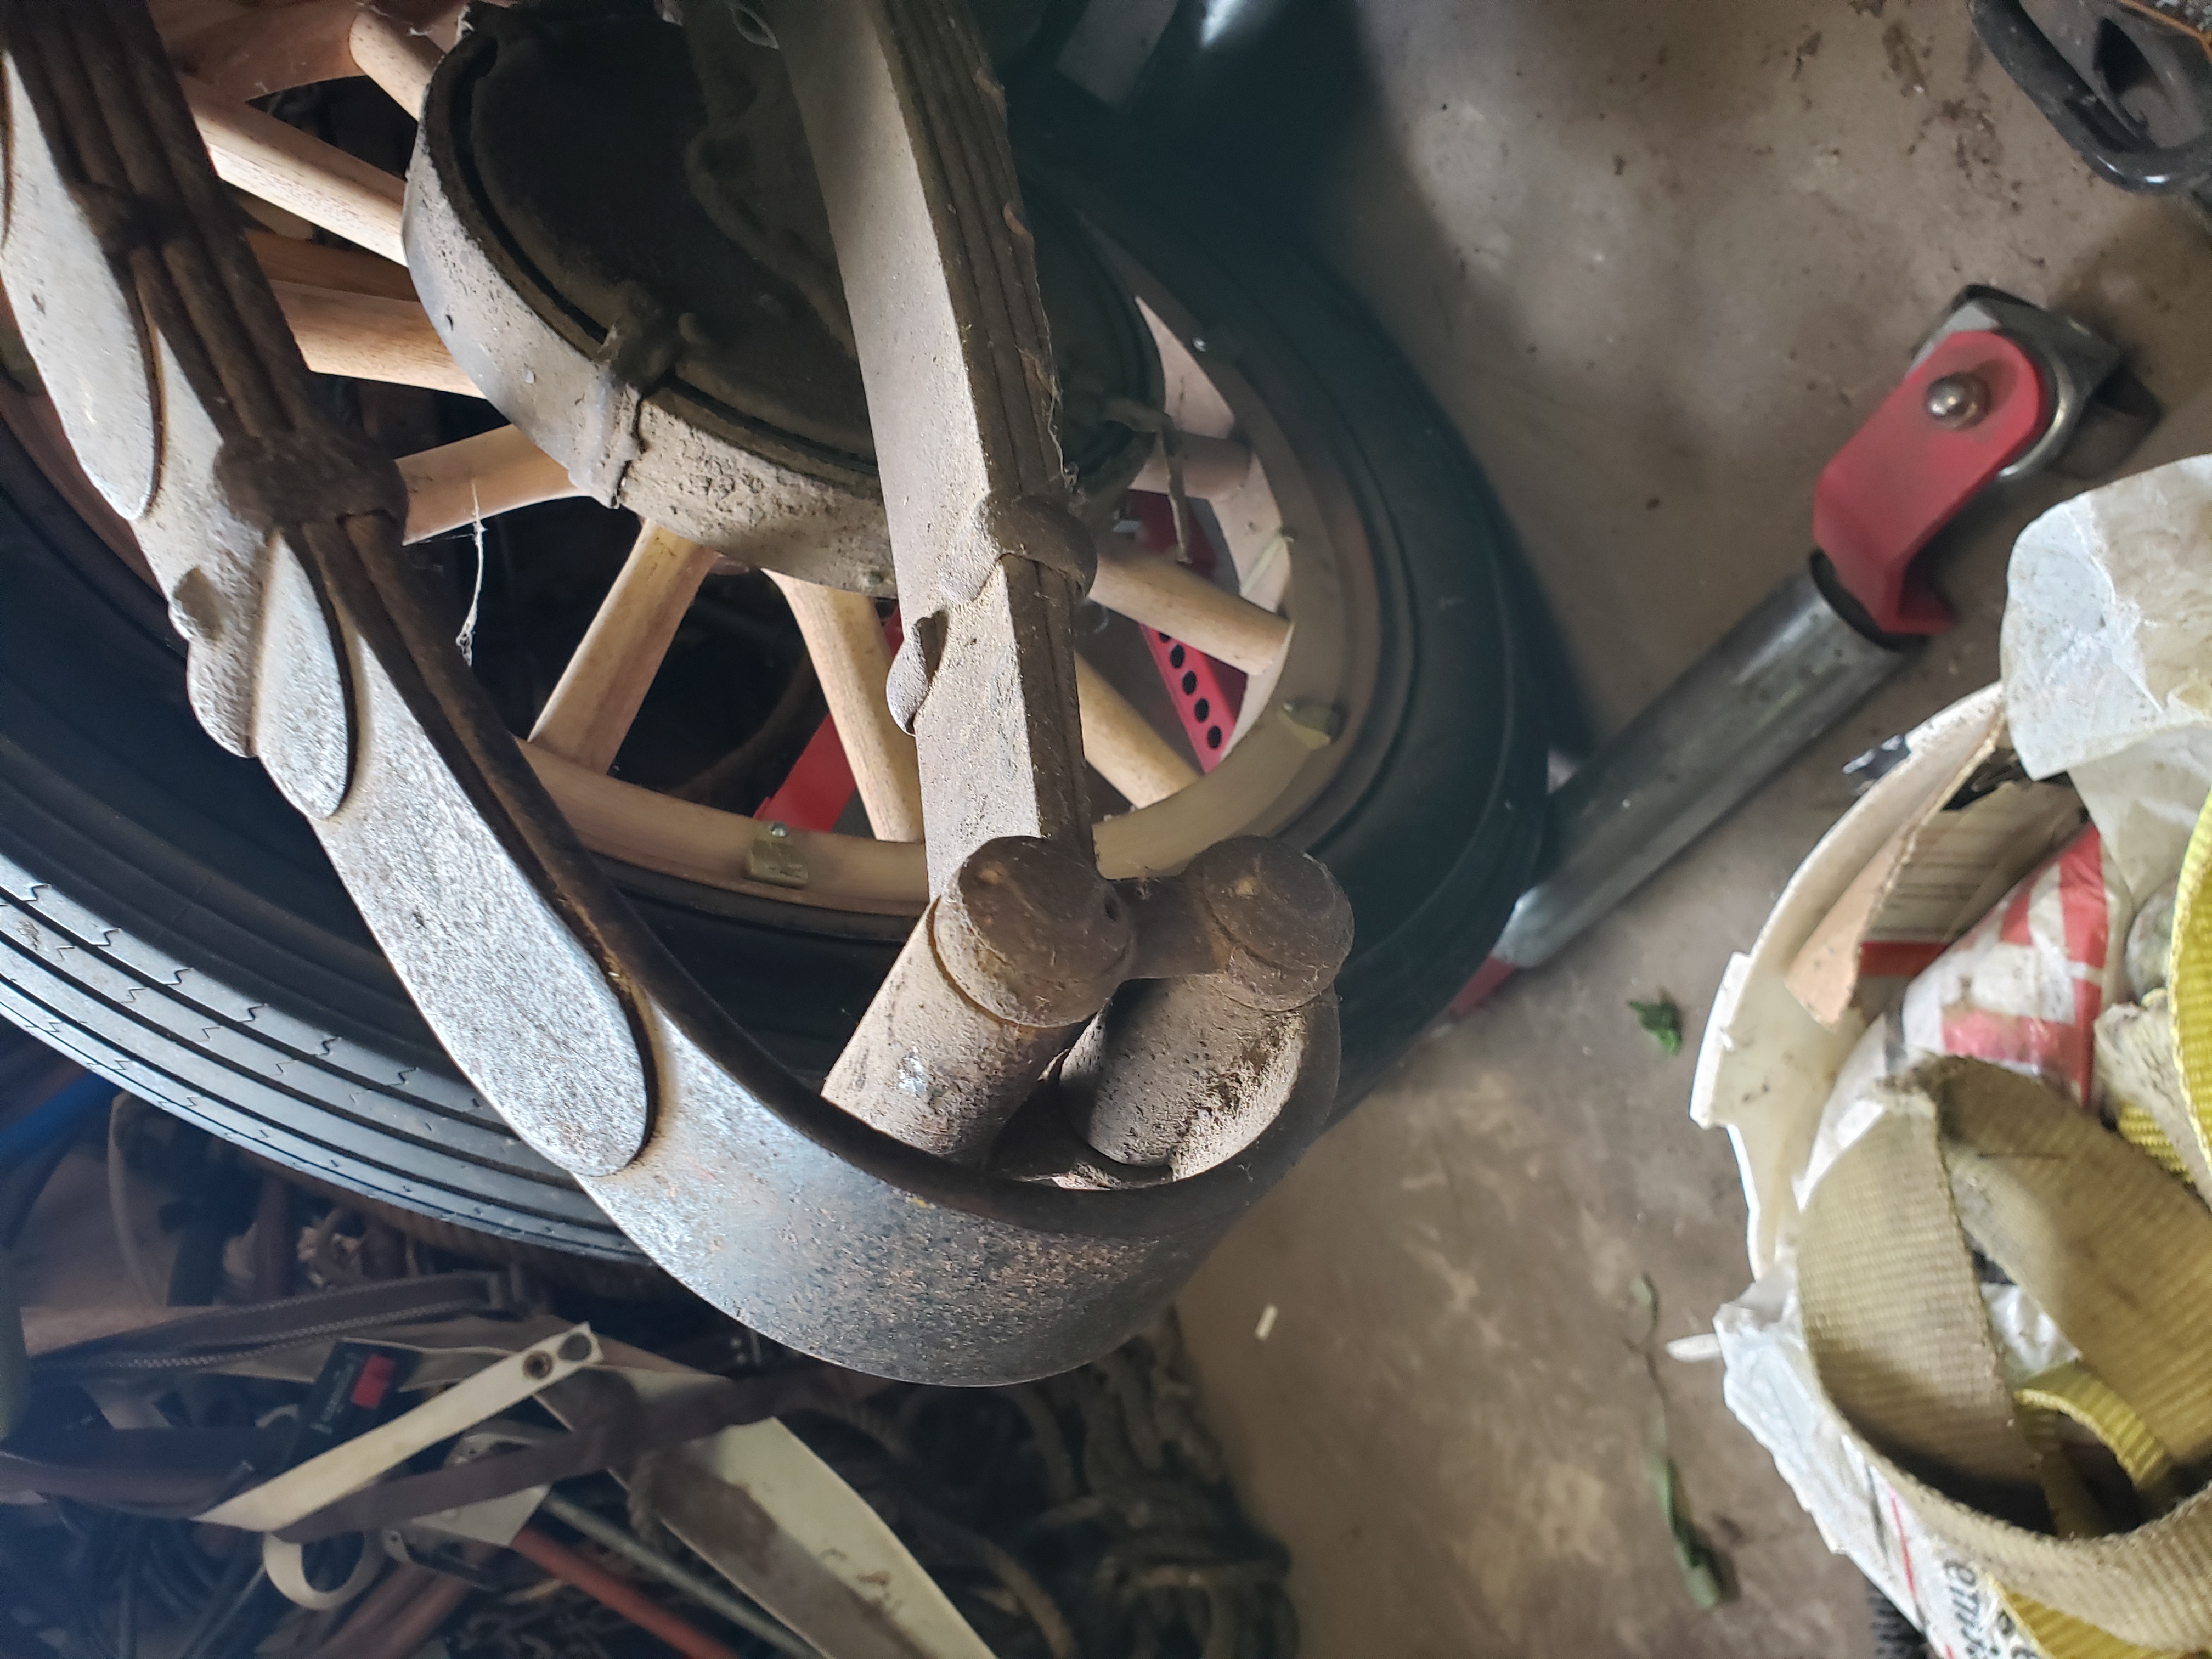
| The left rear spring shackle is not quite right. Click on the picture to see the full size. | The shackle in the correct position. Click on the picture to see the full size. |
Today as I was troubleshooting this, I noticed that the rear spring shackle on the left side of the car was in the wrong position. If you look at the 1st picture below, the red arrow shows the spring shackle in the wrong position.
I used a bar to flip the shackle into the correct position. I was able to do this because the spring shackles are completely worn out.
I went back and looked at old pictures of this car and this spring shackle has been in this position from when we bought it. It would be interesting to know how the shackle got into this position.
With the shackle in the correct position, the fenders are much closer to alignment, within 3/4 inch. Actually, the left side of the car appears to be sitting a little lower than the right side since I did this. It was the opposite case before I switched the position of the shackle.
I discovered (by other measurements) that the spring on the left side is more compressed than the spring on the right side (approx. 1 inch). When I do the rear Springs, I will have to figure out what's going on with those springs and make the adjustments, so the springs are the same. Might have a broken leaf. Maybe just be sagging after 100 years. Who knows?
I do have two extra sets of rear springs to use as parts, so yippee for that.
I am just happy to understand the difference in height from left to right. One more thing figured out. Now I can finish welding up this fender.
How to contact me... |

|
|
John M. Daly |
||
| Phone: | (815) 786-4824 | |
| Email: | ||