Quick Links on This Page
So you want to how the restoration of the
engine
for my E-M-F Automobile is going?
Well, you have found the right page.

Saturday, November 18, 2000 4:26 PM
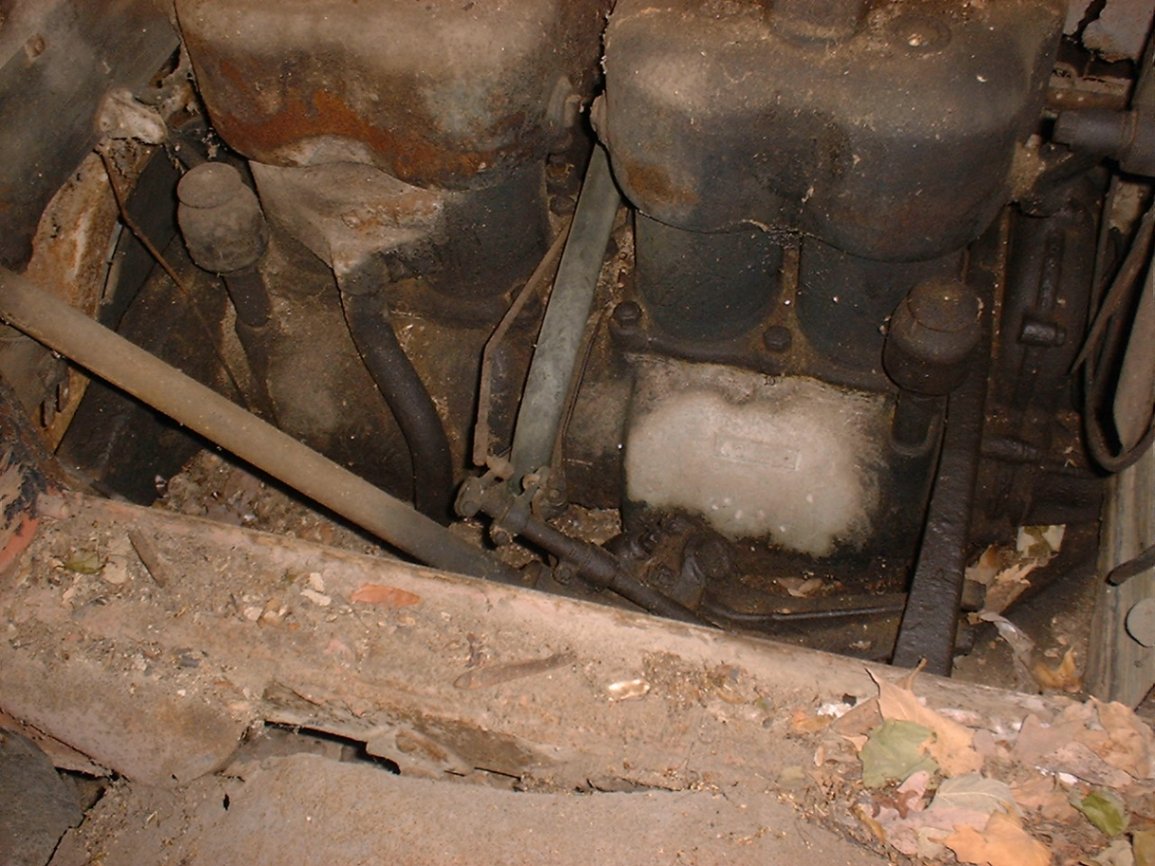 |  |
| Drivers side of engine as I found it. Click on the picture to see the full size. | Passengers side of engine as I found it. Click on the picture to see the full size. |
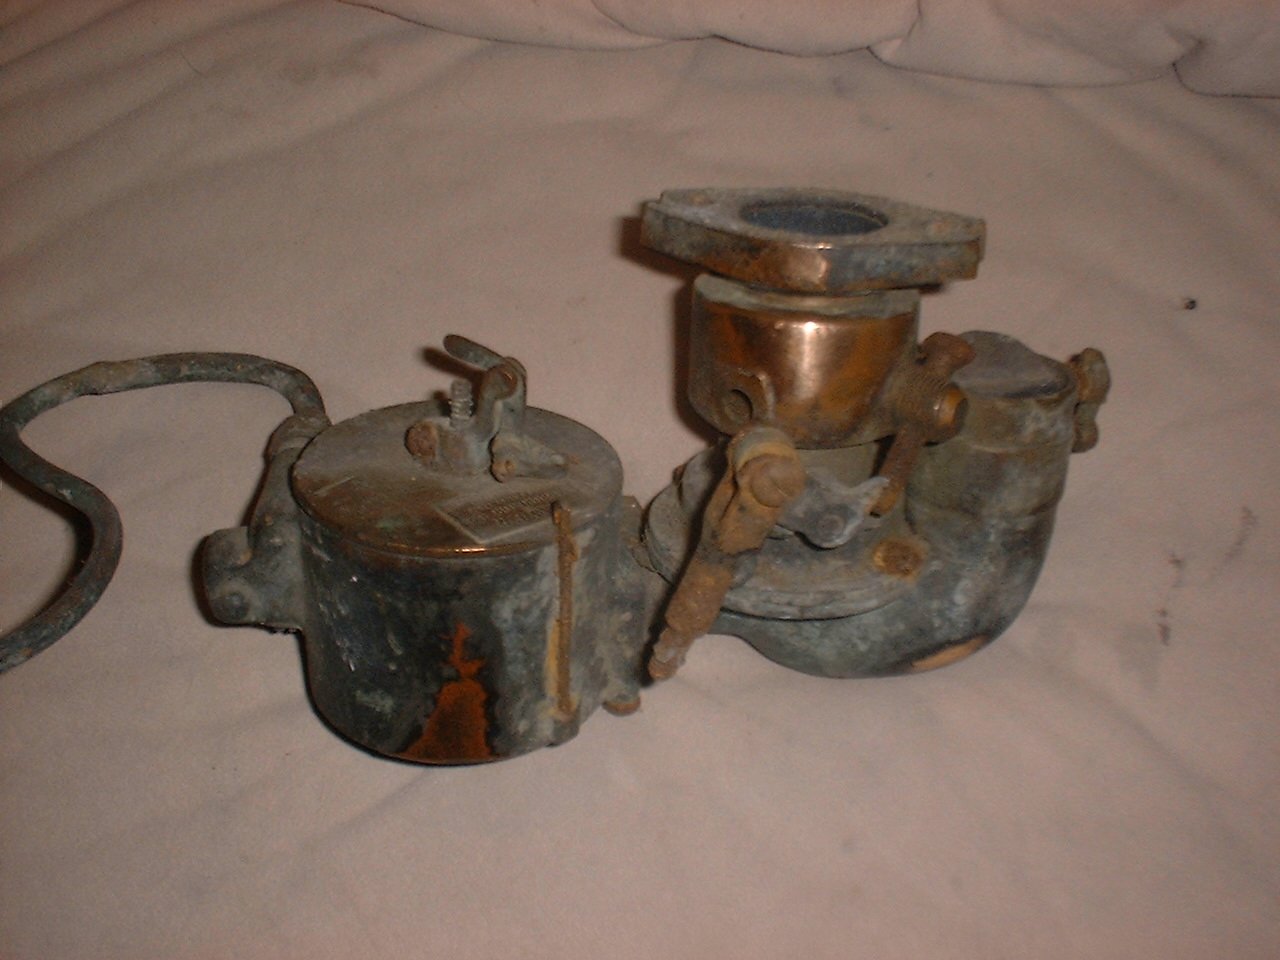 |
| Mayer carburetor that came with the car. Is it correct???. Click on the picture to see the full size. |
My first impression of the engine was "WOW is that a neat engine. I have always liked the older engines where the cylinders were cast in pairs and mounted to a crankcase. I also noticed that the engine compartment seemed very original, down to the original wires on the magneto and to the spark plugs.
The car still had the belly pan on it, so I was unable to see the bottom of the engine. The belly pan also did a nice job of collecting nut shells, corn cobs, leaves and dirt over the years.
I noticed that the carburetor was not attached to the intake manifold (drivers side of engine), but the owner was able to find it by the time I picked it up. What he found was a "Mayer" carburetor. I have not yet had it mounted to the intake manifold, but it is apparent that it once was. All the connections line up.
I have heard that E-M-F made their own carburetor, so this may not be correct for this car. I have also heard that the E-M-F carburetors did not work real well. Perhaps my carburetor was changed for that reason.
My first task was to try to determine the condition of what I had. I noticed that I had no compression when I turned the engine over, and that I could hear a scraping sound as I turned the engine over.
The scraping sound turned out to be the nut shells, corn-cobs etc that were trapped by the belly pan, rubbing up against the flywheel as I turned the engine over. I ended up removing almost a 5 gallon bucket full of stuff that was trapped there.
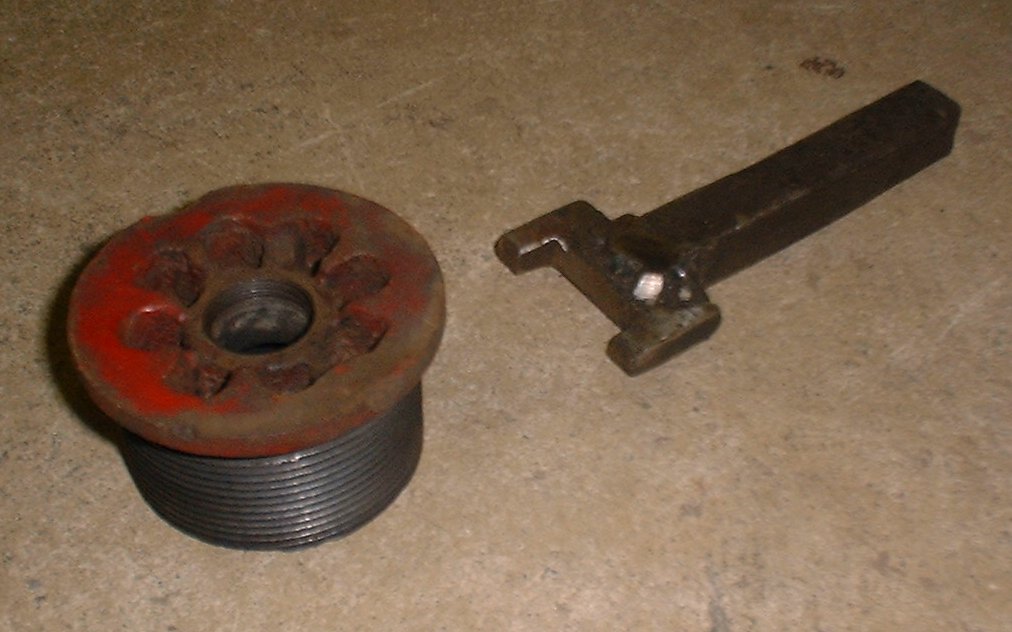 |
| Cylinder port and tool to open them up. Click on the picture to see the full size. |
After about a month of trying things like penetrating oil, heat, pressure etc. I noticed that the valve stem did not appear to be straight and that the valve guide had a crack in it. I theorized that the valve stem was wedged into the guide. If I tried to tap the valve down, it started to push the valve guide out, and I could only go as high as the guide would go.
I finally ended up breaking off the bottom end of the valve guide so that the rest of it could be extracted with the valve through the top of the cylinder. Once I got it out, I could see that I never would have gotten it out undamaged. Getting the remainder of the guide off the valve stem, even with it clamped into my vise, was still a challenge.
One thing I did notice was that the valves appear to never having been ground (at least the one I had out). I hope they are all like this. The seat also did not appear to have been ground.
I took a valve and valve guide out of the spare engine I have, and installed it into my engine. Now I seemed to have good compression on three of the four cylinders, with the one cylinder that I changed the valve in having the lower compression. This does not really matter since I will be going through the entire engine anyway.
I decided to take the belly pan off of the car so I could get at things easier and because I wanted to take the bottom crankcase access panels off to see how the rods and things looked inside the engine. Let me tell you, it was no easy task getting that pan off. I wound up chiseling off the screws/bolts that attached the thing to the car. Several of the screws/bolts were already missing so it did not take long. Once I had all the screws and bolts off, and the pieces of leather that went around the steering arm and spring shackles, I had to determine how to drop the thing down, clearing drag link, tie-rod for the steering, and spring shackles.
I came to the conclusion that there was no way to get that thing off without removing at least the drag-link, so that's what I did. It still was not easy to get off, but with a little forceful language, it came off. If someone knows how to EASILY get this thing on and off, PLEASE sign my guestbook and let me know. I think I now know why I have not seen many of these belly pans on the pictures I have of other E-M-F's.
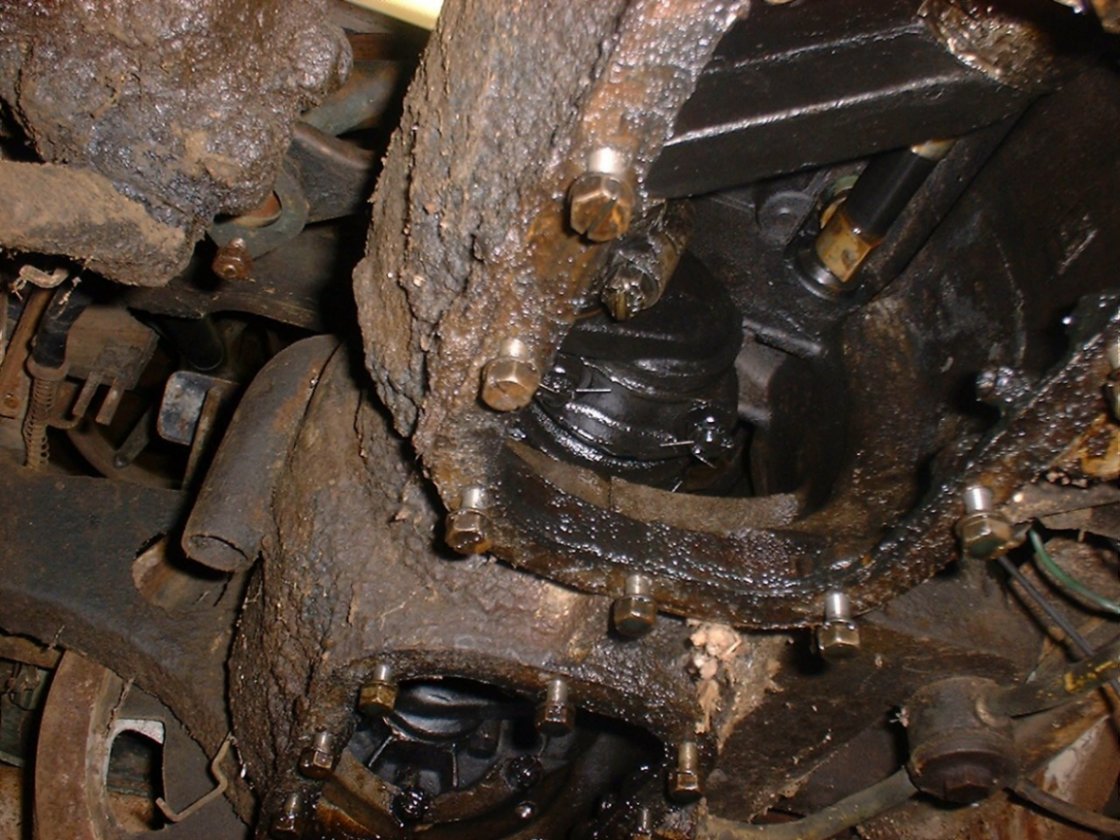 |
| Bottom of engine with access panels removed. Notice all the dirt and grime covering the engine. Click on the picture to see the full size. |
The inside of the engine looked pretty good for something this old, but I also noticed that all the rod caps were marked with center punch dots as to which cylinder they went with. This engine has had some work done at some time in it's life. I did not find any really bad rod bearings or main bearings (that I could tell). I could see a little play in the rods when I turned the engine over, but I could not feel it anywhere (if that makes since). The cam shaft also looked good.
Next I wanted to see if I could get spark out of the ignition system. I removed the magneto from the car and cleaned off some of the dirt. The timer would not budge, so I started soaking it with penetrating oil. I could see that the points were well worn and the little roller that rides the cam in the magneto was dangling there very worn. I checked the magneto on the spare engine, and the points look good in it.
I took the coil box off of the fire wall and took it over to the bench with the idea of hooking up the entire ignition system on the bench to see if it worked.
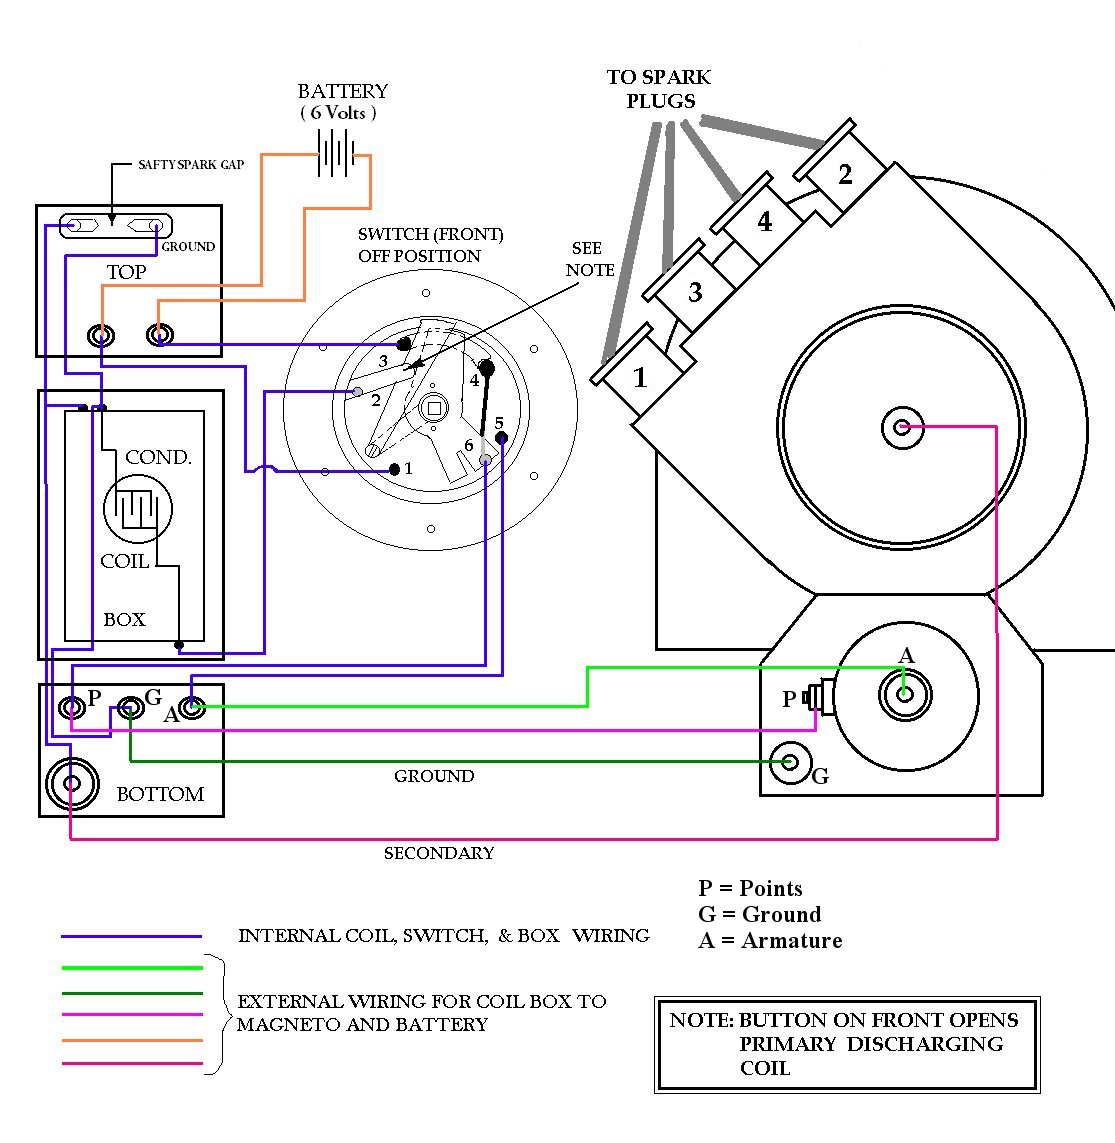 |
| Wiring Diagram for Splitdorf Magneto and coil as used on my E-M-F. Click on the picture to see the full size. |
I set the switch to the "MAG" position and tried again. Now I was getting spark. I checked all of the plug wires and I was getting spark from all of them. Next I wanted to see how big of a gap I could jump a spark. I got to a little more than 1/4 inch when the resistance through my body became less than that through the air. Boy did I get a nice jolt.
Next I wanted to see if I could get the engine to pop a few times, so I put the ignition back on the car and tried it by opening the petcock on the cylinders and putting in little starting fluid. Try as I might, I was not able to get it to pop. I do not think I am getting a good ground. I'll try again.
That is where I am at as of Saturday, November 18, 2000. I will add to this page as I accomplish more on the engine so check back. I will add a link at the top of this page that will take you to the newest entry when I add one.
Sunday, November 26, 2000 11:32 AM
Today was a good day. I figured out that I did have a good ground for the plugs to fire. I bought a 6 volt lantern battery and attached it to the battery leads on the coil. I verified that I had spark on all the cylinders.I then wanted to be sure that the plugs were firing at the right time. Sure enough, I had the timing off by 180 degrees. I must have put the magneto coupling back together wrong. I marked it when I took it apart and matched up my marks when I put it back together, but still I was off. I had turned the engine over several times while the magneto was off and of course I turned the magneto by hand many times. I got it back in time by trial and error. I verified that each cylinder was firing at the proper time before I proceeded.
Next was the moment I had been waiting for. I opened the petcocks for each cylinder, added a little gas, closed the petcocks, retarded the spark, turned the switch to "BAT" and pulled the engine over.
It popped off on the first pull. HURRAY!!!!
Of course it only popped once for each cylinder. I repeated the experiment for my children, wife and myself several more times.
Next it is on the carburetor to see if I can get this thing to actually run. That's all for now.
Sunday, December 31, 2000 11:33 AM
Took the carburetor apart to find that the float valve is stuck pretty good. At this point I have not been able to get it freed up. But since I was able to get the top of the bowl off, I decided to just pour gasoline directly into the bowl.I bolted the carburetor onto the intake manifold and filled the bowl with gas. I pulled the engine over a couple of times to choke it, and then I primed the cylinders using the priming cups. I turned on the switch and after a couple of pulls it fired a couple of revolutions really good. I was of course very happy, until I smelled smoke. Not a good smell at a time like this. I crawled on top of and under the car until I found that an animal had made a nest inside a hole on the muffler (and it looks like this is the original muffler). I quickly removed the muffler from the car to avoid this happening again. Luckily the carburetor does not seem to be supplying gas correctly, so it did not run long.
Sunday, December 14, 2003 11:35 AM
| | 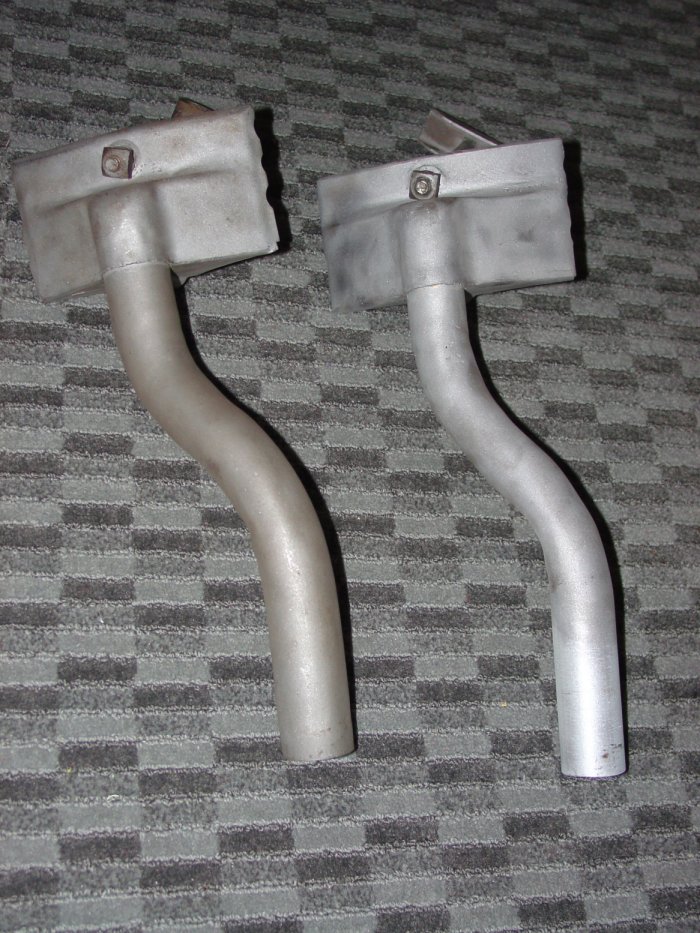 |
| Drivers side of engine as I found it. You can see the original hot air tube still on the engine. Click on the picture to see the full size. | The original hot air tube on the left, and the copy I made on the right. Click on the picture to see the full size. |
One of the things I am missing for my car is the cowl light brackets. They are different from the 5-passenger touring cowl light brackets. The ones I need are the same as those used on the roadsters I think. Anyway, my chances of finding a set are next to nothing. So I knew I would need to fabricate a pair and I would need a set to look at in order to do it. How does this relate to the engine?
Well, remember, my neighbor also has a 1912 E-M-F Demi Tonneau and has the correct cowl light brackets. I asked him if I could borrow his in order to make a pair. He said I could if I would allow him to borrow the hot air pipe that feed warm air off the cylinder jugs into the carburetor. He wanted to ship it off to someone to have one made. I did not feel comfortable having it shipped across the country with a chance it could get lost, so I asked him if it would be alright if I made him a hot air pipe in exchange for the use of the cowl light brackets so I could copy them. He agreed. So over this last thanksgiving, I spent two days in my dads garage making the hot air pipe you see in the pictures. Externally, it is identical to the original. The original was stamped where the one I made was welded together from separate pieces, but from the outside, you would never know it. I put the same embossings in it as the original. I spent a third day (yesterday) in the garage fitting it to my engine and doing the final fabrication and presented it to him yesterday.
I have to admit, it was hard to give up. It turned out even better than I hoped. Everyone I have shown it to has been amazed at how good it looks. I may have to make myself another one for my spare engine sometime now that I know how to do it.
My plan now is to make the cowl light brackets over Christmas. I will post pictures of that when they are done, but it will be on a different page. Stay tuned. I will close with a couple of more pictures. Hope you enjoy them.
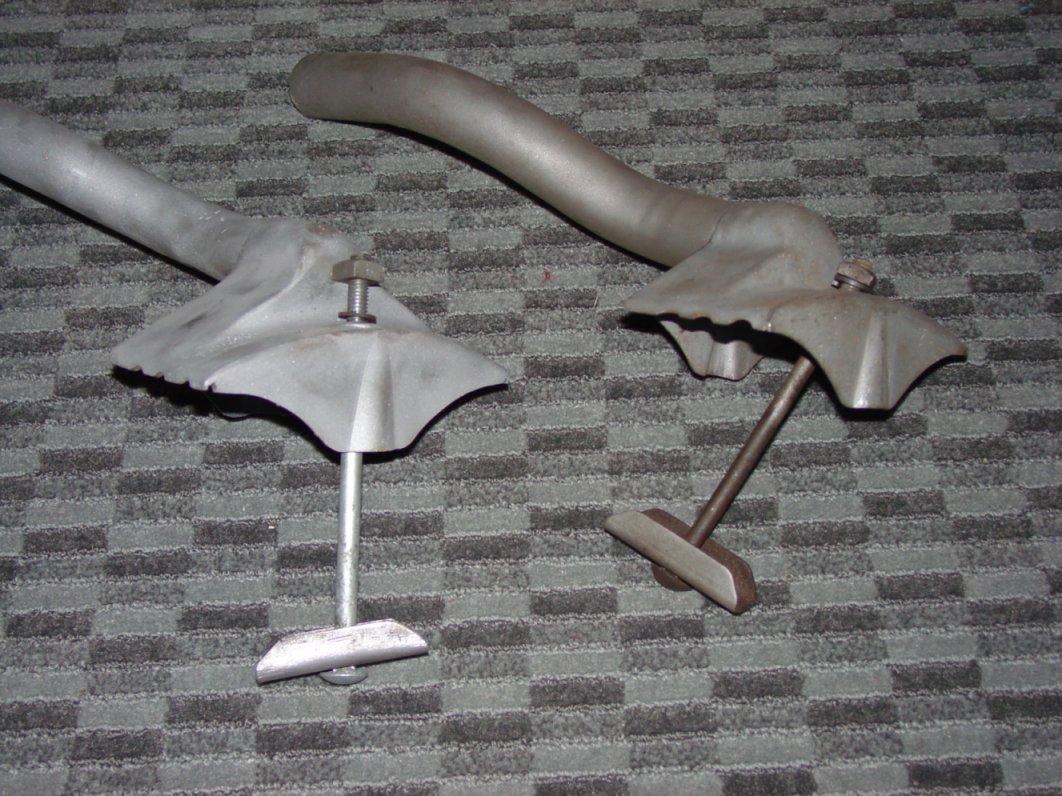 | 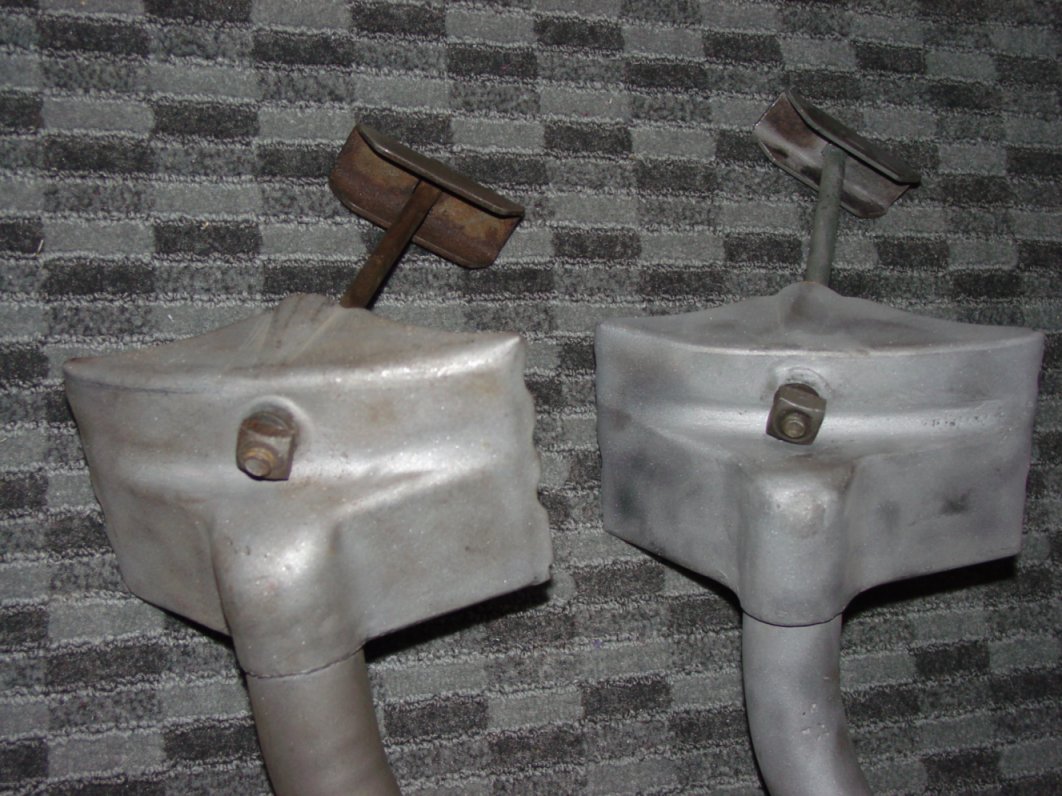 |
| Another view of the two hot air tubes. Original on the right. Click on the picture to see the full size. | Close up of the top of the hot air tube. The original hot air tube on the left, and the copy I made on the right. Click on the picture to see the full size. |
Sunday, January 9, 2005 11:36 AM
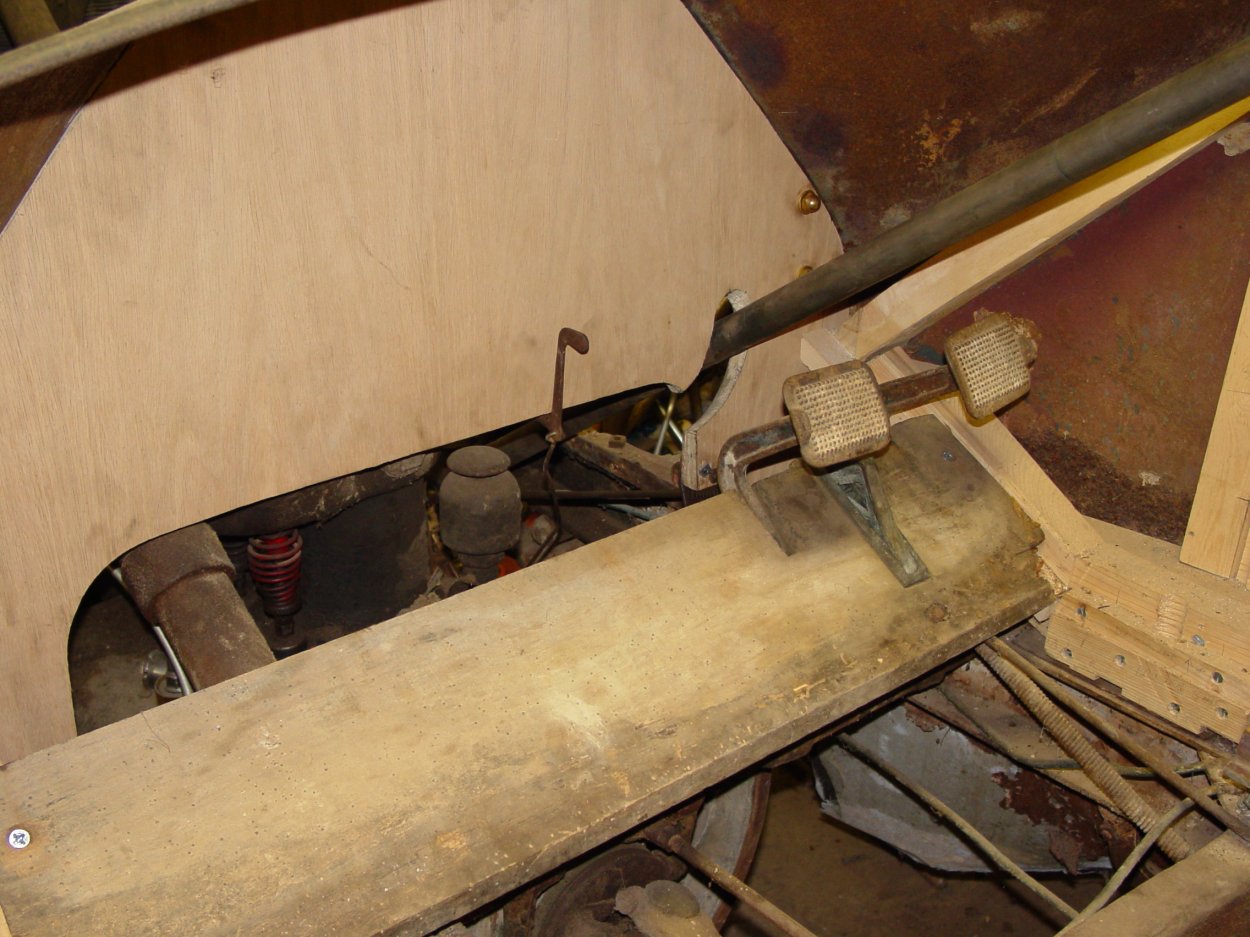 | | 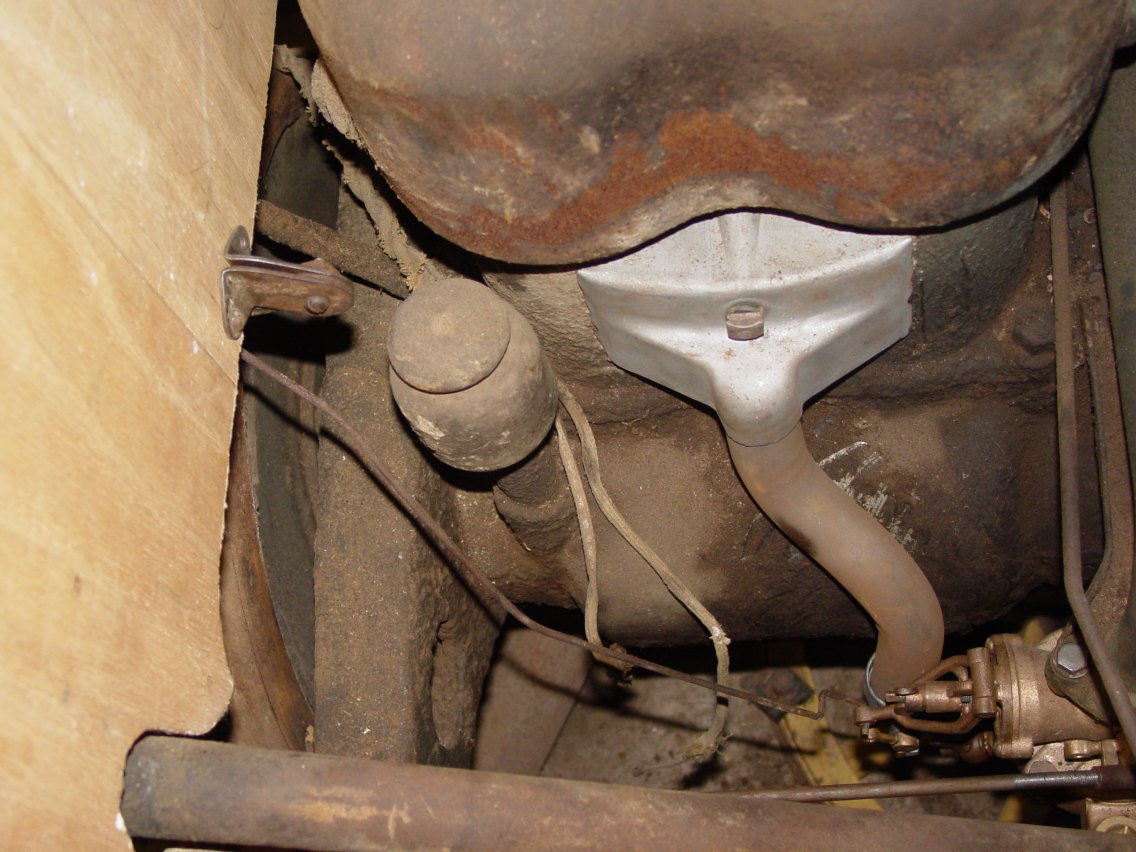 |
| Passenger compartment showing placement of air valve root lever. Click on the picture to see the full size. | | Engine compartment view of air valve placement and hook up to carburetor. Click on the picture to see the full size. |
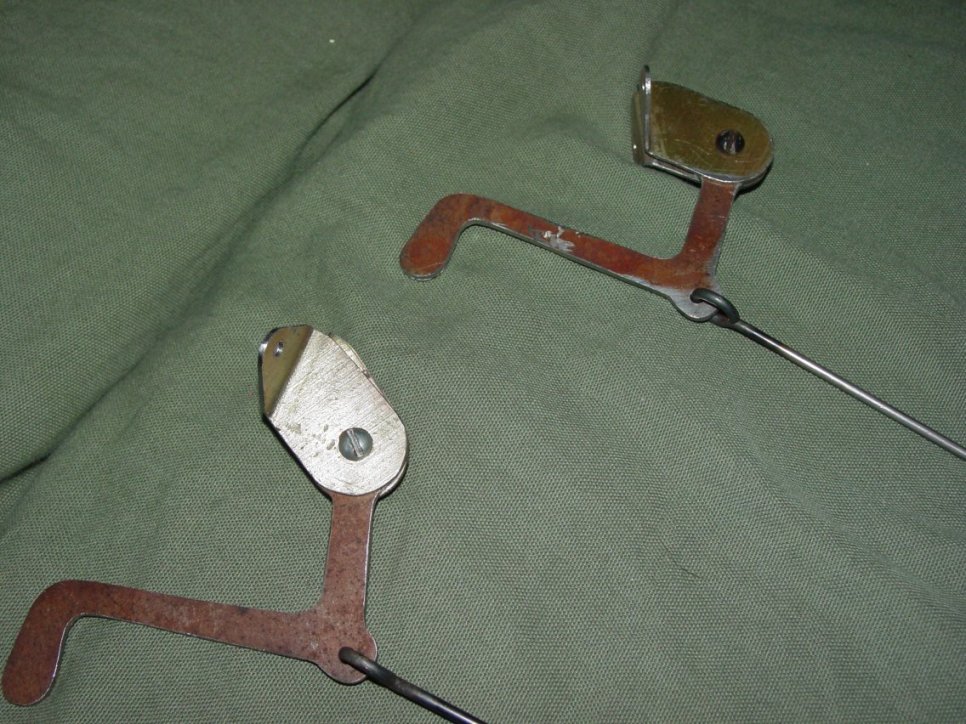 |
| The two air valve foot levers I made. Click on the picture to see the full size. |
The pieces were relatively easy to make. I just happened to have the correct gauge of steel to use, although I had to buy some rod. The hardest part was getting the rod the correct length. Hopefully I have it close enough. The new owners will need to put the bends in to work on their cars.
That is all for now, Please let me know if you have any questions.
How to contact me... |

|
|
John M. Daly |
||
| Phone: | (815) 786-4824 | |
| Email: | ||