Quick Links on This Page
So you want to how the restoration of the
Tonneau
for my E-M-F Automobile is going?
Well, you have found the right page.

Sunday, January 20, 2002 4:47 PM
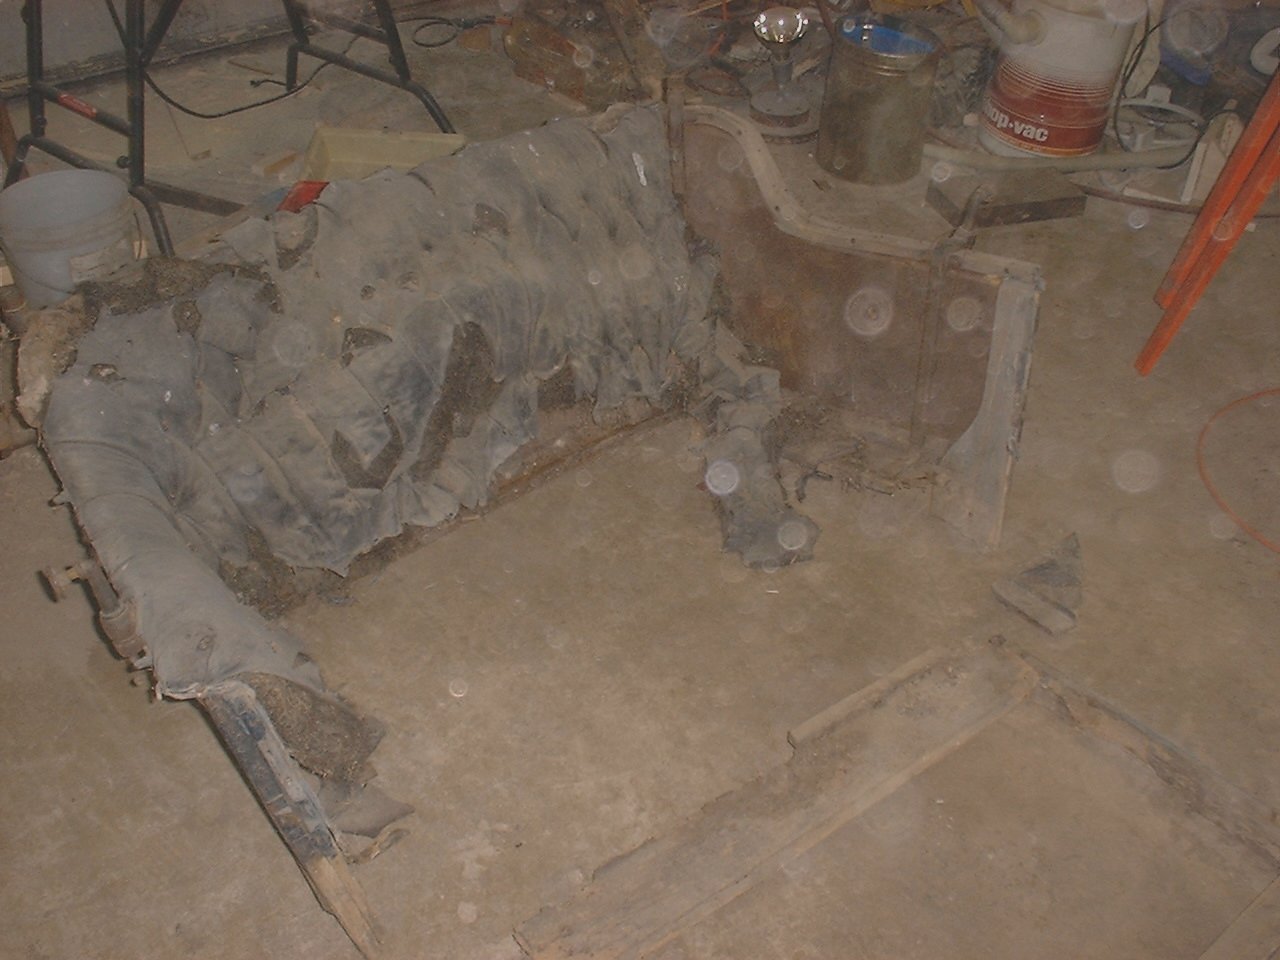 | 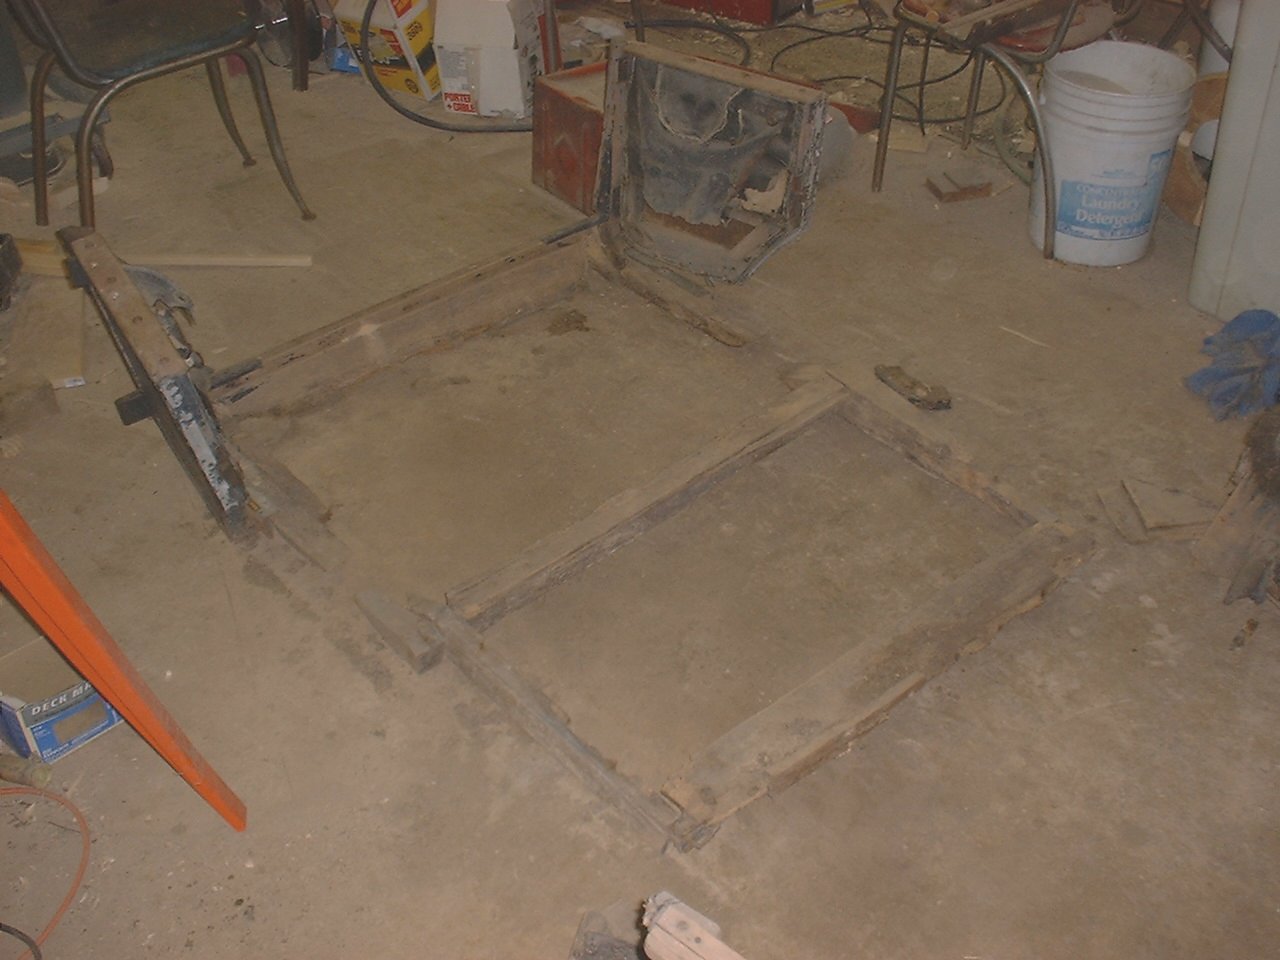 |
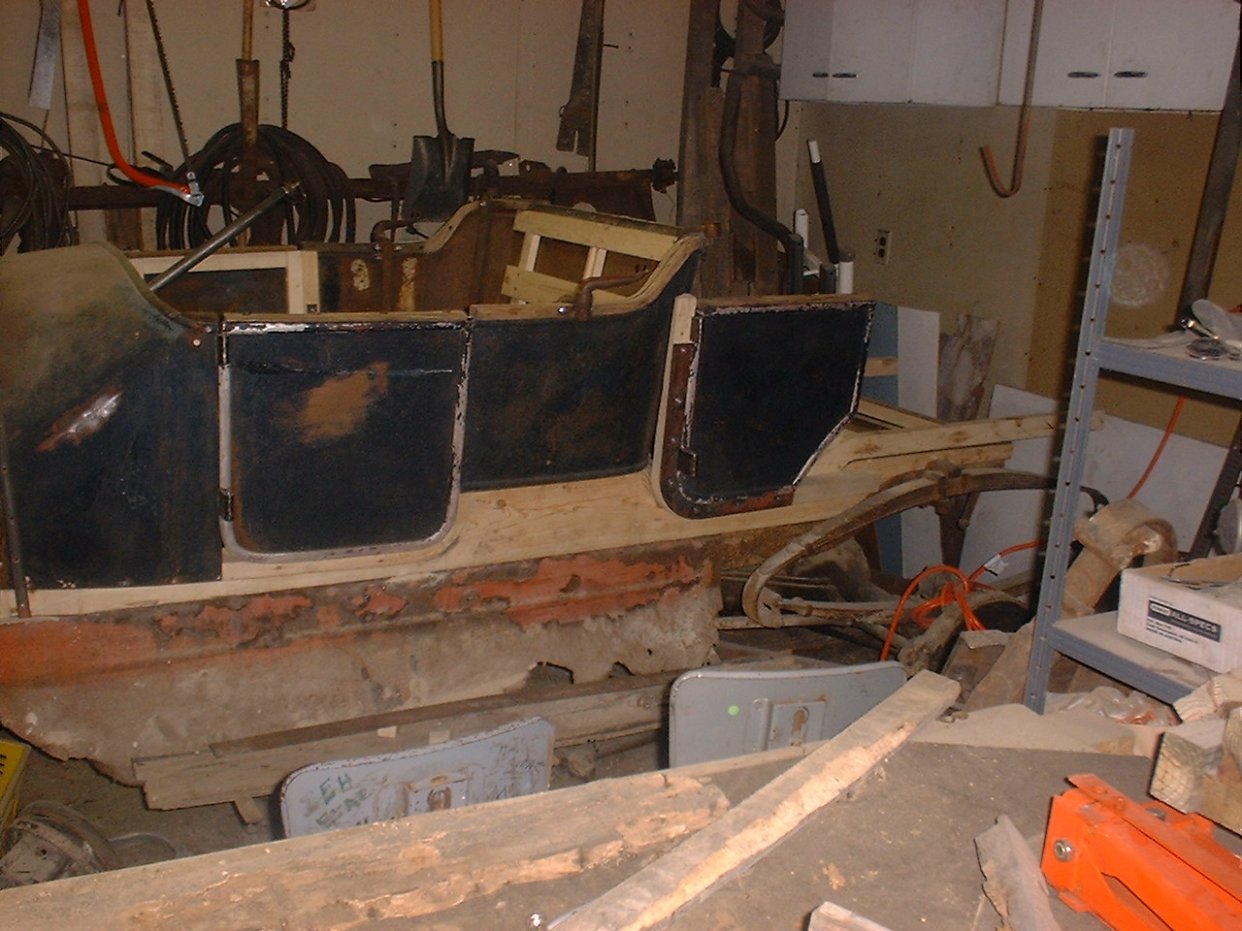
| The back seat of this Demi Tonneau. Not much of a seat frame left and very rusty metal. Click on the picture to see the full size. | This is the Tonneau frame and doors. I hope I can figure out how it goes together. Click on the picture to see the full size. |
Here is the first entry on the Tonneau Restoration page. I do not mind telling you that this is the most intimidating part of the this restoration for me because the Tonneau is in such bad shape that I am wondering if I will be able to figure out how it all goes back together. But I had similar thoughts about the rest of the body and I have gotten it figured out.
This first entry is just to document what I am starting with. The first two pictures at the top of the page show you all that I have of the Tonneau. Not much. There appears to be a basic frame to the Tonneau that has door posts at the front supported by angles "L" brackets that are cast brass. This at least gives me the angle of the doors.
 |  |
| Drivers side door and post. Note the original upholstery on the door. Click on the picture to see the full size. | Passenger side door and post. Click on the picture to see the full size. |
At the front end of this frame there are the posts for the doors. There is a riser for the seat to mount on at the rear. The Rear cross piece of wood appears to have been cut with a very shallow curve to it on the outside, for visual effect I imagine. I will need to think about how to cut this. I is larger diameter than the 10" blade on my table saw, so I can't shallow it out with that. Any Ideas anyone?
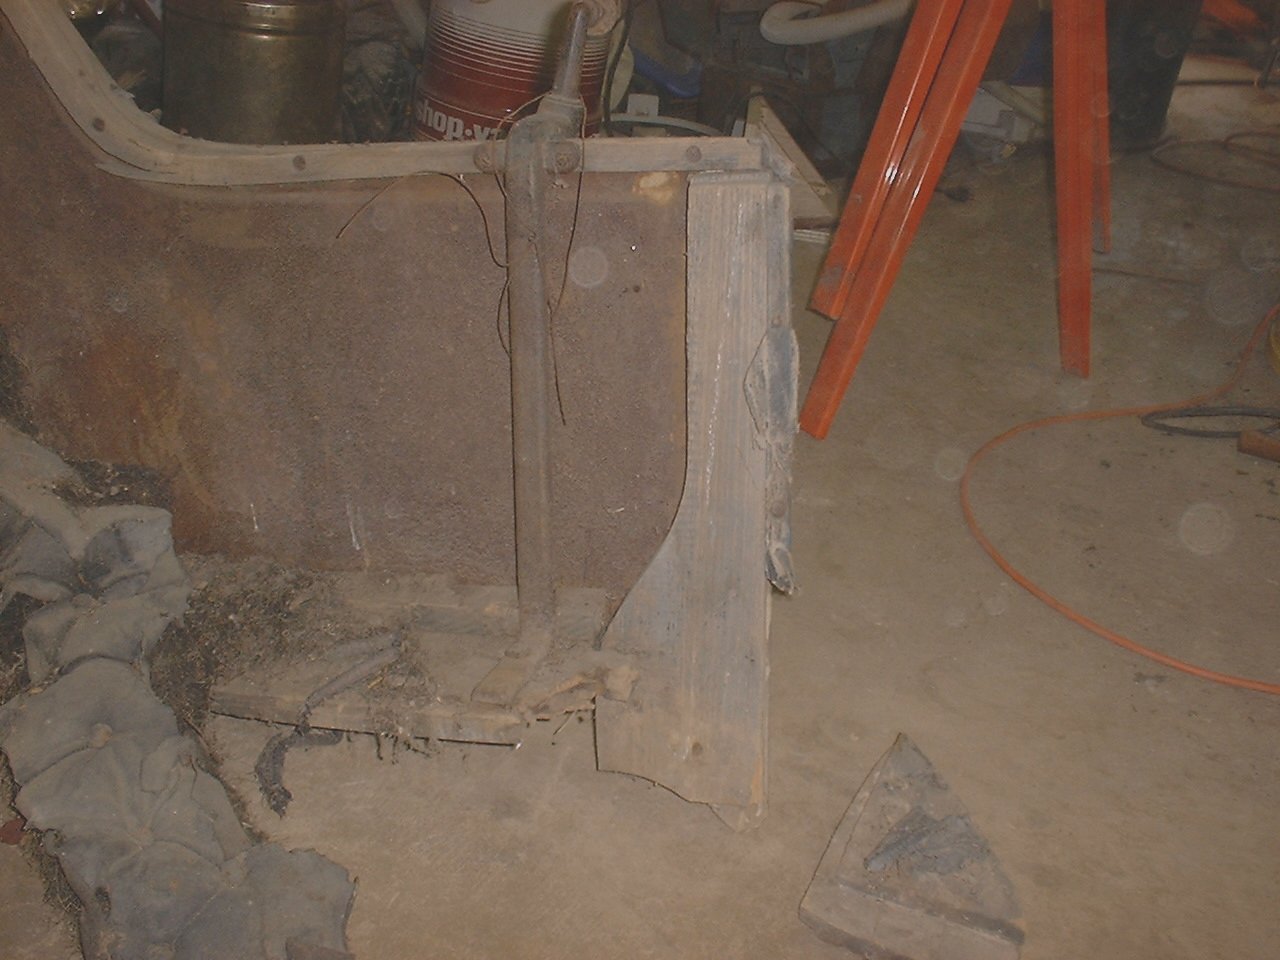 |  |
| Inner side of the passenger side door frame on the seat side. This is a big piece of wood I assume because it is the support for the door jam, no "L" bracket here. Click on the picture to see the full size. | Outside view of the driver side door at the bottom of the door jam. Click on the picture to see the full size. |
I also notice that the top support on the passenger side is bent. Something must have really nailed it to bend it like that without tearing up the body. I will need to straighten it.
All in all, after several hours of looking it over today, I think I can at least see how I need to start, and the basic way the Tonneau went together. Should be a fun puzzle.
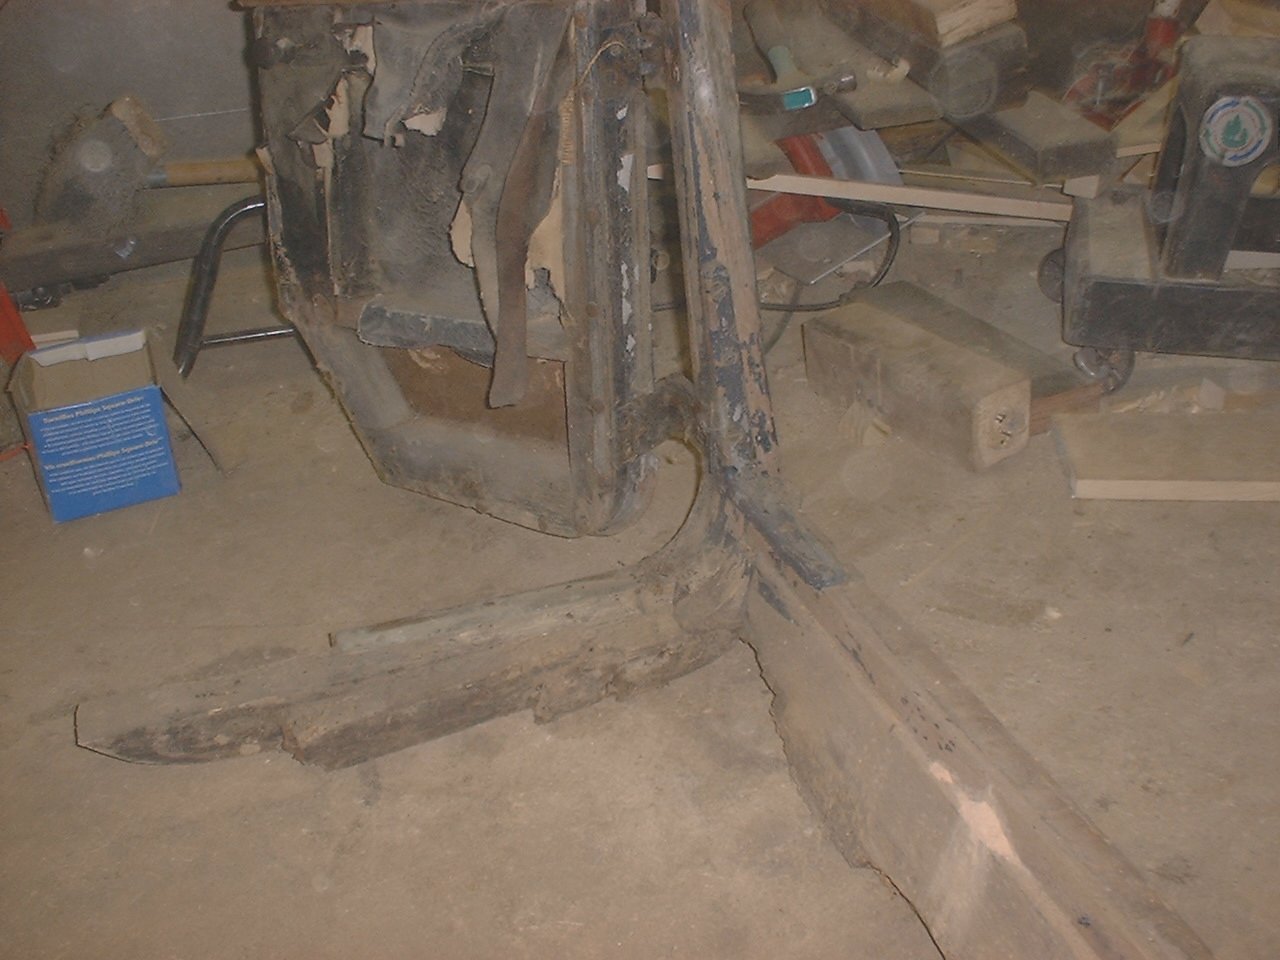
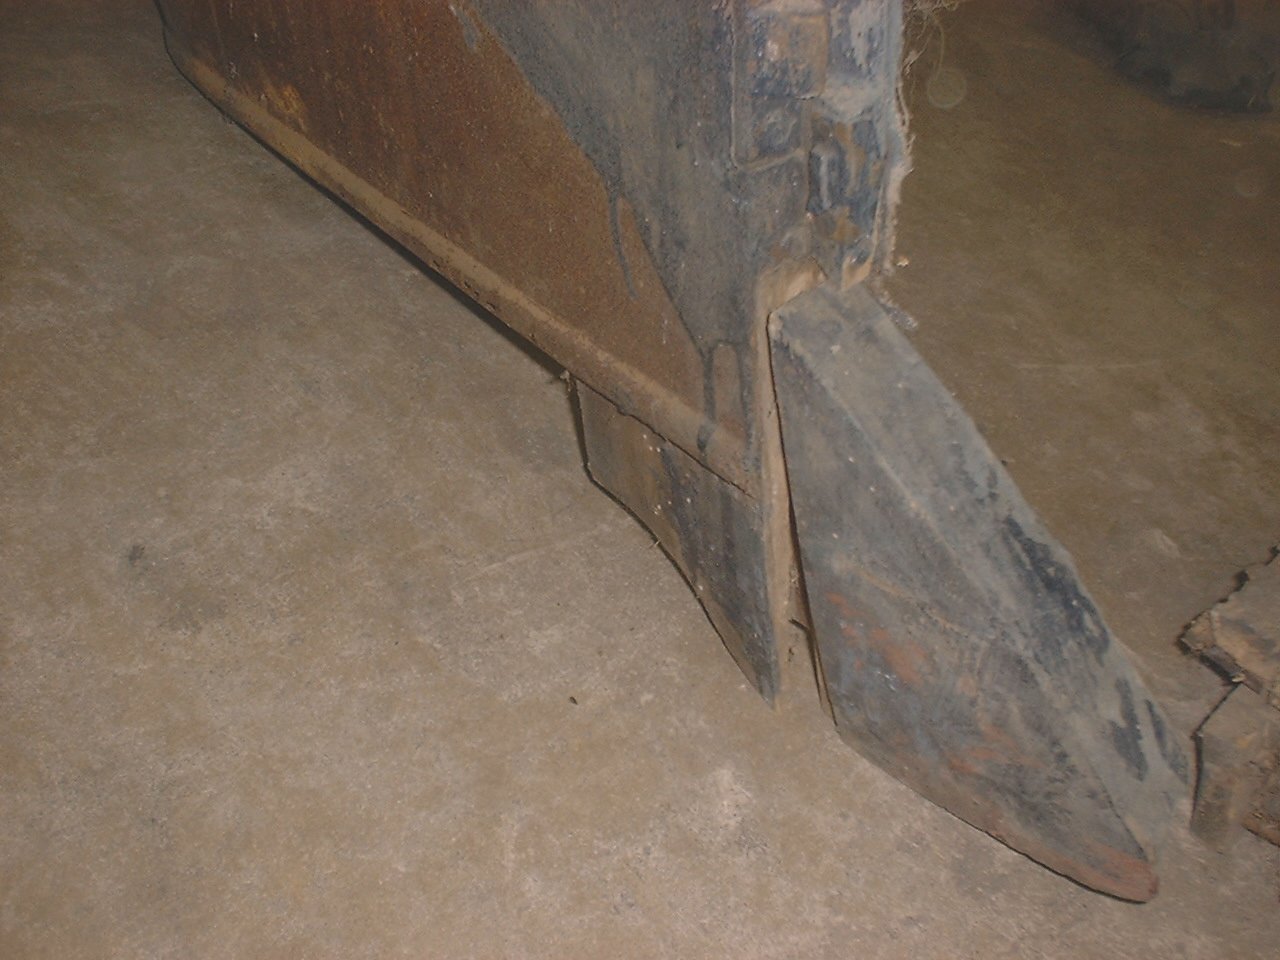
The last two pictures are of the door threshold on the drivers side and the front part of the seat riser. These two pieces come together to form the basic Tonneau frame.
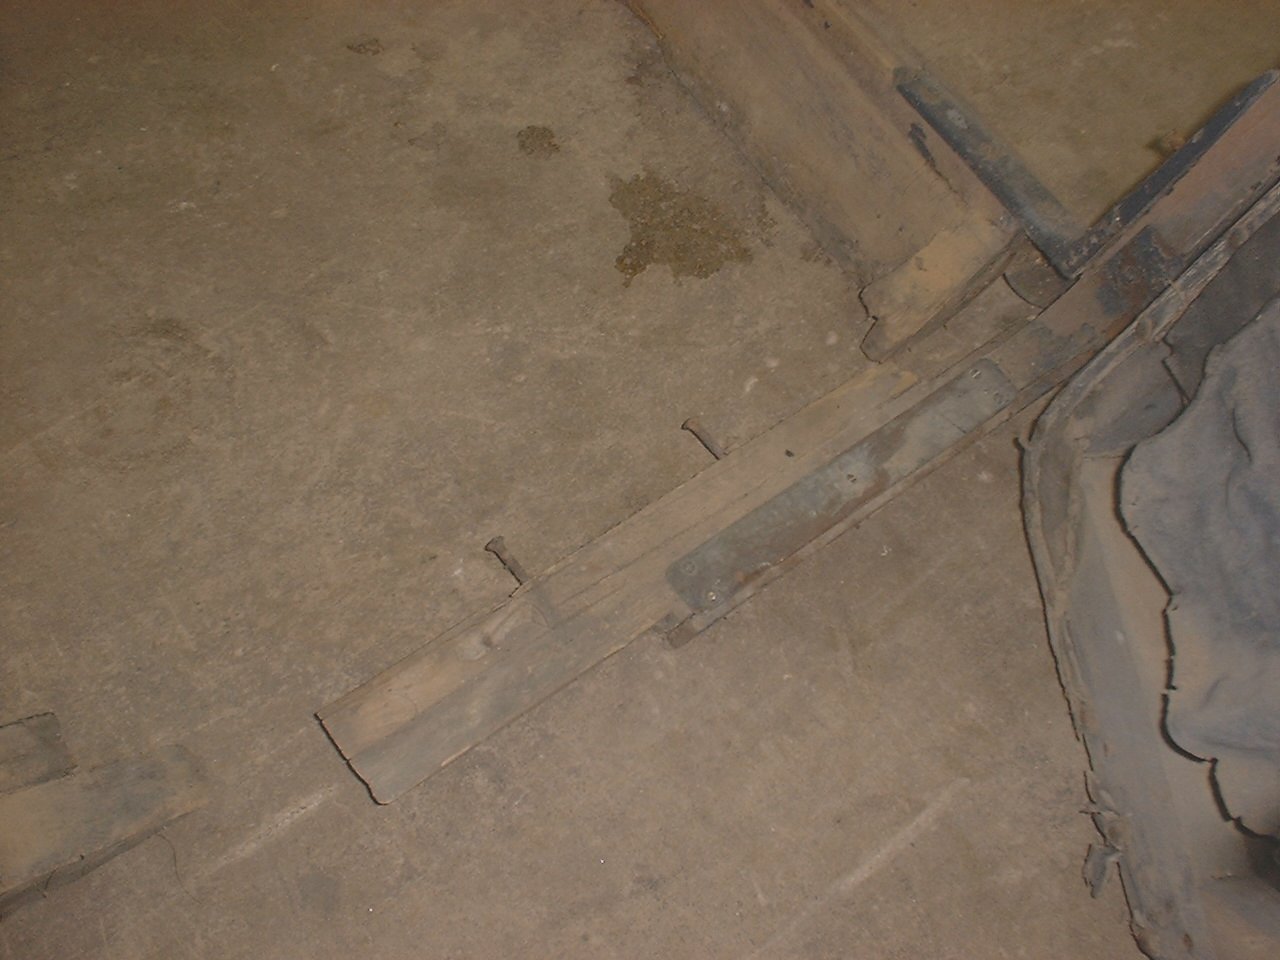 | 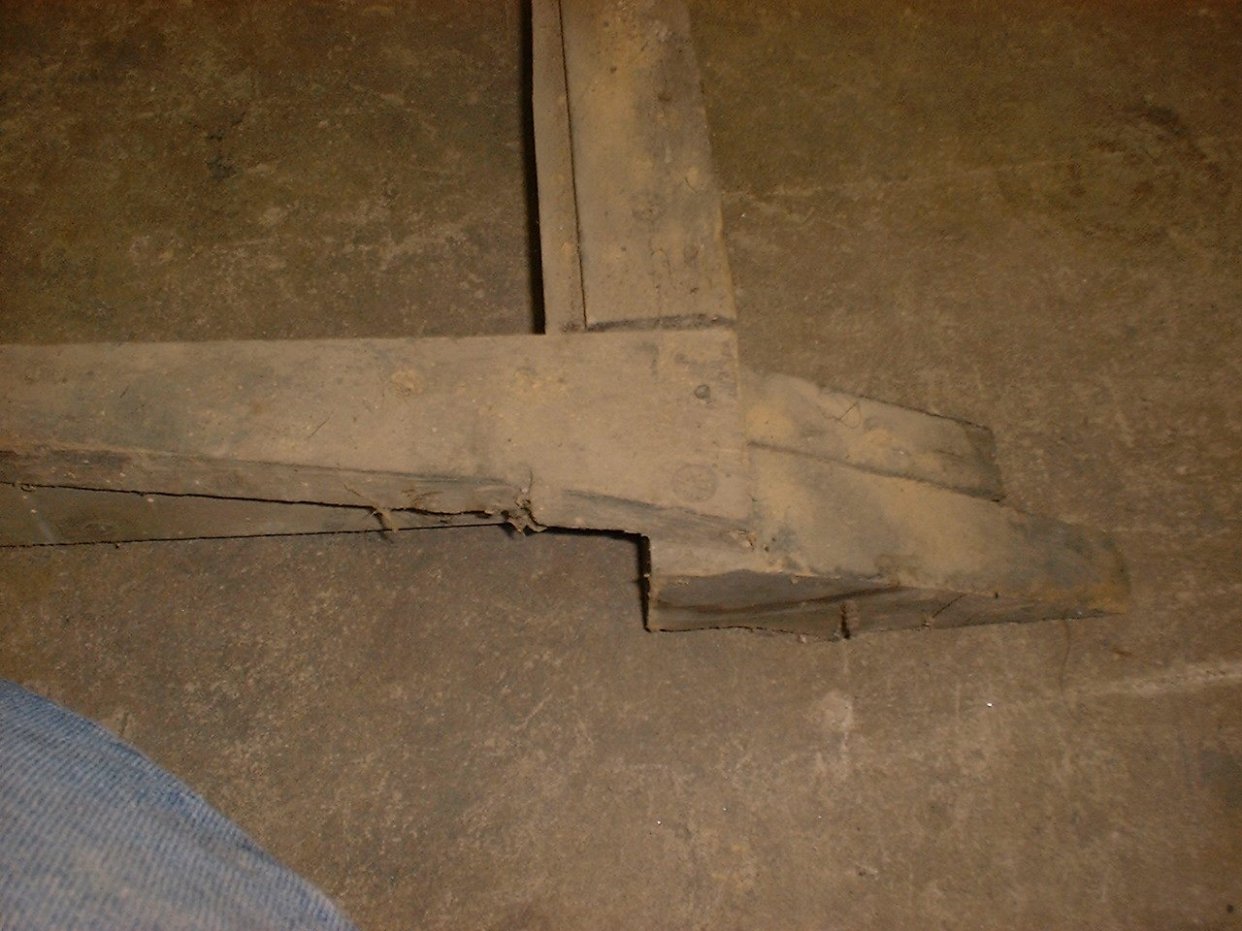 |
| Here is the door threshold on the driver side. Notice the brass threshold step plate. Click on the picture to see the full size. | Here is the front corner of the rear seat riser. Click on the picture to see the full size. |
Tuesday, March 19, 2002 11:54 AM
 | 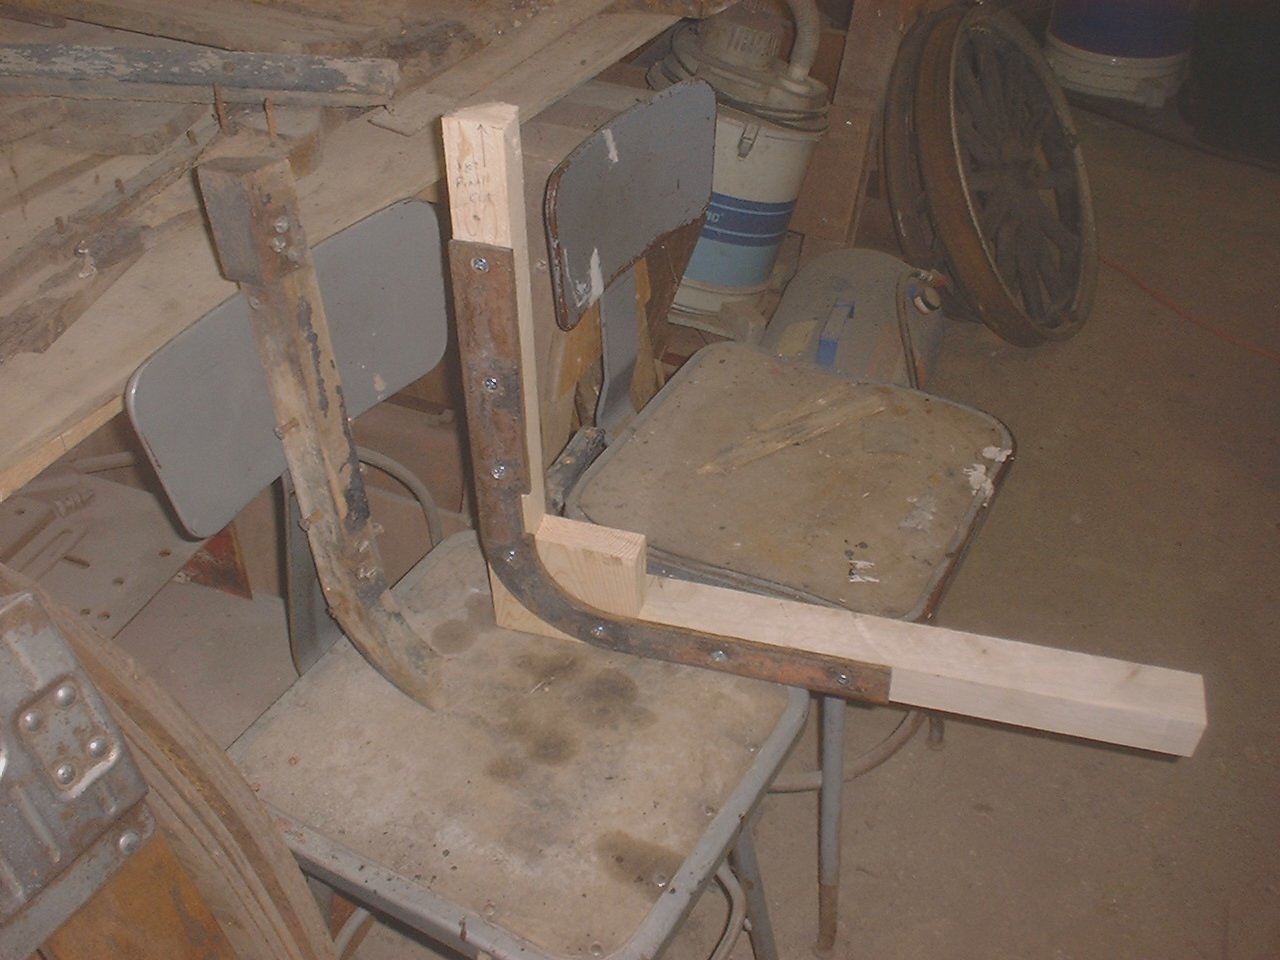 |
| This is the start of the new Tonneau. The door posts will mount to this. Click on the picture to see the full size. | This is the new passenger side door hinge post. I will cut out the inside curve for the door once it is mounted. Click on the picture to see the full size. |
Thought I had better post an update. I have not had a lot of time to work on the E-M-F lately, mostly due to the Life Singers Ministries production that is happening right now. We have three performances left this weekend, then I am done for the summer.
I have started to cut and fit the wood for the new Tonneau out of pine. I have very little left of the original wood, hopefully just enough to see what I need.
I have the basic frame done that mounts down against the main body. I have part of the passenger side door frame done. I just need to put them together. I may be able to try this weekend. You can see this work in the two pictures above.
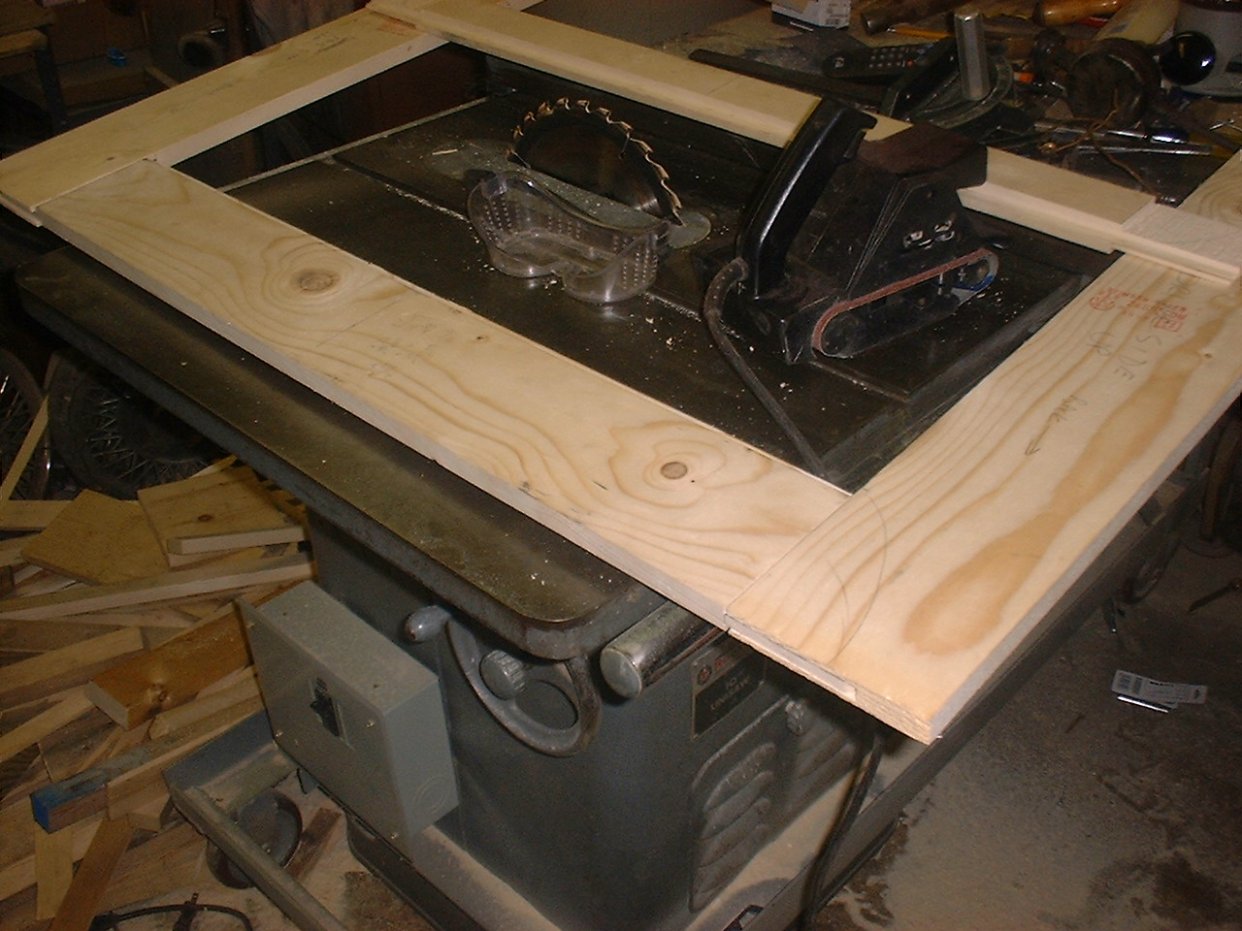
The two pictures below show a part that took me some time to figure out how to make. The one on the lower left is the front drivers side corner (remember, right hand drive). Took me some time to figure out how to cut the curves and make the mortise and tenon. The picture on the right is the front of the tonneau frame with what is left of the original front part of the frame.
Hope to post more soon.
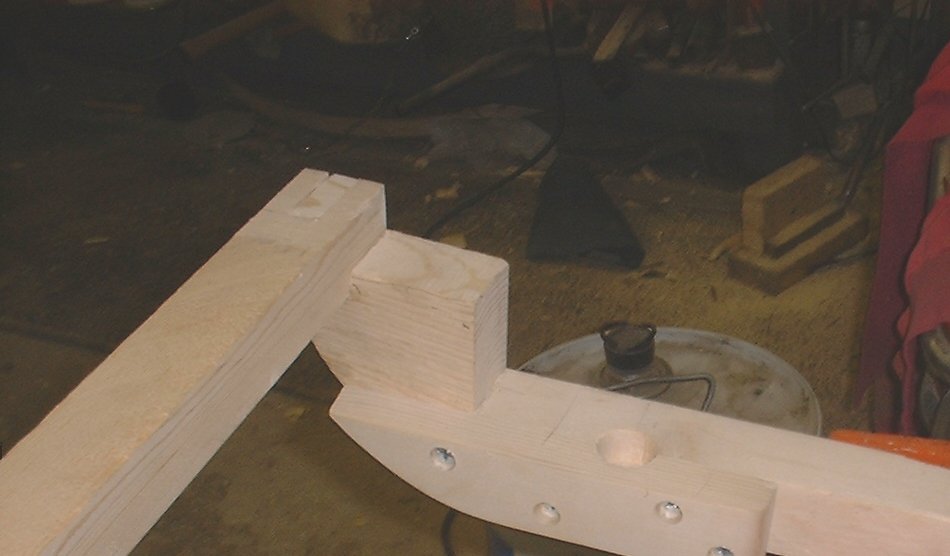 | 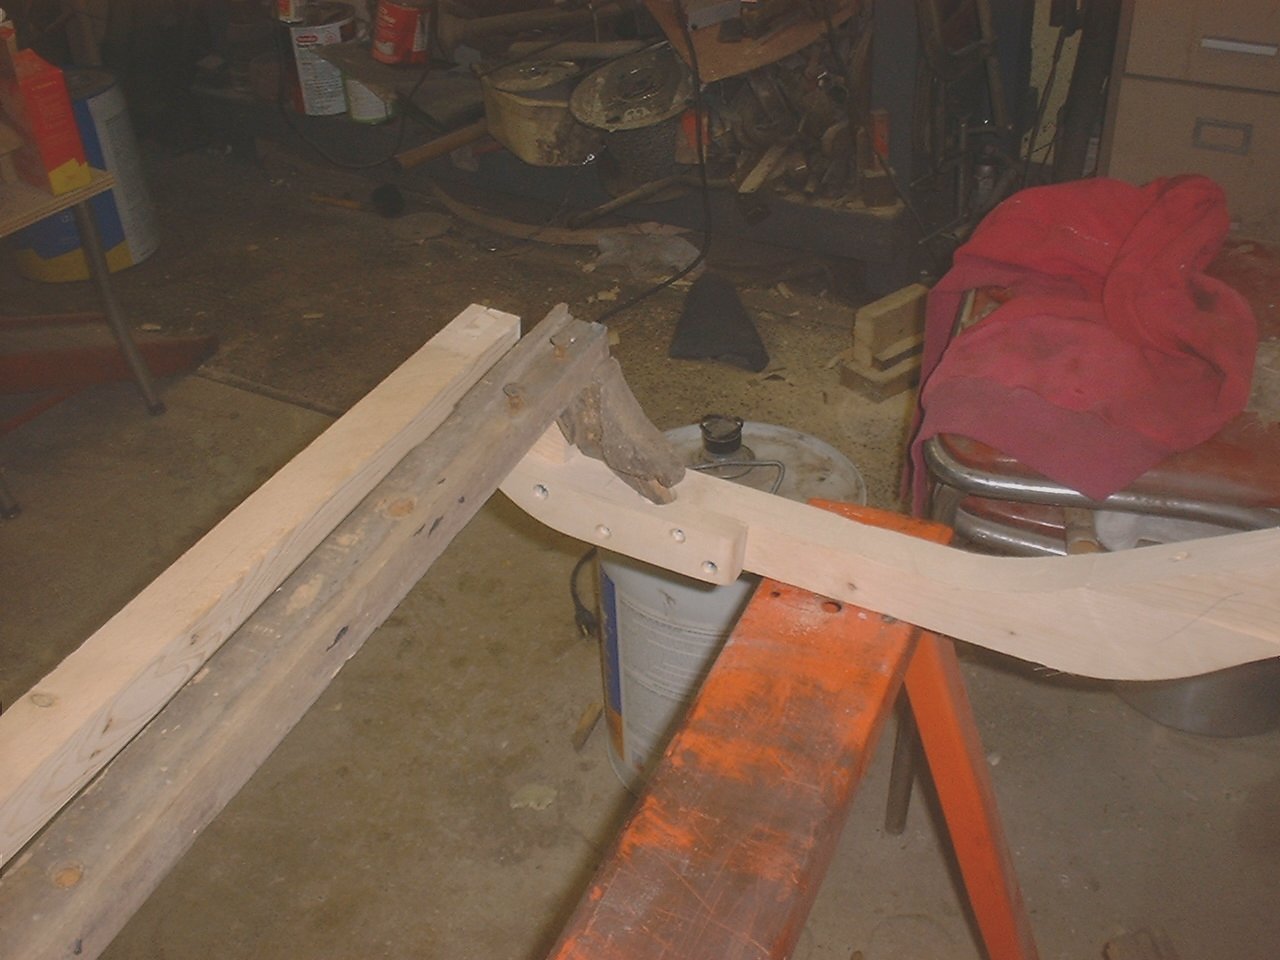 |
| This is the front drivers side corner of the Tonneau frame. Took me a while to figure this out. Click on the picture to see the full size. | This is the front of the new frame with what is left of the original front. Click on the picture to see the full size. |
Monday, April 22, 2002 11:55 AM
 | 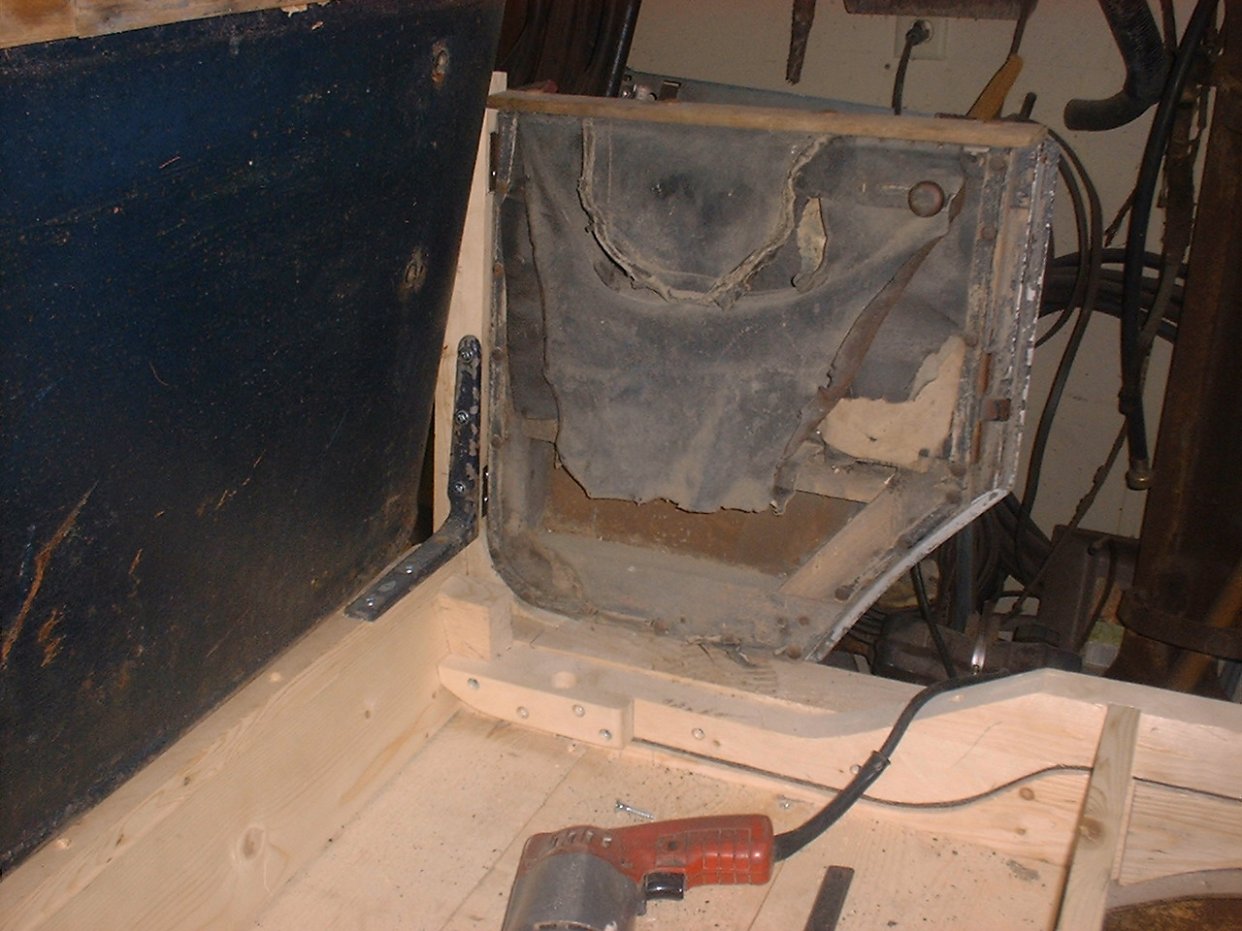 |
| This is the body with tonneau attached. Note the straight lines as a result of my second attempt at lining up the rear doors. Click on the picture to see the full size. | This is the inside of the drivers side rear door. Click on the picture to see the full size. |
My first attempt at hanging the rear (tonneau) doors resulted in doors whose lines did not follow the lines of the front seat. I came in and looked at the pictures I have of the 1912 Demi Tonneau's, limited as they are, and was able to see that the lines should line up between the front and read seat. I thought about it for a week and came back and did the drivers side slightly different, ensuring that the lines of the body were correct. This resulted in a door that looked much better. I then went back and re-did the passengers side. Alignment will be important as I put the rear seat in place since it has the jams and latches for the rear doors.
You may notice a gap between the rear door hinge pillar and the front seat. That is because I do not have a filler piece of wood put in there yet (and still don't as a matter of fact). I will make sure it is there in the finished product.
Next it was on the rear seat. I started by disassembling what was left of the original wood. Needless to say, that did not take long. I then played jig-saw puzzle with all the pieces trying to figure out how it all went together. Once I thought I had that figured out, I started measuring and cutting wood. I seem to have just the right pieces of the original wooked to determine the measurements needed. I will need to extrapolate some, but I should be very close. I had to do the same thing on the front seat.
At this point, I have the basic parts of the rear seat frame cut and two of the four joints made. I do not have the frame cut to fit back into the seat metal yet, as you can see from the pictures below. I will join the frame together and then cut it to fit the metal.
The joints are cut the same way as the original, using a table saw blade to cut the mortise and then cutting the tenon to the contour of the saw blade. You may be able to see this in the picture below.
That is all for now. I will update more as it is available.
 |  |
| This is the start of the frame for the rear seat. The back cross member joints are complete Click on the picture to see the full size. | This is the rear cross member joint dissassembled. This is cut the same way as the original. Click on the picture to see the full size. |
Tuesday, January 14, 2003 11:55 AM
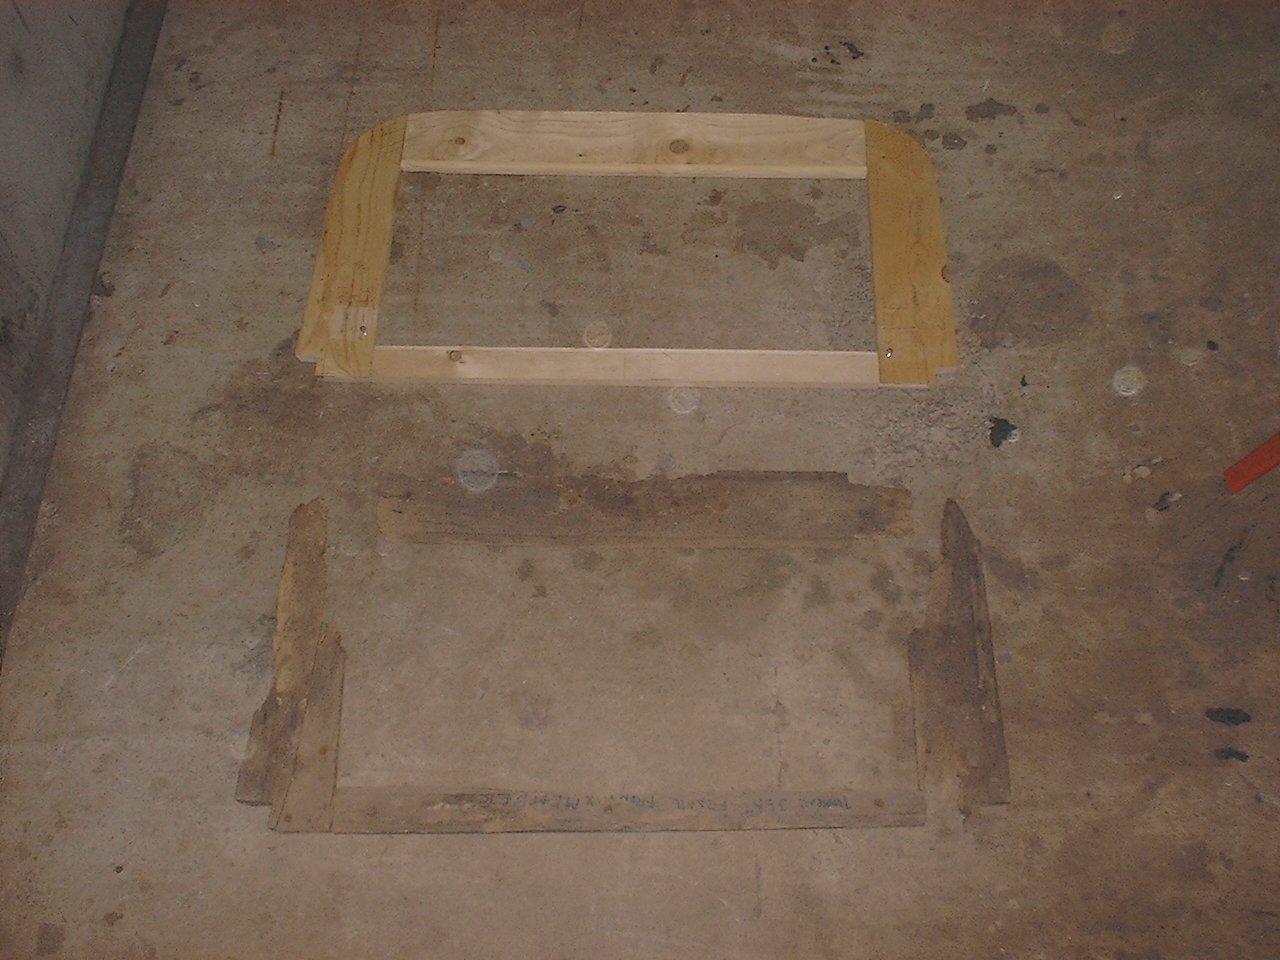 | 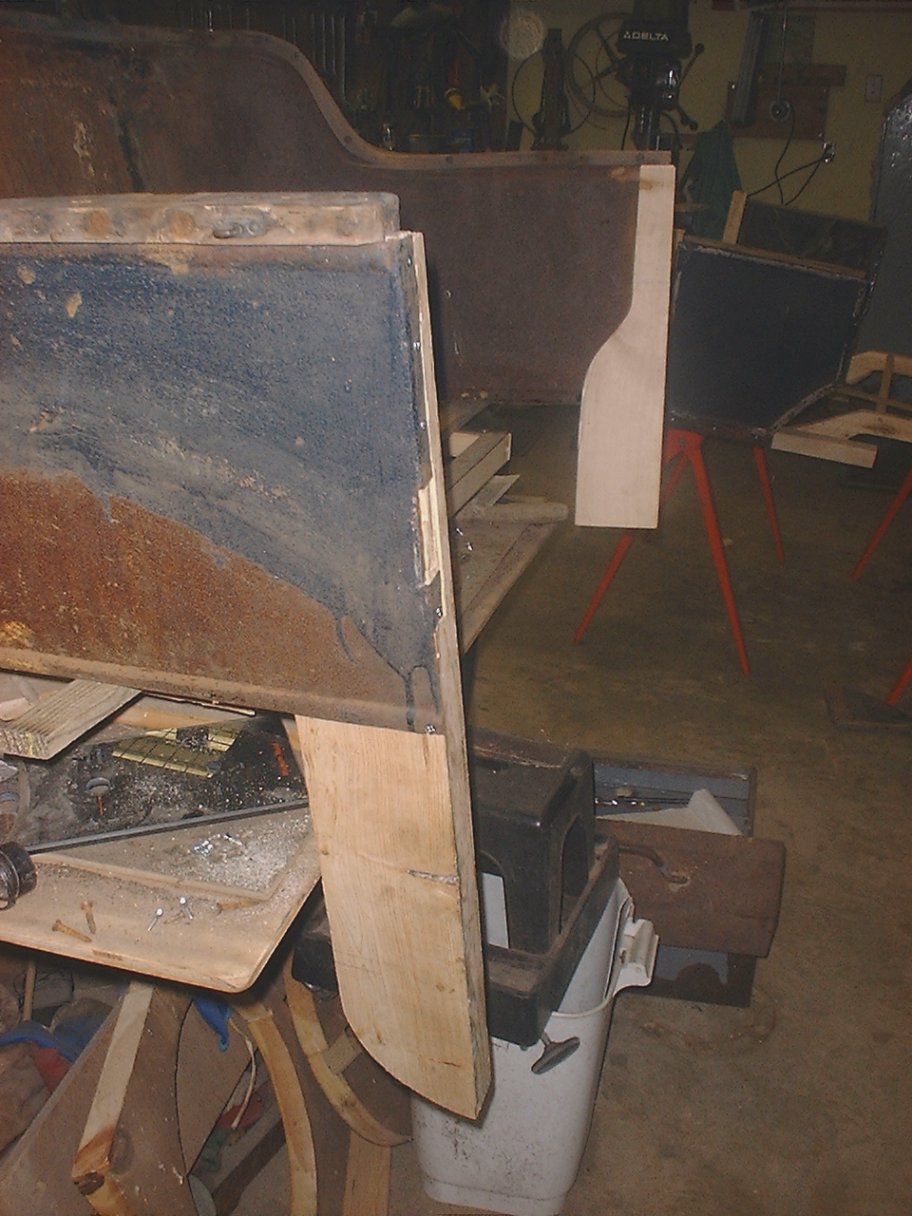 |
| This picture shows all I had of the original tonneau seat frame, and the pine template for the new seat frame. The original is on the bottom, the new is on the top. The original is kind of hard to see, since it blends in with the floor. Click on the picture to see the full size. | The tonneau seat with the rough template for the new door posts installed. Why the strange shape? They are the scrap cut out from the main body sills. Click on the picture to see the full size. |
I spent some time with the tonneau seat frame making it fit the metal seat back. I then cut the remaining two mortise and tenon joints for the front cross member. My problem has been dimensions. I am really having to make educated guess' on this part of the body because so little is left of the original. The picture on the left above will attest to what I have had to work with. The pieces of the original are set apart from each other because about that much is missing. Remember, most of the wood for the tonneau was in a pile when I got it, so it has really been a puzzle to figure out.
I then went back to the door post. The original piece of wood is a strange shape. It starts at the top about 2" square, but widens out about half way down the board to about 5.5". I could not imagine why this was needed and I thought I was going to need to glue up a couple of pieces until, while looking through my pile of scrap wood, I found the exact shaped piece of wood. Apparently this piece of wood is what was cut out of the main body sills to make room for the tonneau. Not realizing this, I had used both of these pieces of wood to make some test cuts on, but I will be sure not to do that with the ash lumber.
Next I fit the new tonneau seat frame into the seat shell with the new door posts installed. I knew I needed to make one more cut to the door posts to fit them the basic tonneau frame, but I thought I would slide the seat frame, as is, onto the tonneau frame to get an idea of the fit. What I find is that I am at a point where I once again am stumped on the dimensions. I decided to quit for the day and do some thinking. I think I know what to do, but I would like to be more sure, so I will wait until I can get over and take a look at my neighbors car, and see how his looks. If it is as I think it is, then I am in good shape. If not, I may have to go back a few steps. I think I need to cut down the sides of the tonneau seat frame so that the doors can close further. Cutting off wood is better than trying to put it back on, right?
So for now, I will think on this a bit. More later.
Sunday, February 29, 2004 11:56 AM
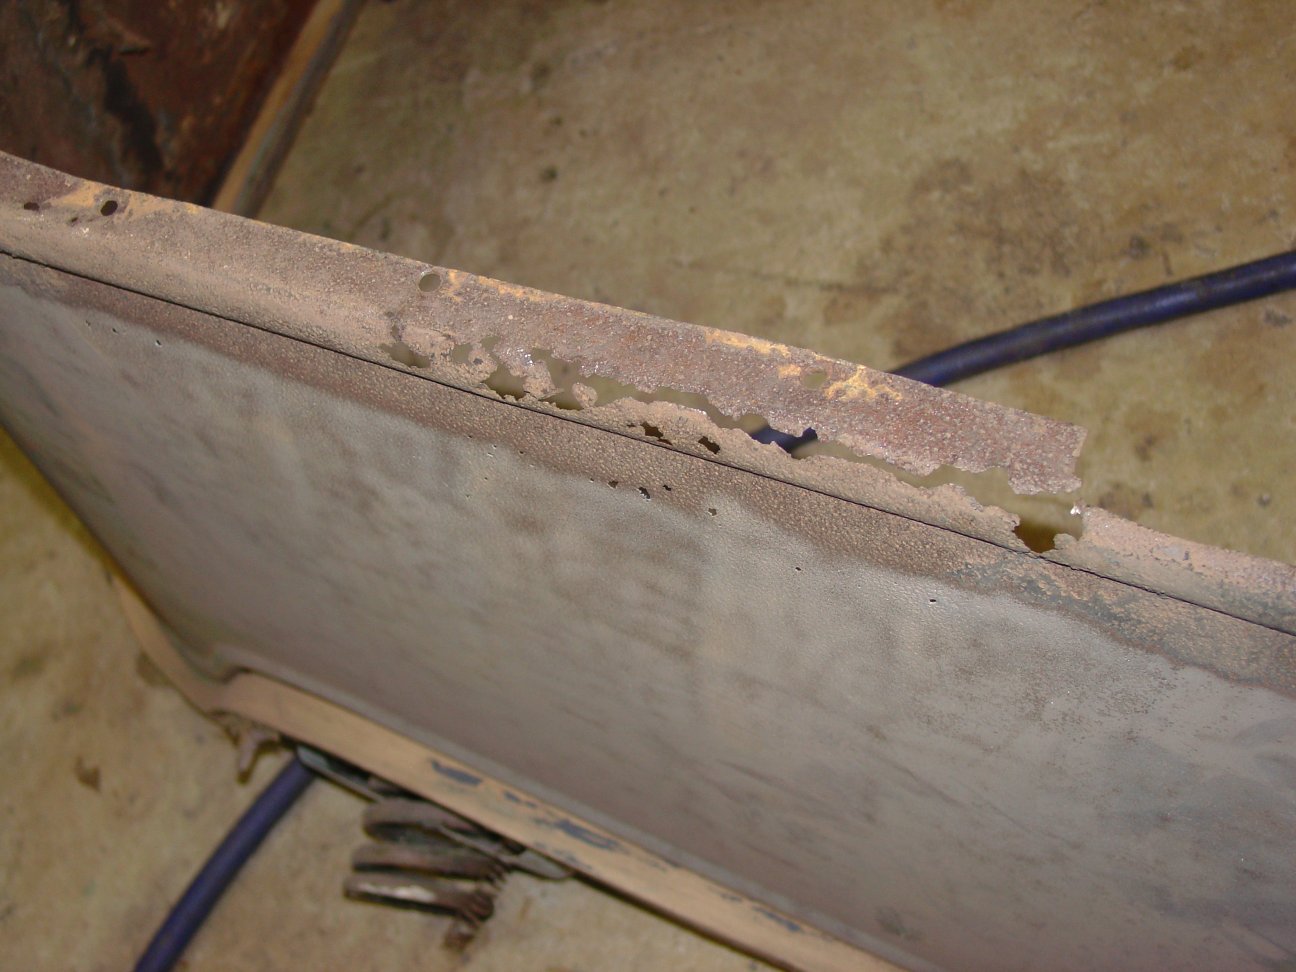 |  |
| This picture shows the bottom side of the skin for the tonneau seat on the passengers side. This is the worst part of the rust on the body. Click on the picture to see the full size. | This is another view of the rusted area so you can see the bead in the steel. Click on the picture to see the full size. |
I needed to make a tool to put the bead back in along the bottom edge. To do this, I got a piece of steel from my dad that already had an inside right angle to it (see the picture below). I took my die grinder and used a carbide cylindrical shaped cutting bit (that I call "Mr. Sliver maker") and cut a groove the right shape to form the outside of the bead. To get the correct shape, I first cut out a cardboard template and used that to make sure I had the shape correct.
I then took a couple of other pieces of bar stock, welded them together and ground them down to the correct shape to form the male part of the stamp. I welded this to a larger block of steel, partially for the weight, but mostly to keep the metal above the bead flat as I was forming the bead. I welded the male and female parts of the die together with a hinge and tried it out on several scrap pieces of sheet metal before I made the final patch piece. You can see the patch in the pictures below.
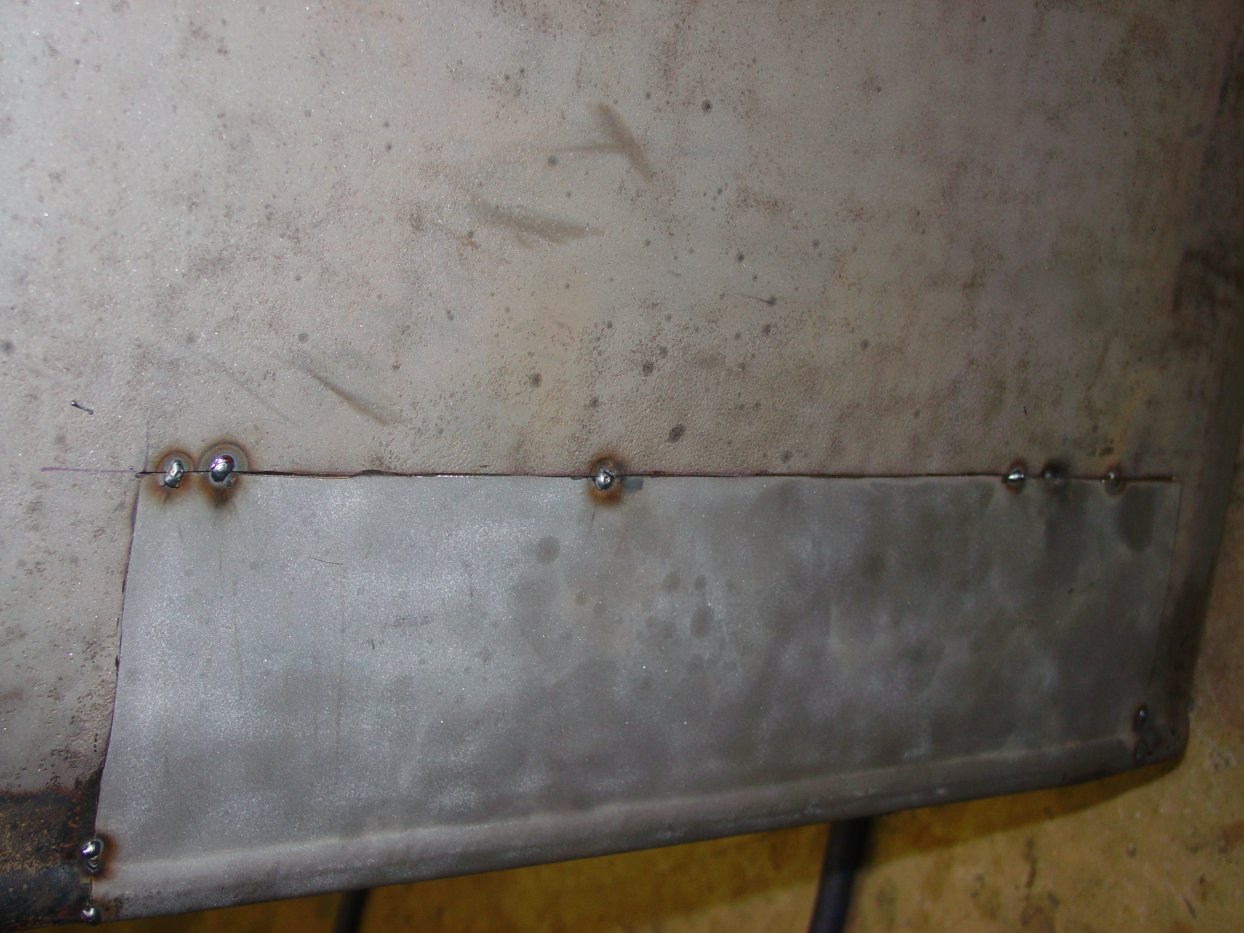
Next I measure the area I wanted to replace. Most of what I am replacing happens to be hidden by the rear fender when the tonneau in mounted to the body. I marked of the area with a Sharpee marker and used my die grinder with a cutting disk in it to cut out the area with the rusted metal.
I then spent about an hour fitting the patch panel the the are I cut out. I have it tight enough that it pretty much stays in by itself. I then tacked it in with a few small welds so it would look like I did something before I came in from the garage. You can see in the picture below the seat skin with the patch tacked in.
It will be a few weeks before I am able to work any more on the E-M-F. My wife and I are starting the performance season for our Easter production with the "Life Singers Ministries". You can check out the website if you would like to know more about that group.
I will post more when there is more to post. Spring is just around the corner.
 |  |
| This is the bead maker I built to put the bead around the bottom of the seat into the patch I was to weld in. Notice the patch panel in the background. Click on the picture to see the full size. | This it the seat with the rusted metal removed and the patch tacked in. Click on the picture to see the full size. |
Sunday, January 9, 2005 11:57 AM
 |
| This is the patch from the last entry finally welded in completely and part of the body work done. Click on the picture to see the full size. |
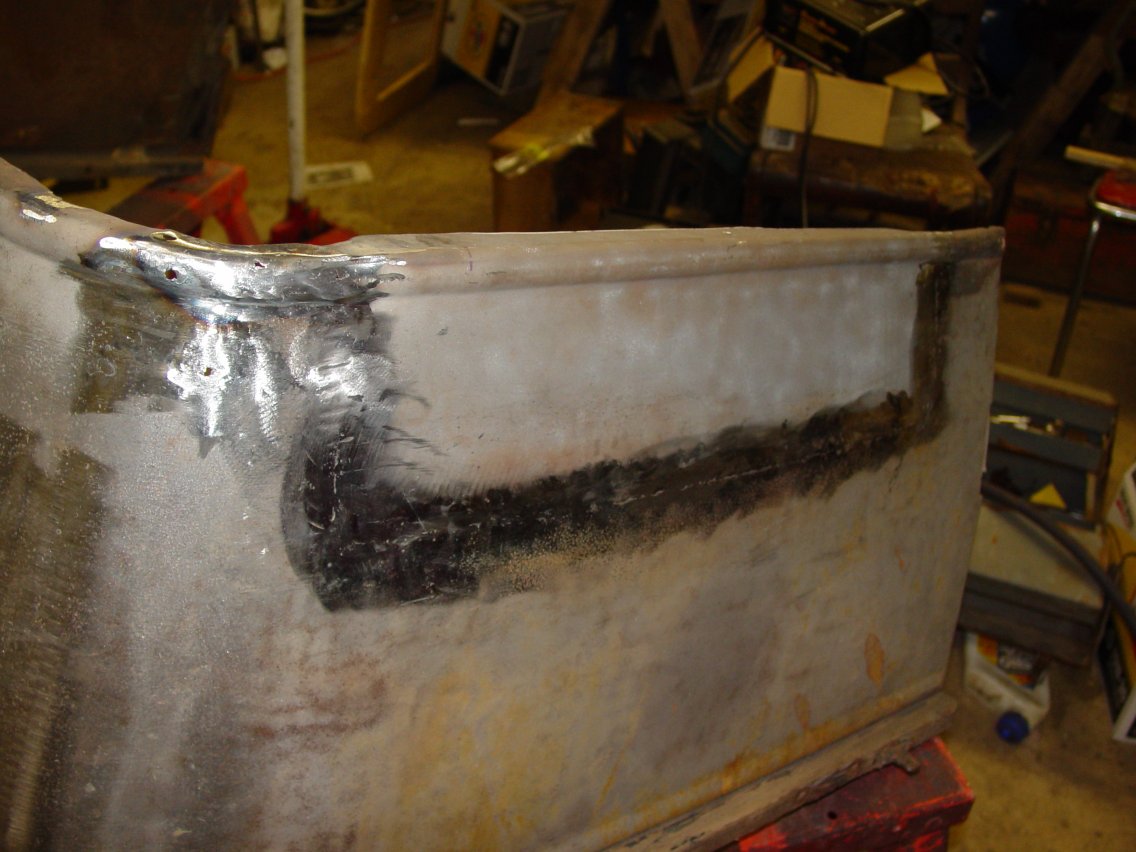
Like I said, I did finish welding in the patch and did some grinding down to finish the patch. I will need to use some body putty to finish things off, but I want to work the metal a bit more so I can use as little filler as possible.
When I welded this, I used my MIG welder in a "back-stitch" pattern, meaning, I welded for an inch, then went back to one inch before the start of my weld, and welded that inch, and proceeded down the weld. That cut down on the heat build up which can cause panel warpage. I did get a little warping, and on the next patch I will do smaller increments.
I then proceeded to look at the bottom corner of the body near the patch. I started welding up the wholes caused by rust, but the more I welded, the more the holes opened up. I did eventually get most of it, and once I ground it down, it looks OK, but then there was the other corner.
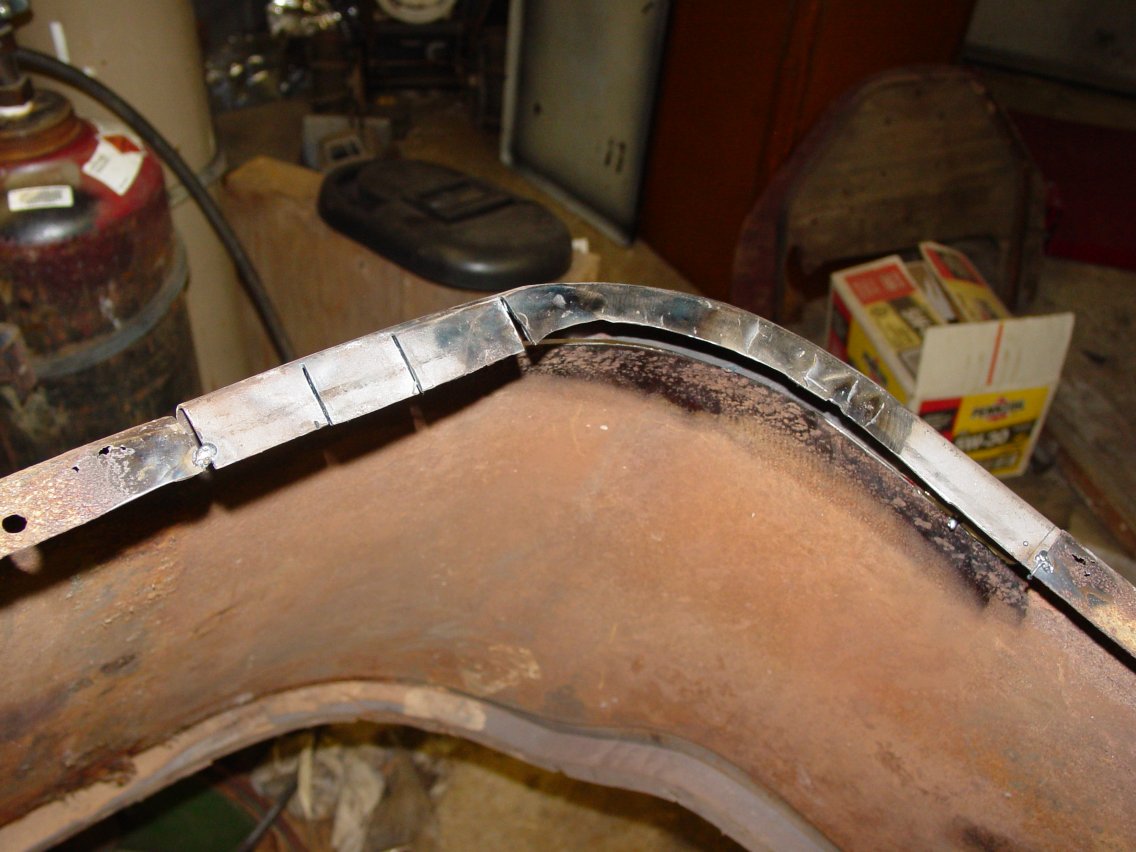
The other corner was so bad I knew I would never be able to weld it up. I decided to try and make a patch for it. I used the bead knocker to make a straight patch panel. Then I took a piece of 1/2 inch steel rod and bent it in the shape of the corner. I wanted the rod to fit down into the bead to help maintain the shape as I bent the patch around the corner. I then notched the bottom side of the patch and heated it with the torch. I clamped one end of the patch to the rod and proceeded to slowly bend it around the corner. Once it was bent, I fit it to the body a bit better before welding up the notches.
you can see from the pictures below that I am still fitting this piece into the corner, but I am just about ready to weld it in. It was not nearly as tough as I expected. If I had known it would be this easy, I would have done the other corner this way.
Hopefully it will not take me a year now to finish the patch:). Please let me know if you have any questions.
 | 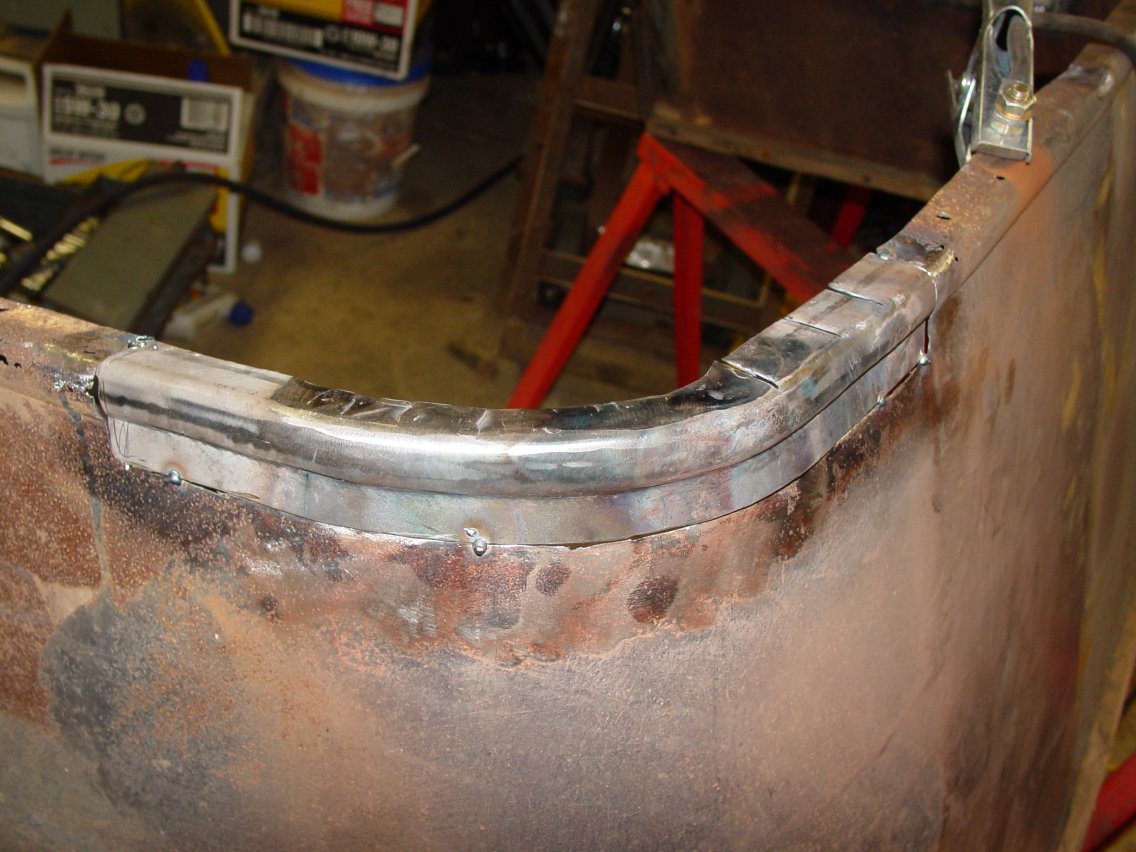 | |
| Bottom side of the seat showing the patch and some of the notches I made to help with bending the corner. Click on the picture to see the full size. | This is the outside of the seat skin showing the new corner patch tacked in place. Click on the picture to see the full size. |
How to contact me... |

|
|
John M. Daly |
||
| Phone: | (815) 786-4824 | |
| Email: | ||