Quick Links on This Page
So you want to how the restoration of the
Lights
for my E-M-F Automobile is going?
Well, you have found the right page.

Sunday, January 4, 2004 4:38 PM
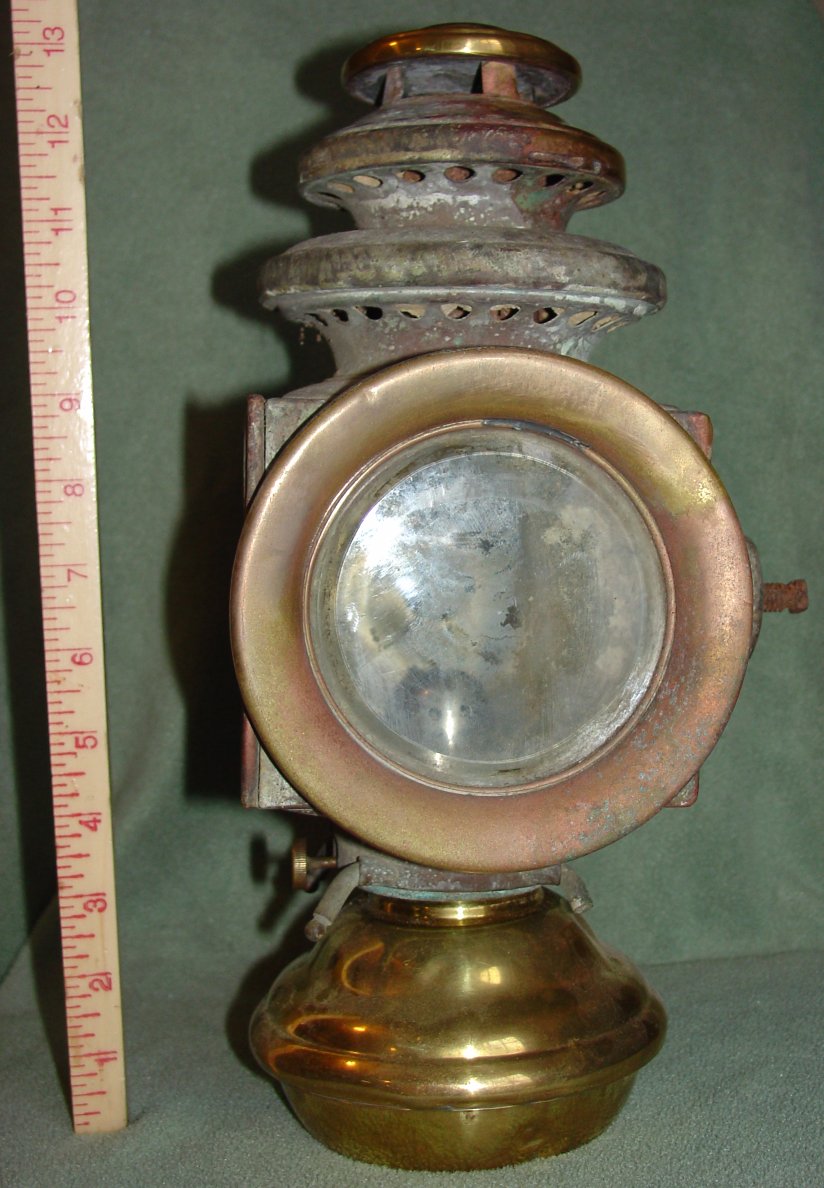 | 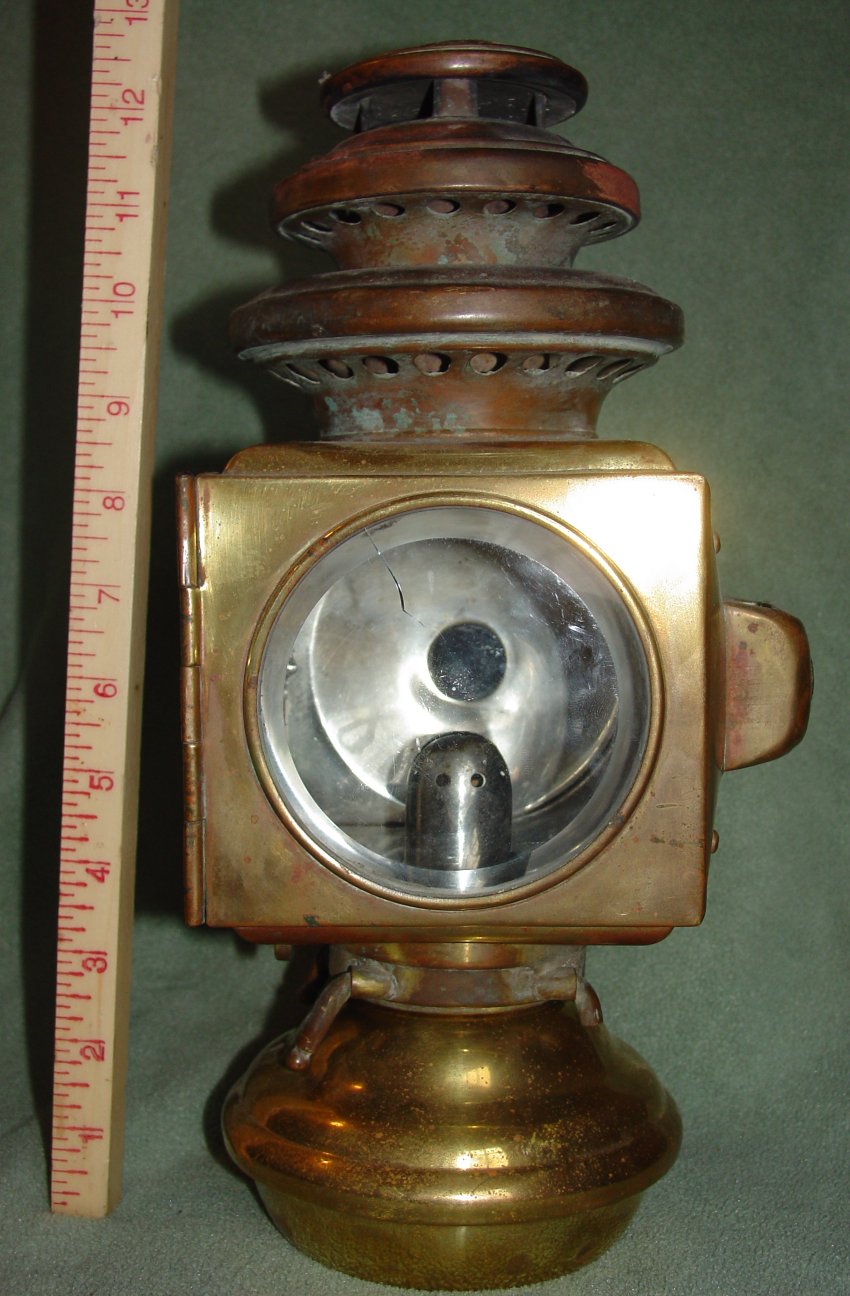 |
| The original drivers side cowl light from my car showing the rimmed style 3-tier E & J lamp. This type was used on the E-M-F's. Click on the picture to see the full size. | A rimless drivers side 3-tier E & J light. This type was also used on the E-M-F's Click on the picture to see the full size. |
I found the rimless style light on E-bay a couple of years ago. I have original pictures that also show this type of light was used on the E-M-F. I basically bought it for the tank to go onto my rimmed style light to complete it.
My car was missing the Cowl light brackets when I got it. When I bought the parts car from Nebraska, it came with two different style of cowl light brackets. But, much to my shagrin, neither type would line up with the holes in my original dash. It was not until I saw another car like mine that I noticed that the cowl light brackets for the Demi Tonneau for 1912 are different than the 5 Passenger Touring (Though I believe they are the same as the 1912 Roadsters).
Luckily, my neighbor ended up buying the car I saw, and he let me borrow the light brackets over my Christmas break and I fabricated a set of my own. Originally they were cast steel and then brass (or nickel on the nickeled cars) plated.
 |
| Old and New Cowl light brackets. The ones I made are the top set. Click on the picture to see the full size. |
To make these I started with some 3/8 inch steel plate. I had to grind it down to the correct size which took several hours of grinding with a body grinder. I then cut out the triangular shaped plates that mount to the firewall and then the pieces that the lights mount to.
I then took a piece of 3/4 inch rod and heated and bent it over an anvil to the approximate shape of the bend of the originals. The Originals were not 3/4" all the way up but instead tapered as it wend up to the light. I took care of that later.
I then notched the plates that attach to the firewall to accept the rod, and "V'ed" away the plates so that I could fill in with weld to get a strong joint. I set up the original bracket next to the one I was building on the welding table to get the angels as close as I possibly could. I then tacked the curved rod to the base plate with the MIG welder. I then eyed it and measured it in every way I could think of and let my dad do the same thing until we agreed that the new matched the original. I then used the ARC welder to weld the rod to the base.
I then lined things up and cut off the top of the rod in the approximate place where the plate that the lamp mounts to would go. I lined this piece up in a similar way and ARC welded it to the rod. Then I continued to fill in the welds and grind them down to give a nice appearance. The process up to this point was done in my dads garage.
I brought the pieces home to my garage to finish them up. I used my MIG welder (new tool for Christmas 2003) to continue to fill and grind until I had all the contours correct and any blemishes out of the pieces. I used my grinder to shape the rods to the correct taper using a micrometer and measuring the original at several places along the rod and making mine match as close as I could. I did final finish work with course and fine files and then emery cloth.
I mounted them to the car then using the holes in the original fire wall to locate the holes in the new fire wall. They were attached by counter-sunk machine screws originally, oval headed I think. The holes in the brackets and in the firewall were 5/16", so I bought some 5/16" steel flat head coutersunk machine screws. I could not find them in brass like I wanted, so I took my torch and added some bronze to the tops of each of the screws and then made them oval headed. I then put the screws in the drill press and used a file to shape them and cut the slots with a cut off wheel in my die grinder. I then polished the new brass heads to a bright shine.
I then mounted the light (drivers side since that is all I have) and heated and bent the brackets to do a final alignment. You can check out the pictures below to see the final version, at least where it is at this point.
In all, the major part of the fabrication for the two brackets took me two days. I then spent a couple more days in the garage doing some finishing work and straightening.
Of course, they will need to be brass plated eventually, but I will hold off on that until I get closer to the end of the restoration. No need to do it now and just watch them tarnish.
My thanks go out to my neighbor Bill Day for allowing me to borrow his brackets to copy and to my dad who helped me think through the fabrication. In all it was a lot of fun.
I will post more on the lights as I get it. That is it for now.
 | 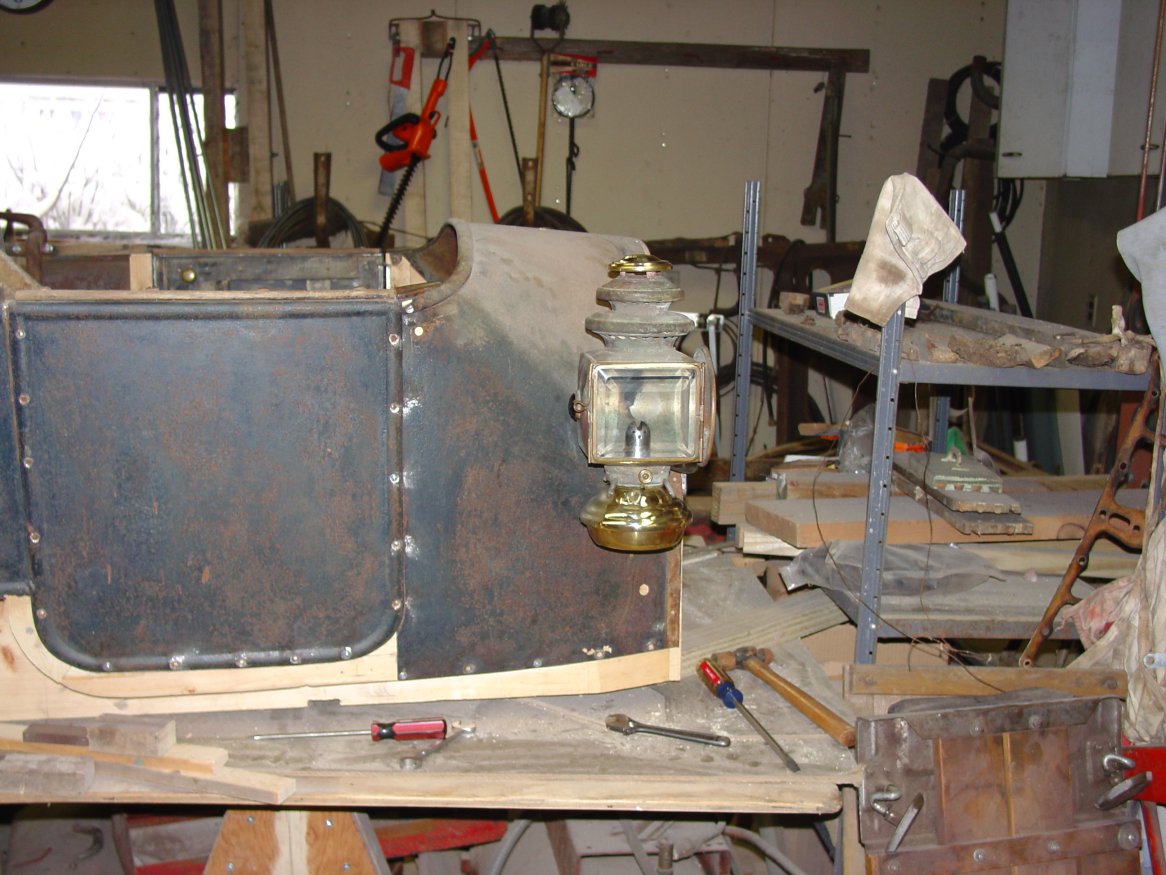 |
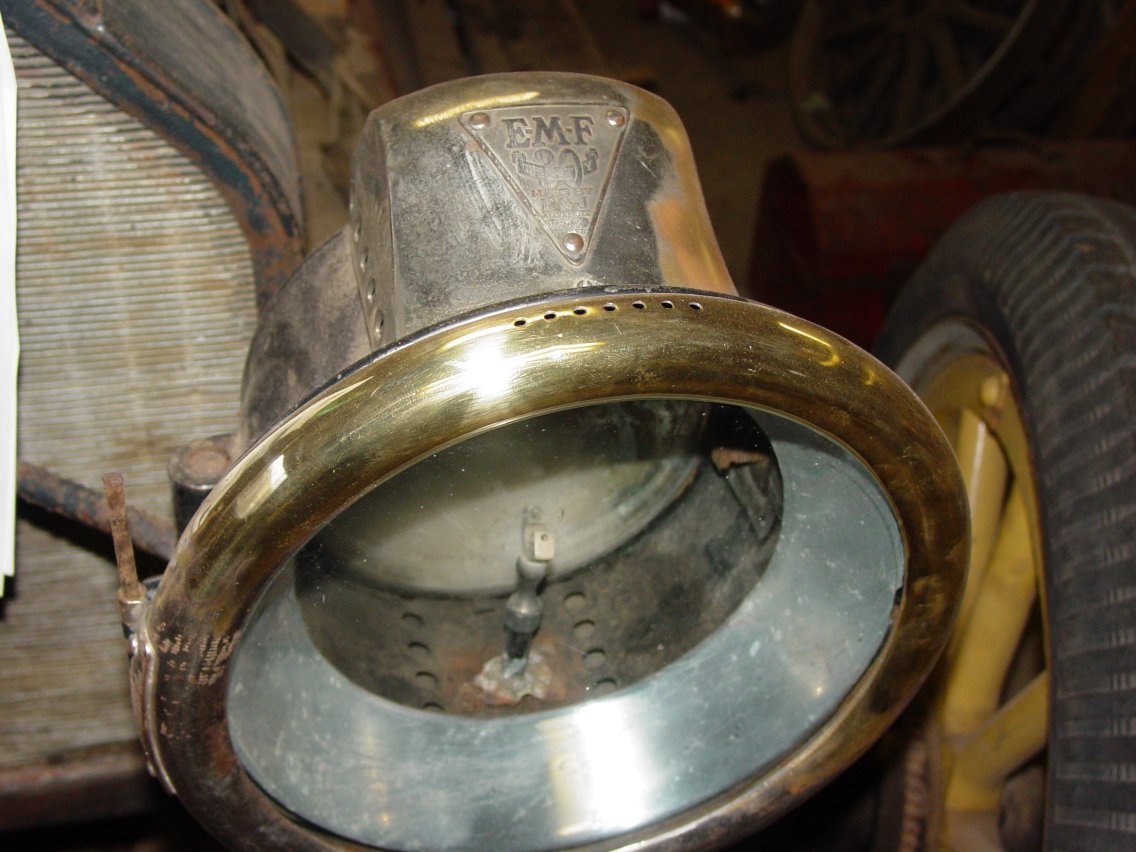
| Drivers side cowl light and bracket. Click on the picture to see the full size. | Side view of the body showing cowl light alignment. Click on the picture to see the full size. |
Sunday, January 9, 2005 11:41 AM
 |  |
| A look at one of the headlights with the dents removed from half of the rim. Click on the picture to see the full size. | Another view of the headlight. Click on the picture to see the full size. |
As I said before, this car takes an E & J number 577 light for a headlight. This was the largest gas headlight that E & J made from what I hear. The reason the rim is so hard to get the dents out of is because the brass rim is folded around a ring of steel, meaning you can not get to the back side of the dent to knock it out. Hmmm. I decided to drill through the steel ring so I could get behind the dent, then knock out the dent and then fill in the hole with the MIG welder. I was hesitant to make that first hole, but one afternoon, when I went out to clean up the garage, I decided that the headlight looked like more fun, so I tried my theory. Low-and-behold, my method looks like it will work. I am going to have a lot of holes to weld up, but when I am done, you should not be able to tell I did a thing.
I will continue with this as I have time, but for now I am just happy I have figured out this problem that has been bugging me for quite a while.
As always, please let me know if you have any questions.
Saturday, October 7, 2017 3:43 PM
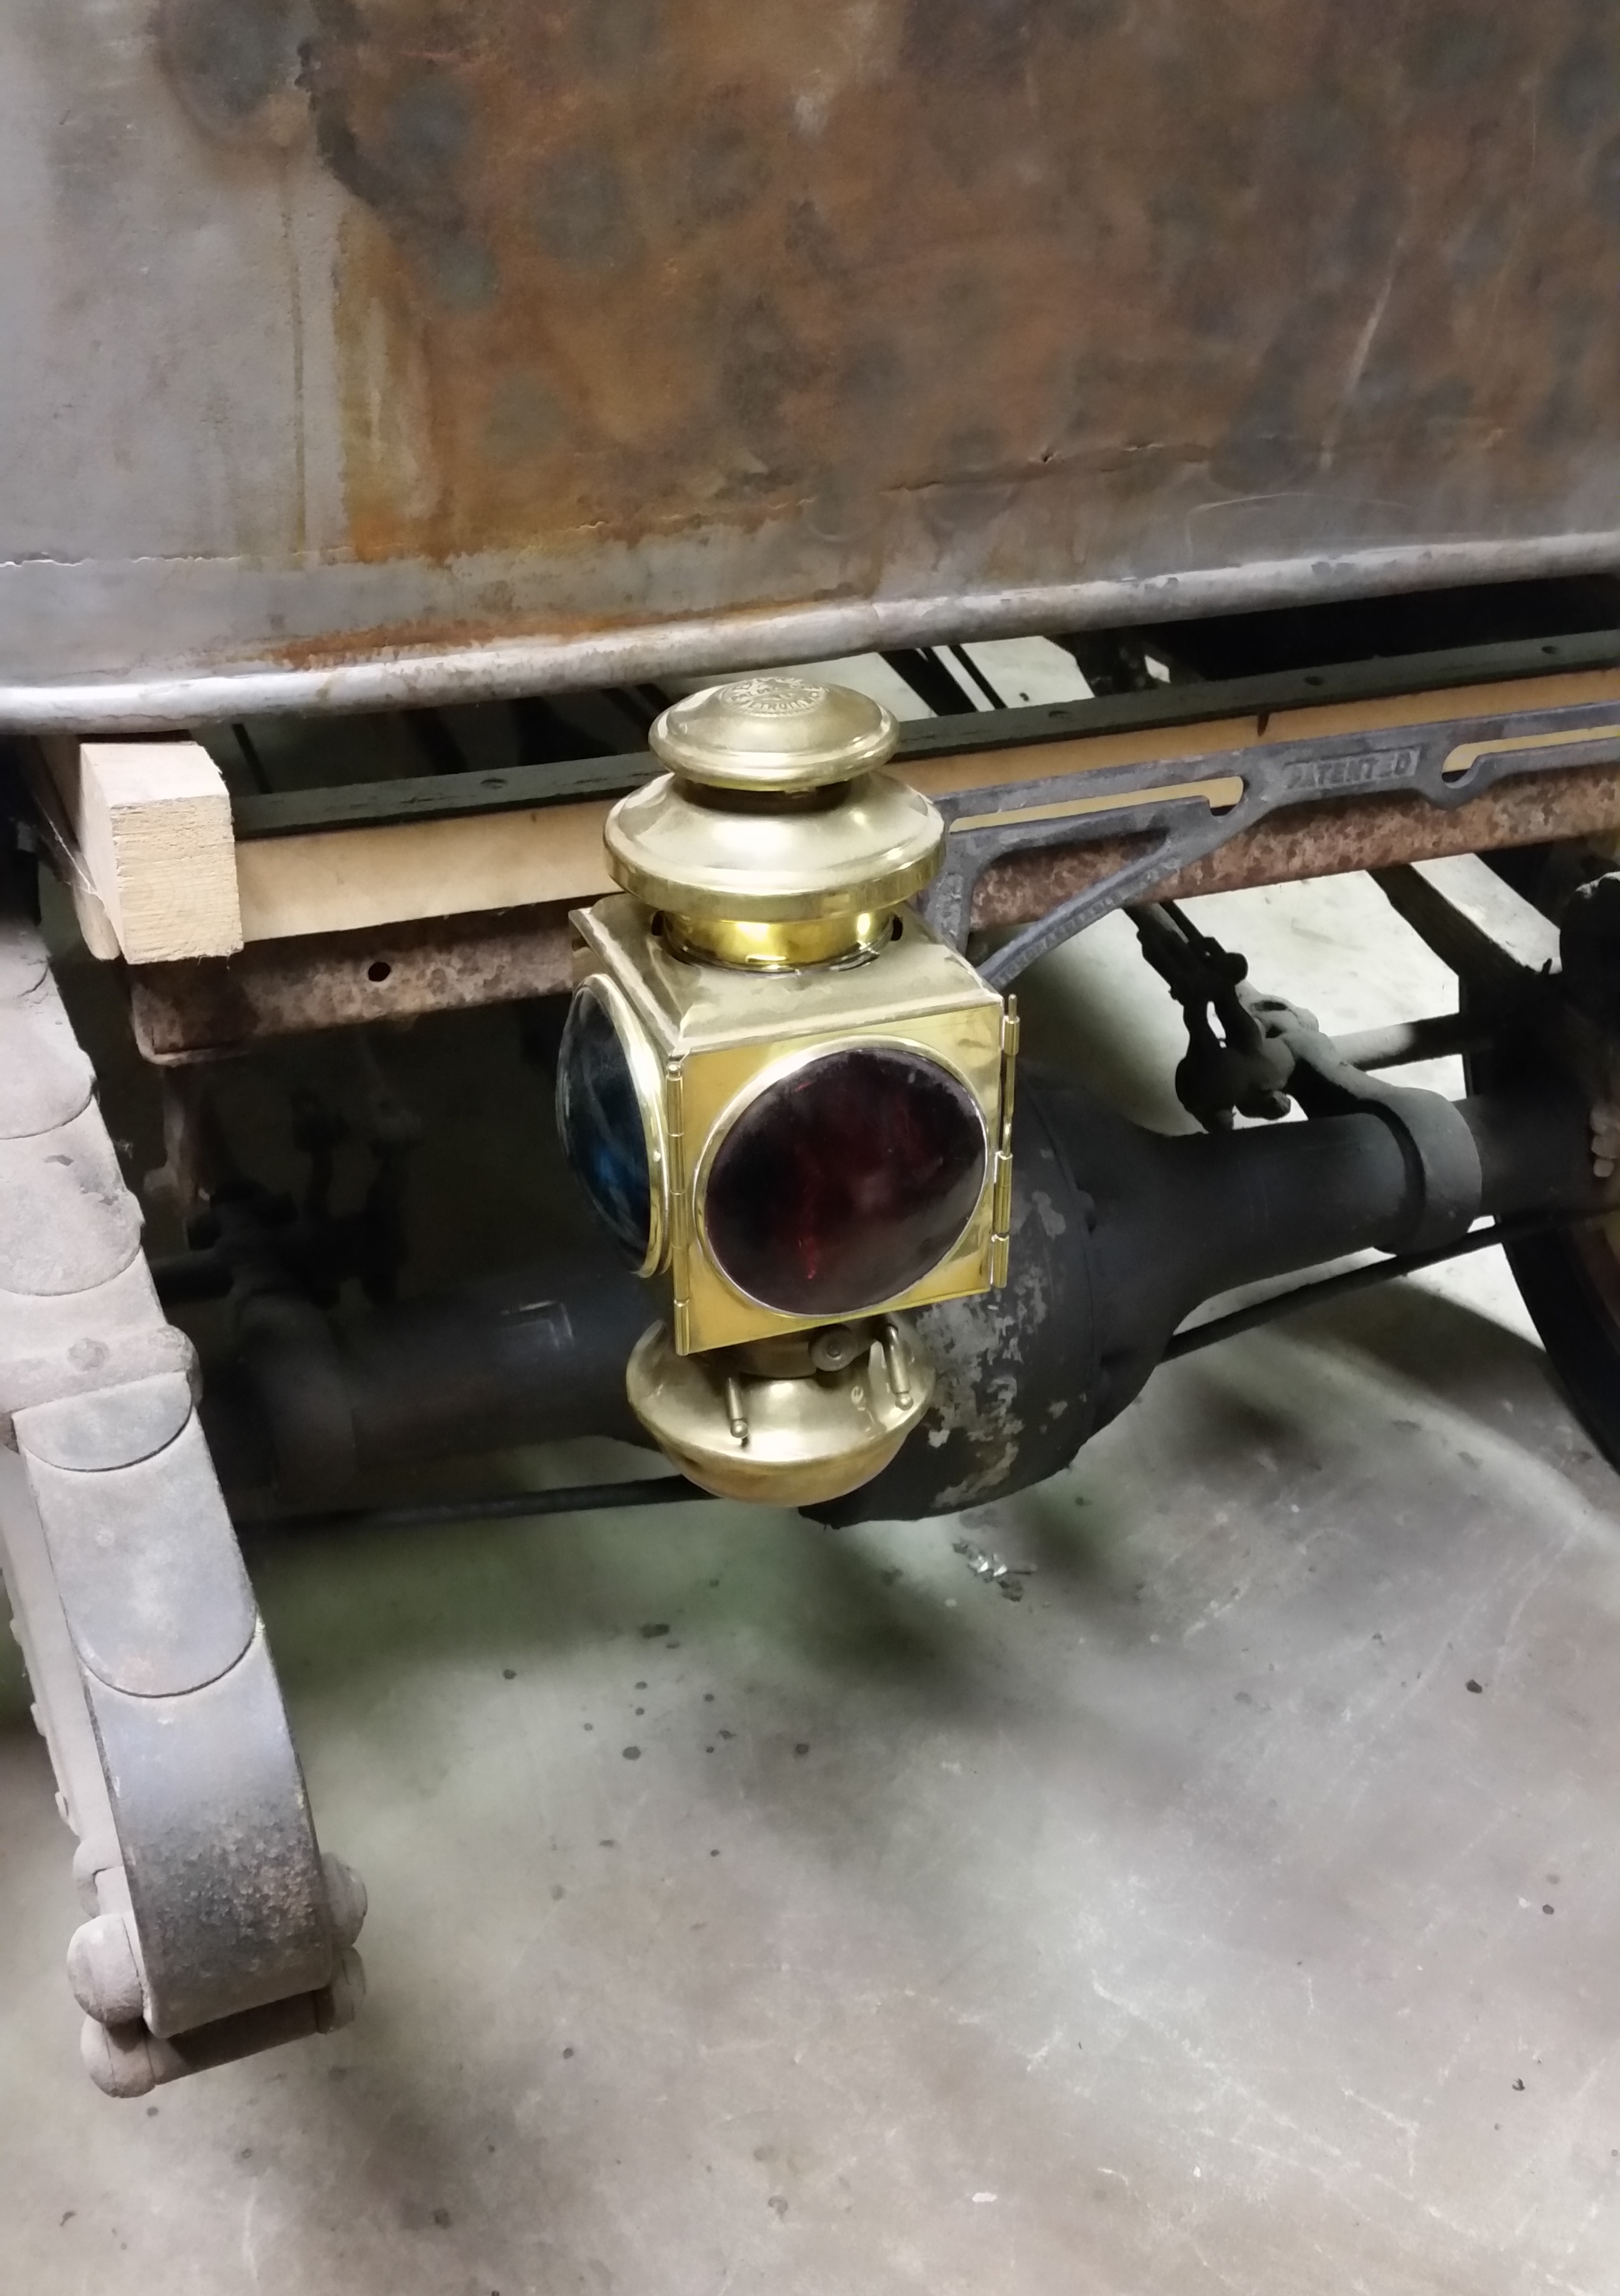 | 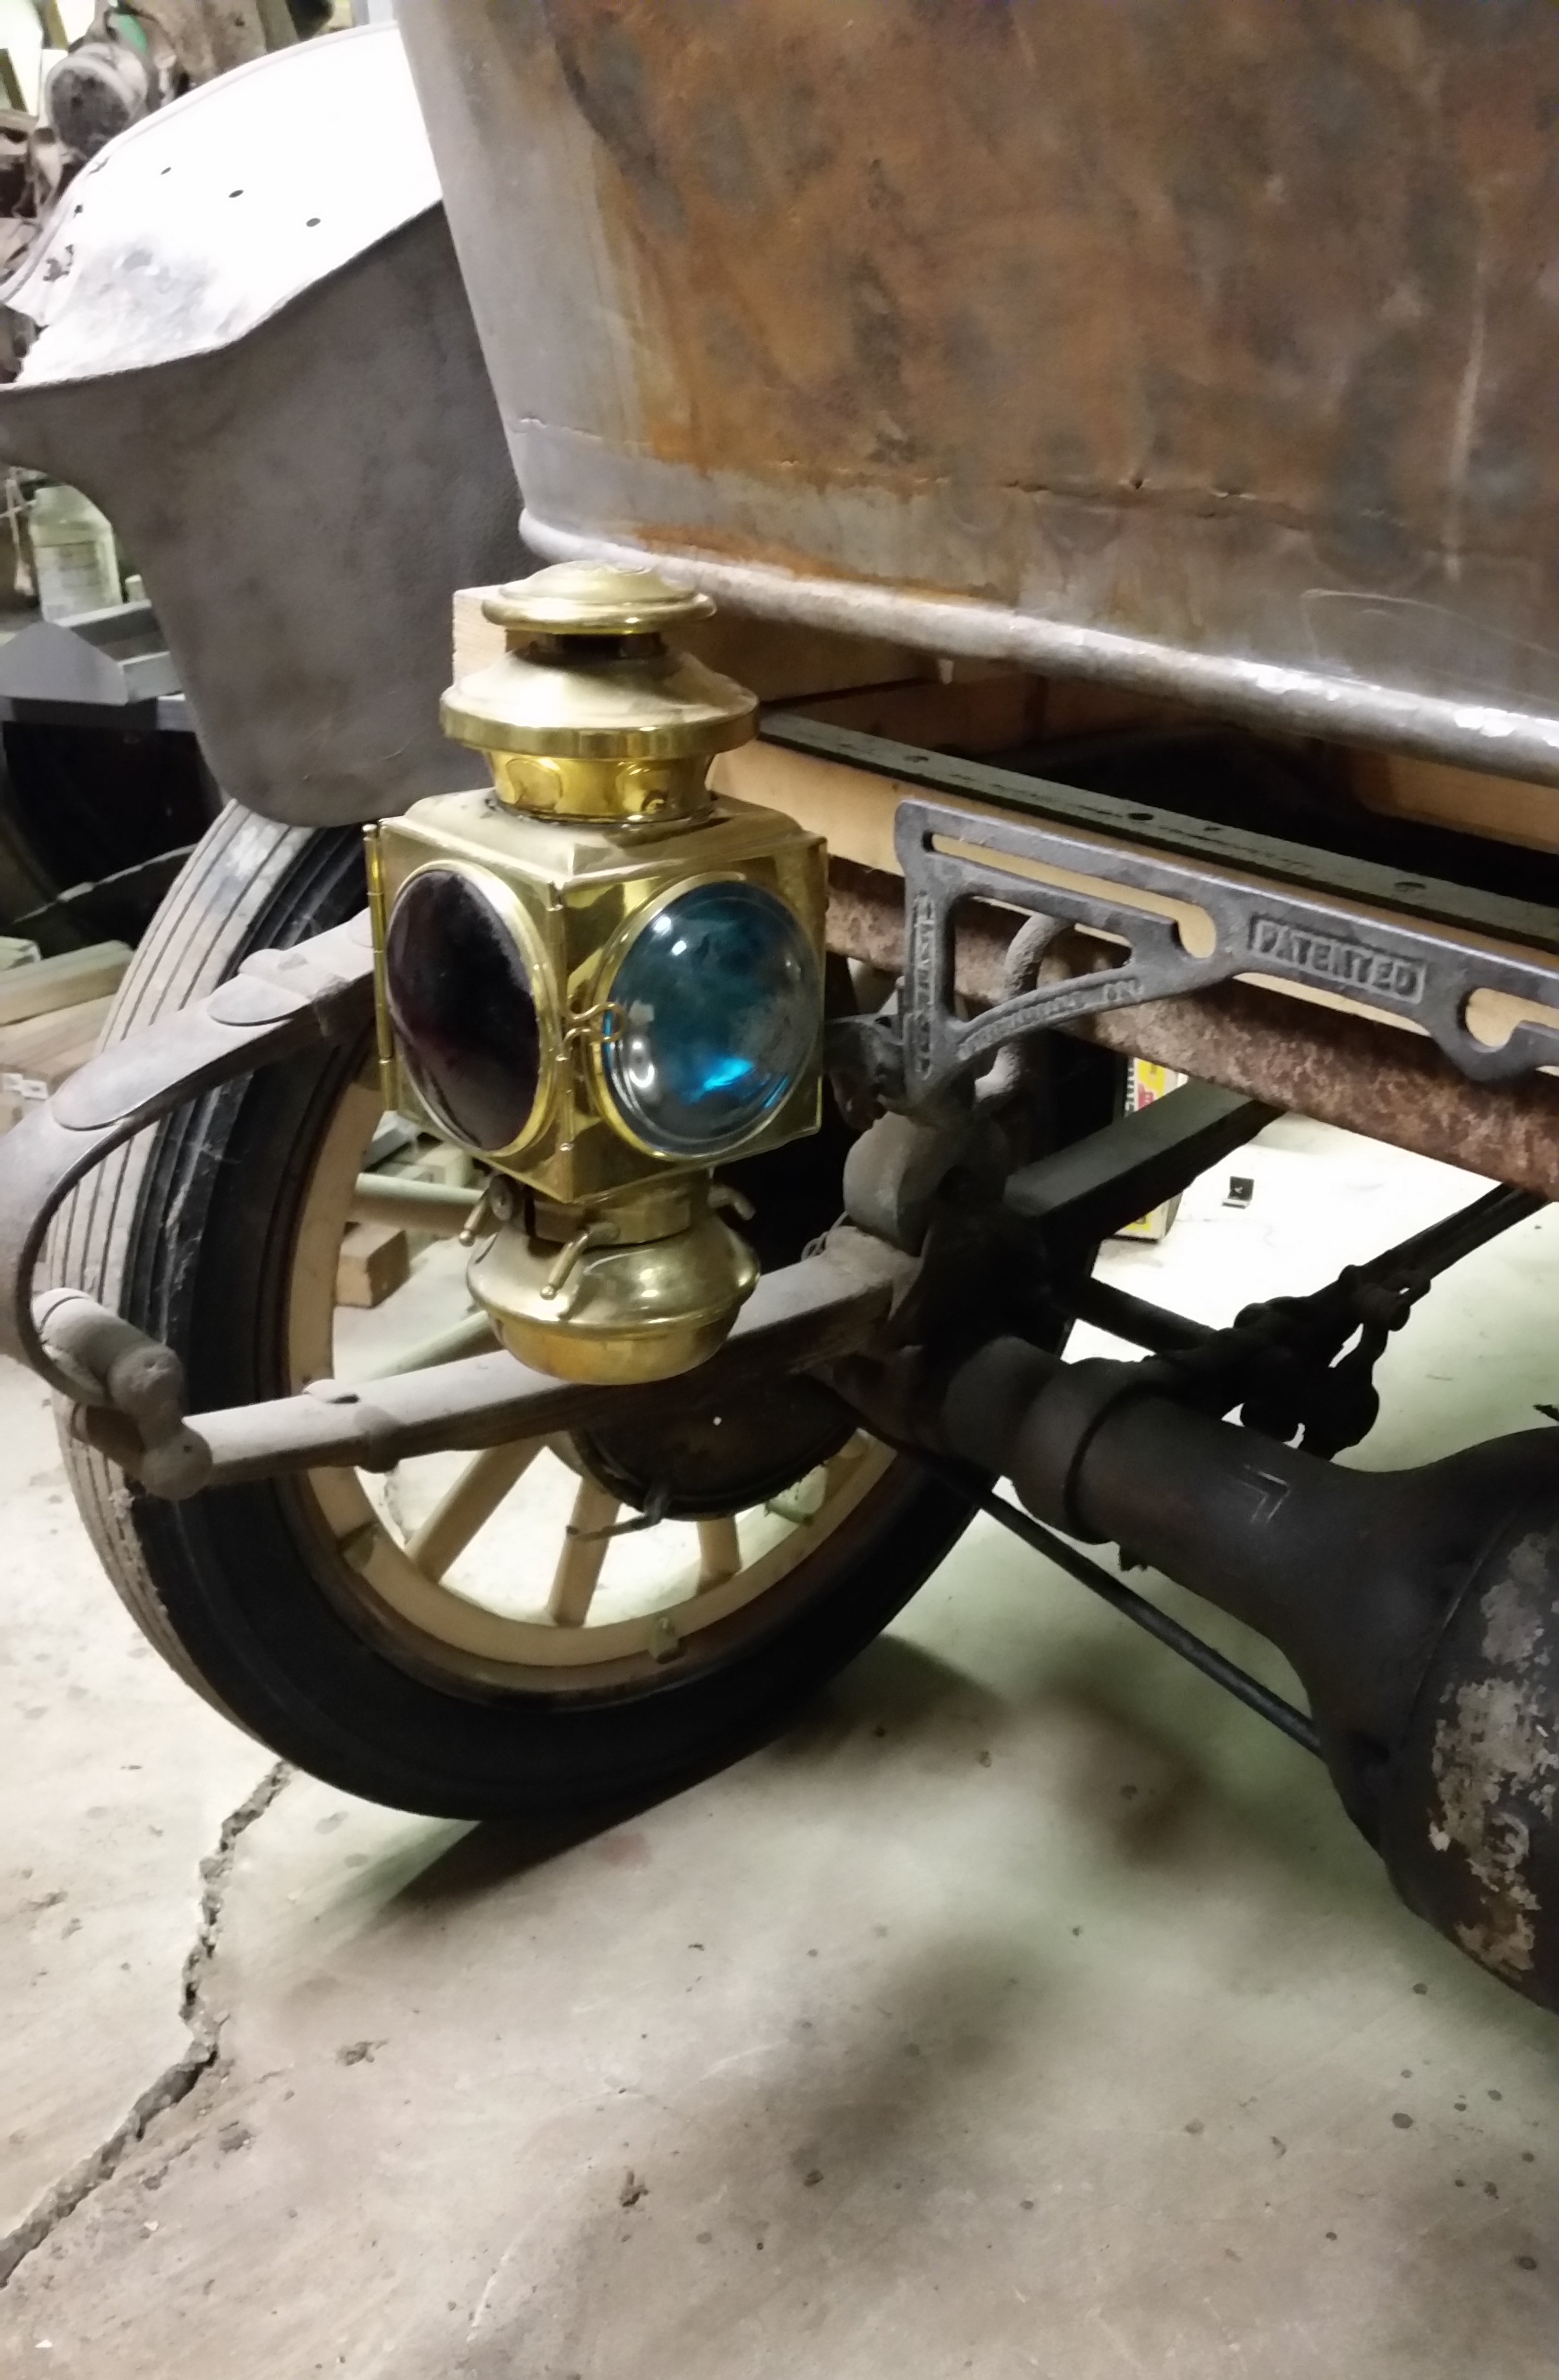 |
| E&J Tailight, left view. Click on the picture to see the full size. | E & J Tail Light and Never-Out License bracket. Click on the picture to see the full size. |
How to contact me... |

|
|
John M. Daly |
||
| Phone: | (815) 786-4824 | |
| Email: | ||